
Pruning
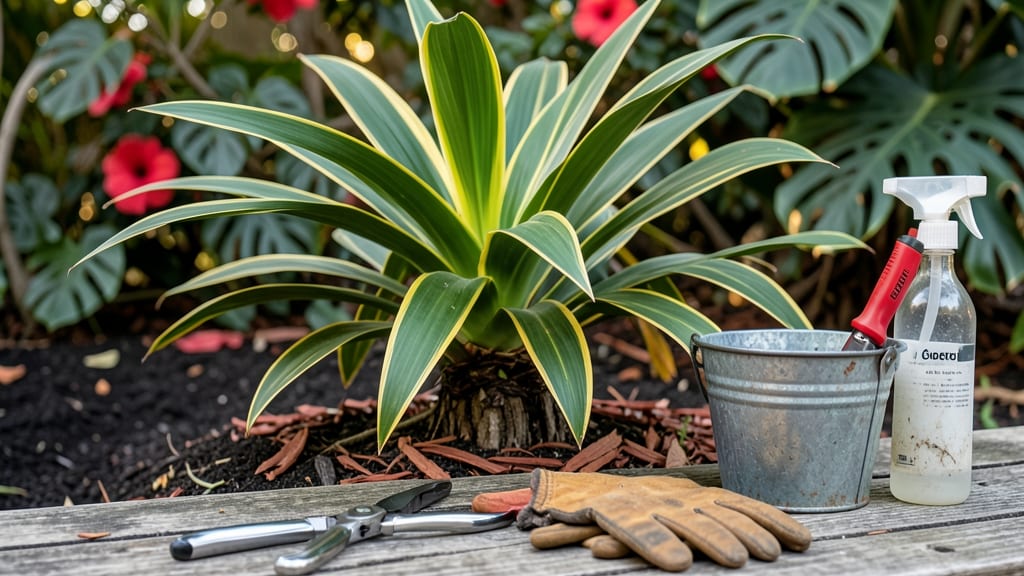
Pruning your cordyline can turn a tired, leggy plant into a showstopper with bold new growth within weeks. 🌿 I’ve seen my own cordylines go from sad and sparse to lush and vibrant after just one careful pruning session—it’s like giving them a fresh start.
The key is timing, technique, and knowing exactly where (and how) to cut.
You’ll need sharp pruning shears, rubbing alcohol to sterilize them, and a dusting of cinnamon or sulfur powder to prevent infections. Spring is the best time to prune, right after new shoots emerge, but you can also trim dead fronds anytime.
Avoid cutting into the thick, woody stem—focus on the outer leaves and stems that are brown, yellowed, or overcrowded.
Start by removing the largest dead or damaged fronds at the base, cutting cleanly about ½ inch above a leaf node where new growth can sprout.
For overgrown stems, trim back to a healthy leaf or bud, and don’t worry—your cordyline will bounce back with thicker, more vibrant foliage in just a few weeks. The goal is to open up the plant’s center, letting light and air circulate.
Here’s the secret: less is more. Over-pruning stresses the plant, while strategic cuts encourage fuller regrowth. If you’re unsure, take it slow—your cordyline will thank you with glossy new leaves that’ll have your neighbors asking for tips. Ready to transform that tired plant?
📚 In This Guide
- What you need
- Instructions
- Tips and common mistakes
- Wrapping up and next steps
What you need
- ● Sharp bypass pruners or pruning shears – Choose a pair with stainless steel blades (4–6 inches long) to make clean cuts without crushing stems.
- ○ Clean, sterilized pruning saw (optional for thick stems) – A folding pruning saw with a fine-tooth blade works best for stubborn, woody growth.
- ● Rubbing alcohol (70% or higher) or bleach solution – For sterilizing tools between cuts to prevent disease spread (1 part bleach to 9 parts water).
- ● Gloves – Wear cut-resistant garden gloves to protect your hands from sap and sharp edges.
- ● Disposable pruning bags or bucket – To collect trimmings for composting or disposal.
- ● Hose or damp cloth – For wiping down tools and cleaning sap residue.
- ● Rooting hormone – If you plan to propagate cuttings, use a gel or powder to encourage root growth.
- ● Small pots with well-draining soil – For propagating new plants from pruned sections (4–6 inch pots work well).
- ● Horticultural sealant – To coat larger cuts and prevent sap oozing (e.g., pruning wax).
- ● Ladder or step stool – If your cordyline is tall (6+ feet), reach safely without straining.
Step-by-Step guide to pruning cordyline for lush, renewed growth
Revitalizing your cordyline isn’t just about cutting back—it’s about encouraging bold new foliage while protecting its health.
✂️ Step 1: Assess and Prepare for Pruning
Examine your cordyline for signs of overgrowth, yellowing leaves, or leggy stems—these are your pruning targets. I always start by removing any dead or diseased foliage first, using clean, sharp pruners to make precise cuts. This prevents spreading pathogens to healthy parts of the plant. For cordylines, I focus on stems that are at least 1/4 inch in diameter—thinner stems won’t regenerate as robustly.
Gather your tools: sterilized pruners, rubbing alcohol (to wipe blades between cuts), and a small bucket to collect clippings. Work on a clear day when temperatures are between 60-75°F—this range minimizes stress on the plant. If your cordyline is in a pot, move it to a shaded spot for the day after pruning to reduce sun exposure while it recovers.
✂️ Step 2: Make Strategic Cuts for Renewal
For leggy or overgrown stems, cut back to a healthy node—this is where new growth will emerge. I like to make cuts at a 45-degree angle, about 1/8 inch above the node, to encourage faster healing and reduce water pooling. Avoid cutting too close to the base unless the stem is completely brown and dead. Cordylines are resilient, but they won’t regrow from bare stems without nodes.
If you’re pruning to shape, focus on removing 1/3 of the oldest or most unsightly foliage at a time. This prevents shocking the plant and gives it energy to produce fresh, vibrant leaves. For example, if your cordyline has long, bare stems with a cluster of leaves at the top, cut those stems back to just above a lower node. You’ll see new shoots emerge within 4-6 weeks in ideal conditions.
💧 Step 3: Post-Pruning Care for Strong Recovery
After pruning, water your cordyline deeply to help it recover from the stress of cutting. I use room-temperature water and let it soak into the soil until it drains from the bottom of the pot or the ground around the base. Overhead watering can introduce bacteria to fresh cuts, so always water at the soil level. For potted cordylines, I also add a balanced liquid fertilizer (diluted to half strength) to support new growth.
Monitor the plant closely for the next 7-10 days. You’ll notice new shoots forming at the nodes you cut back to—this is your signal that the pruning worked. If the weather is hot or dry, mist the foliage lightly in the morning to reduce transpiration stress. Avoid fertilizing again until you see new leaves unfurling, usually within 3-4 weeks of pruning.
☀️ Step 4: Optimize Light and Conditions for Regrowth
Cordylines thrive in bright, indirect light but can scorch if exposed to harsh afternoon sun immediately after pruning. Move your plant to a spot with morning sun and afternoon shade for the first two weeks post-pruning. If you’re growing it outdoors in a warm climate, provide partial shade during the hottest part of the day. Over time, you can gradually increase its sun exposure as new growth hardens off.
Keep the soil consistently moist but not soggy—cordylines prefer slightly dry conditions but need regular watering during active growth. If you notice the leaves drooping or turning yellow, it’s a sign of overwatering. Adjust your watering schedule based on the top 2 inches of soil: water when it feels dry to the touch. With the right care, your cordyline will reward you with bold, new foliage within 8-12 weeks, often in more vibrant colors than before.
Tips & tricks for revitalizing cordyline growth through pruning
Transforming your cordyline from leggy to lush requires precision—and a few insider tricks that make all the difference. Here’s how to elevate your pruning game.
Precision Cutting Technique: When making those 45-degree cuts in Step 2, use a ruler or measuring guide to ensure you’re exactly 1/8 inch above the node. This tiny detail prevents water from pooling on the cut, which can lead to rot. I mark my pruners with a small piece of tape at the 1/8-inch point to make this consistent every time. The goal is to expose just enough of the node to stimulate growth without damaging the underlying tissue.
Strategic Pruning Timing: The ideal 60-75°F temperature range mentioned in Step 1 isn’t just about comfort—it’s about photosynthesis efficiency. Cordylines recover faster when their metabolic processes aren’t stressed by extreme heat or cold. If you’re pruning in summer, do it in the early morning or late afternoon to avoid the midday heat. In winter, wait until temperatures naturally rise above 60°F before cutting, even if it means delaying pruning by a few weeks.
Post-Pruning Fertilizer Hack: That diluted liquid fertilizer in Step 3 deserves special attention. Instead of just adding it to the soil, I mix it with water and use it to give the plant a gentle foliar spray after pruning. This delivers nutrients directly to the leaves, where they’re most needed during recovery. Just be sure to spray in the morning so the leaves have time to dry before evening. The key is to use a fertilizer with a balanced NPK ratio (like 10-10-10) to support all aspects of regrowth.
Light Transition Strategy: The morning sun and afternoon shade recommendation in Step 4 is gold, but here’s the secret: gradually shift the plant’s position over two weeks rather than moving it all at once. Start with 2 hours of morning sun and 4 hours of shade, then increase sun exposure by 30 minutes per day until you reach the full morning sun window. This slow acclimation prevents sunburn on new growth and helps the plant adjust without stress.
Pro Tips for Cordyline How To Prune
- Transforming your cordyline from leggy to lush requires precision—and a few insider tricks that make all the differen...
- Precision Cutting Technique: When making those 45-degree cuts in Step 2, use a ruler or measuring guide to ensure you...
- Strategic Pruning Timing: The ideal 60-75°F temperature range mentioned in Step 1 isn’t just about comfort—it’s about...
Frequently asked questions
Got questions about pruning your Cordyline? You’re not alone! Here are some of the most common concerns—and straightforward answers—to help you prune like a pro.
When is the best time to prune a Cordyline?
The ideal time to prune your Cordyline is in early spring or late winter, just before new growth begins. This timing ensures your plant has plenty of energy to recover and sprout fresh, vibrant leaves. Avoid pruning in fall or winter, as the plant may be dormant and less resilient.
How much can I cut off my Cordyline without harming it?
You can safely remove up to 1/3 of the plant’s height in one pruning session, focusing on dead, yellowed, or overgrown leaves. For leggy stems, cut just above a leaf node (where leaves emerge) to encourage bushier growth. Avoid over-pruning—this can stress the plant and stunt new growth.
What should I do if my Cordyline looks sad after pruning?
If your Cordyline appears wilted or weak post-pruning, it’s likely just adjusting. Provide bright, indirect light and keep the soil slightly moist (but not soggy) for a few weeks. Avoid fertilizing immediately—wait until new growth appears (usually 4-6 weeks). Most plants bounce back beautifully with patience!
Can I propagate my Cordyline from pruned cuttings?
Healthy cuttings (4-6 inches long) can root in water or moist soil. Place them in a warm, bright spot (but out of direct sun) and keep the soil consistently damp. Roots typically form in 2-4 weeks. Just avoid overcrowding—each cutting needs its own container to thrive.
What if my Cordyline has brown tips after pruning?
Brown tips often signal underwatering or fluoride/chlorine buildup from tap water. Flush the soil with distilled or rainwater and adjust your watering routine to keep the soil evenly moist. If the issue persists, check for pests (like spider mites) and treat accordingly.
Wrapping up and next steps
Pruning your cordyline isn’t just about keeping it tidy—it’s a way to unlock vibrant, healthy growth and maintain its stunning foliage. By following the right steps—like trimming dead fronds, shaping strategically, and timing your cuts—you’ll encourage new shoots and a fuller plant.
With a little patience and care, your cordyline will thrive and reward you with lush, eye-catching leaves for years to come! 🌿✨
Ready to give your plant the TLC it deserves? Grab your pruners and start snipping! If you’re new to pruning, bookmark this guide and revisit it whenever you’re ready for your next grooming session. Happy pruning! 🌱