
Pruning
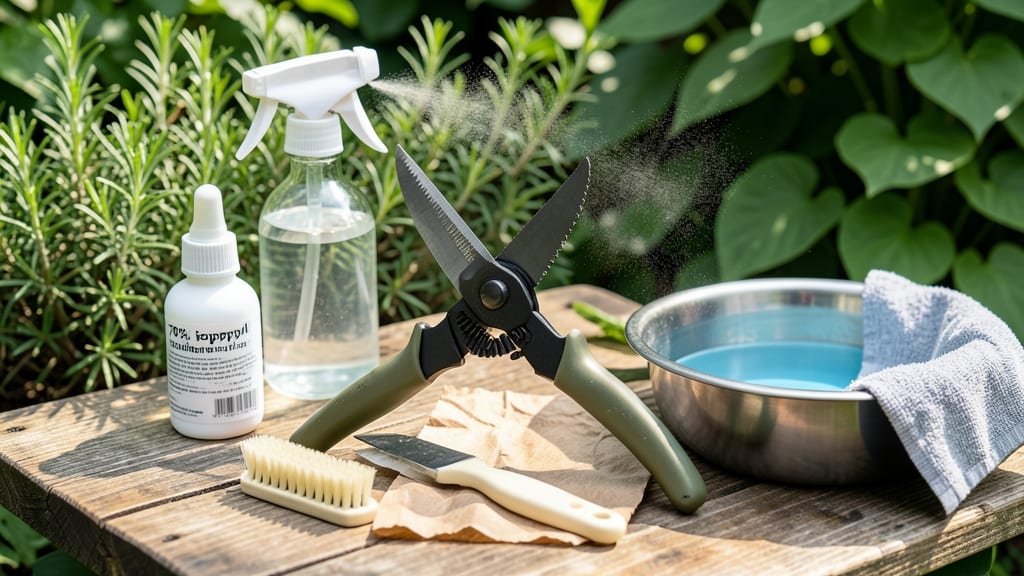
Disinfecting pruning tools isn’t just about clean cuts—it’s the secret to keeping your garden healthy and thriving. 🌿 After my third failed rose bush last year, I realized the culprit wasn’t poor soil or lack of sunlight, but my beloved pruners carrying fungal spores from plant to plant.
A quick sanitizing routine changed everything—my bushes now recover faster, and diseases stay at bay.
The process is simpler than you’d think: just a few household items and 5 minutes between plants. You’ll need rubbing alcohol (70% or higher), a clean cloth or paper towels, and a little elbow grease.
Commercial disinfectants work too, but alcohol is cheap, effective, and won’t leave residue that could harm plants. The key is consistency—sanitize after every cut, especially when dealing with diseased branches.
What you’ll gain is a garden that stays productive and pest-free, with tools that last longer and cuts that heal faster. No more wasted plants or rusted blades—just clean, sharp tools ready for the next pruning session.
The payoff? Stronger plants, fewer headaches, and a garden that looks like it belongs in a magazine.
Even experienced gardeners skip this step, but it’s the difference between a struggling garden and one that thrives. Here’s how to do it right—no guesswork, just results. Let’s get those tools sparkling clean!
📚 In This Guide
- What you need
- Instructions
- Tips and common mistakes
- Wrapping up and next steps
What you need
- ● Pruning tools: Shears, loppers, pruners, or saws (1–5 tools, depending on your needs).
- ● Disinfectant: Rubbing alcohol (70% isopropyl) – 1–2 cups (for quick sanitization).
- ● Bleach solution (1 part bleach to 9 parts water) – 1–2 gallons (for deep cleaning).
- ○ Commercial tool disinfectant (optional but effective, e.g., Concrobium or Sterifume).
- ● Cleaning supplies: Soft-bristle brush or toothbrush (for crevices).
- ● Microfiber cloths or paper towels (2–3 per tool).
- ● Rag or old towel (for drying).
- ● Protective gear: Gloves (nitrile or rubber, 1 pair).
- ○ Safety glasses (optional but recommended).
- ● Container: Bucket, basin, or large bowl (large enough to submerge tools).
- ● Oil or lubricant (e.g., WD-40 or 3-in-1 oil) – 1 small bottle (to protect blades post-clean).
- ● Tool sharpening stone – If you want to sharpen while you sanitize!
- ● Label maker – To track last-clean dates on tools.
Step-by-step instructions for disinfecting pruning tools
Keeping your tools clean isn't just about sharp cuts—it's your first line of defense against disease.
🪴 Step 1: Gather Your Cleaning Arsenal
Start with a clean workspace—outdoor or sink area works. You'll need a bucket, hot water (160-180°F), rubbing alcohol (70% isopropyl), and a stiff-bristle brush for scrubbing crevices. I like to add a splash of dish soap to the hot water mix for extra grease-cutting power. This combo tackles both bacteria and sap buildup that dulls blades over time.
If you're dealing with rusty tools, add a vinegar soak (1:1 ratio with water) to the bucket first—let them soak for 10-15 minutes before scrubbing. Rust won't stand a chance against this acidic treatment. For stainless steel tools, skip the vinegar and use barkeeper's friend (oxalic acid) instead—it's gentler on the finish while still dissolving rust stains.
✂️ Step 2: Scrub and Rinse Thoroughly
Use the stiff-bristle brush to scrub every surface—don't miss the bolts, rivets, or serrated edges where debris collects. Pay special attention to the cutting edges and pivot points where sap and moisture trap pathogens. Work in circular motions to lift old sap and grime without scratching the metal. I find that old toothbrushes work perfectly for tight spots in shears.
Rinse immediately with hot water to remove all soap and debris. Cold water leaves residue that can dull blades faster. Let the tools air-dry completely before moving to the next step—never store them damp. Moisture trapped in crevices is what causes rust between cleanings. If you're short on time, use a clean microfiber towel to wipe dry, but always follow with proper drying.
💧 Step 3: Sanitize with Alcohol or Bleach Solution
For general sanitization, pour rubbing alcohol into a spray bottle and apply liberally to all surfaces. Let it sit for 2-3 minutes before wiping dry with a clean cloth. The alcohol evaporates quickly, leaving no residue that could interfere with future cuts. This method is perfect for between-tree use when switching between different plants in your garden.
For deep sanitization (especially after diseased plants), use a bleach solution (1 part bleach to 9 parts water). Soak tools for 5-10 minutes, then rinse thoroughly with clean water. Never leave tools soaking in bleach—it can corrode metal over time. After sanitizing, I always give the tools a final wipe-down with mineral oil on stainless steel or light machine oil on carbon steel to protect the blade and prevent rust.
☀️ Step 4: Store Properly to Prevent Future Issues
Hang tools in a dry, shaded area where they won't collect moisture. I use a pegboard with hooks to keep them off the ground and exposed to air circulation. For shears, store them blade-to-blade with a rubber band to protect the edges. Never stack tools with blades touching—this causes nicks and dulls them faster than anything else.
Check your tools monthly for signs of rust or dullness. If you notice white powdery residue on stainless steel, it's likely mineral deposits from hard water—wipe with white vinegar and rinse immediately. For carbon steel tools, apply a thin coat of oil every few uses to maintain the edge. Proper storage isn't just about cleanliness—it's about extending the life of your tools so they stay sharp and effective for years.
Tips & tricks for rust-proof steel sanitization
Here's what nobody tells you about keeping your pruning tools sharp and safe for seasons to come.
Temperature Matters: That 160-180°F hot water range isn't arbitrary—it's the sweet spot for dissolving sap and killing pathogens without damaging most tool materials. For stubborn sap buildup, I crank the water to 180°F (just below boiling) for 5 minutes before scrubbing. Use a thermometer to monitor—boiling water can warp some metals over time.
The Technique That Changed Everything: In Step 2, when scrubbing, I've found that old toothbrushes are worth their weight in gold for tight spaces. For serrated blades, wrap the brush handle with a rubber band and use it like a mini drill to loosen packed debris. The circular motion prevents scratching while getting into those hard-to-reach grooves where bacteria love to hide.
Chemical Wisdom: Never mix vinegar and bleach—they create toxic chlorine gas. If you're using vinegar for rust removal, rinse tools thoroughly before moving to bleach sanitization. For stainless steel tools, I've had great results with barkeeper's friend powder mixed with water to form a paste—it lifts rust stains without the harshness of vinegar.
Storage Wisdom: The monthly check you do is your best defense against rust. I keep a small bottle of mineral oil and light machine oil near my tool storage to apply immediately after cleaning. A quick wipe-down with a microfiber towel before oiling removes any lingering moisture that could cause spots. For carbon steel tools, I apply a thin coat of oil every time I use them—it's the secret to maintaining that razor-sharp edge.
Pro Tips for Disinfect Pruning Tools
- Here's what nobody tells you about keeping your pruning tools sharp and safe for seasons to come.
- Temperature Matters: That 160-180°F hot water range isn't arbitrary—it's the sweet spot for dissolving sap and killing pathogens without damaging most tool materials.
- The Technique That Changed Everything: In Step 2, when scrubbing, I've found that old toothbrushes are worth their weight in gold for tight spaces.
Frequently asked questions
Got questions about keeping your pruning tools in top shape? Here are answers to the most common ones—because clean tools mean healthier plants!
How often should I disinfect my pruning tools?
Disinfect your tools after every use if you’re pruning multiple plants or trees, especially if diseases like fire blight or powdery mildew are present. For general maintenance, aim for once a month during growing seasons. Rust and bacteria build up fast—don’t wait until you see issues!
Can I disinfect tools in the middle of pruning?
If you’re tackling a large garden or orchard, disinfect between sections (e.g., after finishing one tree or plant type). Use a portable spray bottle with rubbing alcohol (70%+) or a quick wipe with a disinfectant cloth. This prevents cross-contamination and keeps your work efficient.
What’s the best disinfectant for pruning tools?
The top choices are:
- Rubbing alcohol (70%+ isopropyl): Fast-acting and evaporates quickly.
- Bleach solution (1 part bleach to 9 parts water): Effective but rinse tools well afterward.
- Commercial tool sanitizers: Convenient and formulated for metal tools.
My tools still have rust after disinfecting. What now?
Rust means moisture got trapped—here’s how to fix it:
- Scrub off rust with a wire brush or sandpaper.
- Rinse and dry thoroughly after cleaning.
- Apply a thin layer of mineral oil or WD-40 to protect the metal.
- Store tools in a dry, ventilated space (like a tool rack or bag with silica gel).
Are there natural alternatives to chemical disinfectants?
Yes! For a non-toxic option, try:
- Hydrogen peroxide (3%): Spray, let sit for 5 minutes, then rinse.
- Neem oil solution: Mix 1 tbsp neem oil with 1 cup water, wipe tools down.
- Steam cleaning: Boil tools in water for 10–15 minutes (great for small shears).
Wrapping up and next steps
Keeping your pruning tools clean and disinfected is the secret weapon for a thriving garden—no rust, no disease, just healthy, happy plants! 🌿 With the right sanitizer blend (like your DIY vinegar or commercial solution), you’ll slash risks of fungal spread and extend the life of your tools.
Now that you’re armed with the know-how, there’s only one step left: put it into action!
Start with one tool at a time, test your sanitizer, and watch your pruning routine transform. Your garden—and your tools—will thank you! 💪 Ready to grow? Grab your tools and get sanitizing!