
Pruning
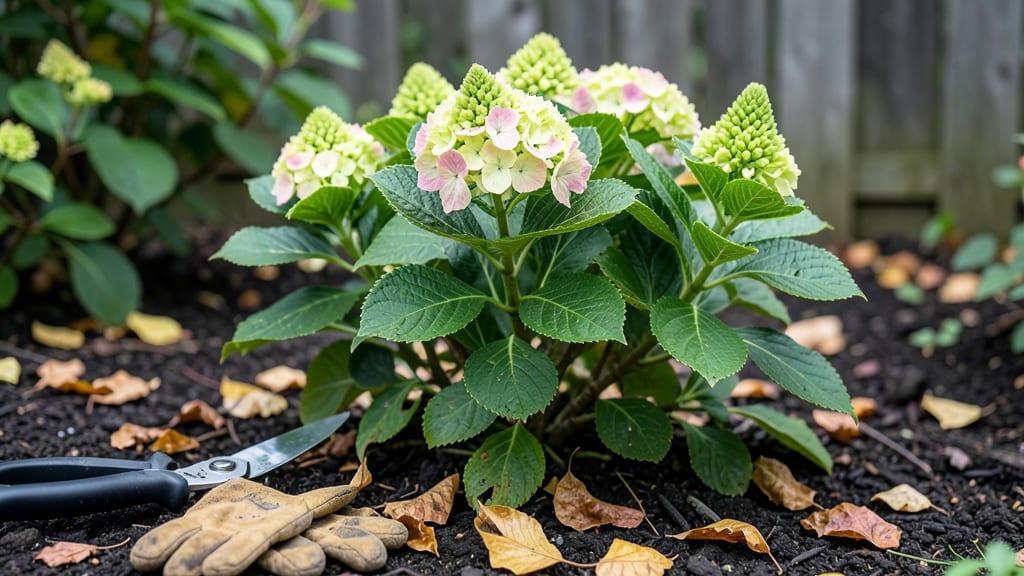
Fall pruning Limelight hydrangeas unlocks next spring's showstopper blooms—but timing is everything. 🌿 I learned the hard way that pruning too early can shock the plant, while waiting too long risks winter damage.
The sweet spot is after the first hard frost but before the ground freezes solid, typically late November through December in most zones.
This method works because Limelight hydrangeas bloom on new wood, so cutting back now removes dead growth while leaving next year's flower buds intact. You'll need clean pruners, sharp loppers, and gardening gloves—plus a clear day to avoid working with wet stems.
The goal is to shape the plant while encouraging stronger, bushier growth for spring.
By late spring, you'll see vibrant green foliage pushing out from the base, with those signature cone-shaped blooms forming earlier than ever. The difference between a pruned and unpruned Limelight is night and day—one stays compact and productive, while the other sprawls with fewer flowers.
Just avoid cutting into last year's stems, which are already dormant.
Works best in zones 4-8, but adjust for your first frost date. In warmer climates, prune slightly later, while colder zones may need to finish by early November.
The key is pruning when the plant is dormant but still flexible—not too late that the cuts won't heal before winter.
📚 In This Guide
- What you need
- Instructions
- Tips and common mistakes
- Wrapping up and next steps
What you need
- ● Pruning shears: Bypass pruners (sharp, clean, and sterilized with rubbing alcohol). Quantity: 1 pair (or 2 if pruning multiple bushes).
- ○ Loppers: For thicker stems (1–2 inches in diameter). Quantity: 1 pair (optional but handy for larger bushes).
- ● Gloves: Heavy-duty garden gloves (cut-resistant, preferably). Quantity: 1 pair.
- ● Disposable pruning bags: To collect debris (1–2 bags, depending on bush size).
- ● Rubbing alcohol (70% or higher): For sterilizing tools between cuts. Quantity: Small bottle (4 oz).
- ○ Sharpie or permanent marker: To label pruned stems (optional but helpful for tracking).
- ● Weather check: Prune on a dry, overcast day (avoid frost or rain within 24 hours).
- ● Hydrangea health: Ensure your Limelight hydrangea is free of pests/diseases (treat issues before pruning).
- ○ Safety gear: Safety glasses (optional, if debris might fly).
- ● Clean workspace: Lay down a tarp or old sheet to catch fallen leaves/debris.
- ● Pruning saw: For stubborn, thick stems (rarely needed for Limelight hydrangeas).
- ● Hydrangea bloom booster: Balanced fertilizer (10-10-10) for post-pruning feeding.
- ● Plant food: Organic mulch (2–3 inches) to protect roots over winter.
- ● Camera/phone: To document your pruning progress (because bragging rights matter!).
Step-by-Step guide for pruning Limelight hydrangeas in fall
Timing and technique are everything—here's how to prune for maximum next-spring color without risking winter damage.
✂️ Step 1: Wait Until First Frost Has Passed
Don't rush—wait until after your area's first hard frost (typically late October to November) when foliage has browned but stems remain firm. This ensures the plant has entered dormancy and won't regrow before winter. I test by gently squeezing a stem—if it snaps cleanly instead of bending, it's ready.
Pruning too early stimulates new growth that won't harden off before cold snaps. If you missed the window, wait until late winter (just before buds swell) instead. The key is avoiding active growth periods—Limelight hydrangeas bloom on new wood, so winter pruning won't remove flower buds.
✂️ Step 2: Remove Dead or Damaged Wood First
Start by cutting out any stems that are completely brown, mushy, or showing signs of disease (blackened spots, unusual growths). Use clean, sharp pruners to make cuts at a 45-degree angle, about ¼ inch above a healthy bud or lateral branch. I always disinfect my tools with rubbing alcohol between cuts to prevent spreading pathogens.
Look for stems with peeling bark or hollow centers—these won't recover. Healthy wood should have a smooth, firm surface. Remove these stems completely down to the base or to a strong lateral branch. This step improves airflow and reduces next season's pest pressure.
✂️ Step 3: Thin Out Overcrowded Stems
Limelight hydrangeas produce 3-5 main stems per plant. Select the thickest, most vigorous stems (at least ½ inch in diameter) and remove the rest at the base. This encourages the remaining stems to grow stronger and produce more blooms. I count stems and remove every other one to maintain balance.
Focus on stems that cross or rub against each other—these create wounds and invite disease. Make cuts just above outward-facing buds to encourage upward growth. Avoid leaving stubs longer than ½ inch, as these can rot over winter. Your goal is a rounded, open center that lets sunlight reach all stems.
✂️ Step 4: Shape for Next Season's Growth
Step back and visualize how the plant will fill out next spring. Aim for a rounded, slightly vase-shaped form that allows light to penetrate to the center. Prune to maintain this shape—cut back any stems that grow too upright or outward. I like to leave the outer stems slightly longer to create a natural frame.
For mature plants, you can lightly trim the tips of remaining stems to encourage bushier growth. Cut just above a set of 3-4 buds to promote branching. Avoid heavy pruning—Limelight hydrangeas respond best to gradual shaping. If you're unsure, err on the side of leaving more growth—you can always prune more next year.
✂️ Step 5: Clean Up and Protect for Winter
After pruning, rake up and dispose of all debris—this removes hiding spots for pests and reduces disease risk. I like to add a 2-3 inch layer of mulch around the base (but not touching the stems) to insulate roots and retain moisture. Use shredded bark or straw mulch for best results.
If your winters are particularly harsh (below 0°F), consider wrapping young plants with burlap or using frost cloth. Focus protection on the upper portion of the plant—the roots are already insulated by mulch. Water deeply before the first hard freeze to help roots establish. Your pruned Limelight will reward you with bold, vibrant blooms next spring if you've followed these steps carefully.
Tips & tricks for perfect fall hydrangea pruning
Timing is everything when it comes to pruning Limelight hydrangeas—here's what I've learned after years of trial and error.
Timing Secret: The first hard frost is your signal, but don't wait until the ground is frozen solid. Look for browned foliage that still snaps cleanly when bent—not mushy or brittle. I've made the mistake of pruning too early when stems were still green, only to see new growth get nipped by unexpected cold snaps. That late October to November window is your sweet spot for most climates.
Pruning Angle Matters: Those 45-degree cuts in Step 2 aren't just for show—they help water run off cleanly and prevent rot. I use a simple trick: hold your pruners at a slight downward angle toward the outside of the plant. This creates a natural water runoff path away from the stem. And remember, that ¼-inch clearance above buds is critical—any closer and you'll damage the growth point.
Visual Stem Selection: When thinning stems in Step 3, think of your plant like a sculpture. The thickest stems (at least ½-inch diameter) are your foundation, while the thinner ones provide balance. I like to count stems and remove every other one to maintain that natural vase shape. For crossing stems, make your cut at the base of the weaker stem—this prevents future rubbing injuries that lead to disease.
Mulch Depth Wisdom: That 2-3 inch layer of mulch in Step 5 isn't arbitrary—it's the Goldilocks zone for root insulation. Too little and your roots won't stay warm enough, too much and you risk suffocating them. I use shredded bark because it breaks down slowly, providing both insulation and moisture retention. Always keep it 2-3 inches away from the stem to prevent rot.
Pro Tips for Fall Pruning Limelight Hydrangea
- Timing is everything when it comes to pruning Limelight hydrangeas—here's what I've learned after years of trial and ...
- Timing Secret: The first hard frost is your signal, but don't wait until the ground is frozen solid. Look for browned...
- Pruning Angle Matters: Those 45-degree cuts in Step 2 aren't just for show—they help water run off cleanly and preven...
Frequently asked questions
Got questions about fall pruning your Limelight hydrangea? You’re not alone!
Here are the most common concerns—and expert answers—to help you prune like a pro for stunning spring blooms.
When is the exact best time to prune Limelight hydrangeas in fall?
The ideal window is late fall, after the first hard frost (typically November–December in most climates). This timing lets the plant enter dormancy while avoiding winter dieback. Avoid pruning too early—you risk encouraging new growth that won’t harden off before cold snaps. Pro tip: If your area has mild winters, wait until January to be safe.
What if I prune too late? Will my hydrangea survive?
Pruning after mid-winter (February+) is risky but not fatal. Late pruning can expose tender stems to sunscald or frost damage. If you miss the fall window, wait until spring (just after blooms fade) to prune lightly. Limelight hydrangeas are resilient—focus on removing dead wood first, then shape in spring.
Do I need to cut back Limelight hydrangeas hard, or just trim lightly?
Limelight hydrangeas are semi-evergreen and bloom on old wood, so avoid heavy pruning. Instead, lightly trim to remove:
- Dead, damaged, or crossing branches
- Up to 1/3 of the plant’s height (no more!)
- Weak stems at the base
What if my Limelight hydrangea didn’t bloom this year? Did I prune it wrong?
Not necessarily! Limelight hydrangeas can skip blooming due to:
- Too much shade
- Over-fertilizing with high nitrogen
- Extreme weather (late frost, drought)
- Pruning after blooms appeared (if you thought it was a different type!)
Can I prune Limelight hydrangeas in early spring instead of fall?
Yes, but with caution! Spring pruning (just after blooms fade) works, but you’ll miss the disease prevention and shape-setting benefits of fall pruning. If you choose spring:
- Prune immediately after flowers fade (May–June).
- Avoid cutting back old wood—only shape new growth.
- Be extra vigilant for powdery mildew (spring humidity is risky!).
Wrapping up and next steps
Fall pruning your Limelight Hydrangea is your secret weapon for show-stopping blooms next spring! 🌸 By trimming back now—before the first frost—you encourage stronger stems, larger flowers, and a healthier plant. Remember, timing and technique are everything: aim for late fall, use sharp shears, and avoid over-pruning.
Ready to transform your garden? Grab your tools, follow the steps, and watch your Limelight Hydrangea shine brighter than ever. Next up: mark your calendar for spring feeding and enjoy the fruits of your labor—literally! 🌿