
Pruning
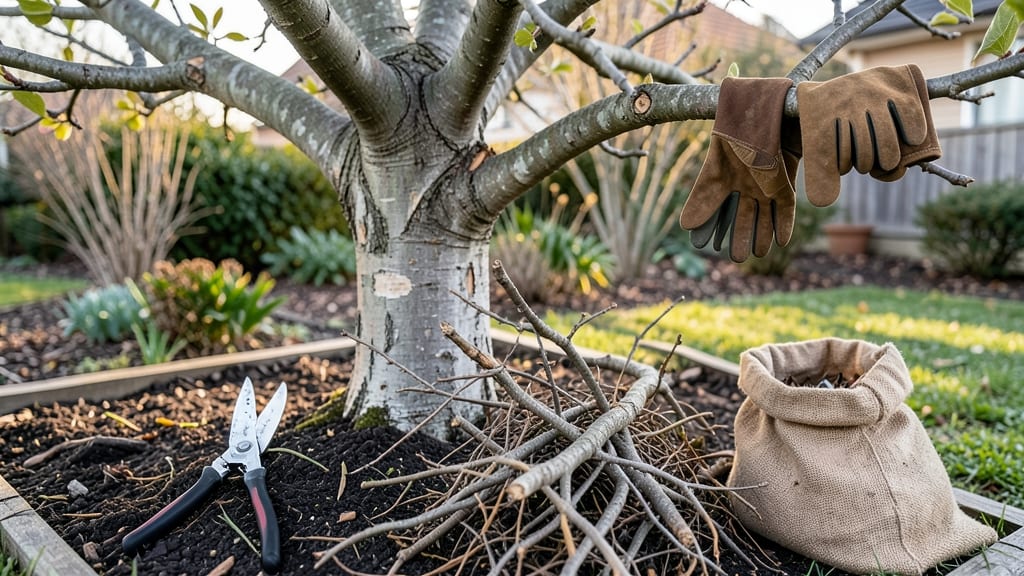
Late-winter fig tree pruning is your secret to jumpstarting next season’s harvest—just as buds begin to swell but before new growth starts. ✂️ I’ve watched my own figs go from bare branches to lush canopies in just six weeks after a proper late-winter cut, and the key is timing it right between dormancy and spring’s first warmth.
Cold-hardy varieties like ‘Celeste’ or ‘Chicago Hardy’ can handle this, but tropical types like ‘Brown Turkey’ need gentler shaping.
The right tools make all the difference: sharp bypass pruners for clean cuts, rubbing alcohol for sterilizing between branches, and a sturdy ladder if your tree’s over 6 feet tall. Focus on removing dead, crossing, or weak growth first—these are the branches stealing energy from fruit production.
Then open the center for airflow, which cuts down on fungal issues and makes harvesting easier.
What you’ll end up with is a tree that bursts into glossy new leaves by early summer, with fruit buds forming where you’ve made those strategic cuts. The first harvest arrives earlier, and the branches stay strong enough to support heavy crops.
Just avoid heavy pruning if your area’s still seeing hard freezes—wait until temperatures stay above 25°F for a few nights.
This method works for both container figs and in-ground trees, and it pairs perfectly with winter mulching to protect roots. Once you’ve pruned, give the base a 3-inch layer of straw or wood chips to lock in moisture and regulate soil temps.
The combination of pruning and mulching is what turns a good fig season into an embarrassingly productive one.
📚 In This Guide
- What you need
- Instructions
- Tips and common mistakes
- Wrapping up and next steps
What you need
- ● Pruning shears: Bypass pruners (for cuts up to ½ inch thick) or anvil pruners (for thicker branches). Choose sharp, high-quality tools to avoid crushing stems.
- ● Loppers: Bypass-style (for branches ½ to 1½ inches thick). Look for long handles (20+ inches) for leverage.
- ● Pruning saw: Curved-tooth saw for branches 1½+ inches thick. A foldable design saves space.
- ● Gloves: Heavy-duty, cut-resistant gloves (e.g., mechanics’ or pruning gloves) to protect hands from thorns and rough bark.
- ● Disinfectant: 70% isopropyl alcohol or bleach solution (1 part bleach : 9 parts water) to sterilize tools between cuts and prevent disease spread.
- ● Rags or paper towels: For wiping tools clean before and after use.
- ○ Marking twine or tape: Colored twine or masking tape to tag branches for removal (optional but helpful for complex pruning).
- ● Heavy-duty trash bags: For collecting pruned branches and debris.
- ● Extension pole: Attaches to pruners/loppers for high branches (10–15 feet).
- ● Safety glasses: Protects eyes from debris, especially when sawing.
- ● Tree wound dressing: Pruning sealant (controversial—skip if your tree is healthy; only use for large wounds >2 inches).
- ● Step stool or ladder: Sturdy, non-slip (3–4 feet tall) for reaching higher branches safely.
- ● Notebook & pen: To sketch your tree’s structure or note pruning decisions.
Step-by-Step guide for pruning fig trees in late winter
Here's how to refresh your fig tree for a stronger, more productive spring—just in time for new growth.
✂️ Step 1: Identify and Remove Dead or Damaged Branches
Start by scanning the tree for branches that are completely brown, brittle, or show no signs of life. These dead branches won’t regrow and only drain energy from healthy wood. Use clean, sharp pruning shears to cut back to the main trunk or a healthy side branch. Look for areas where the bark is cracked or peeling—these are often hiding decay beneath the surface.
I always make my first cut about ¼ inch above a bud or lateral branch that’s growing in the direction I want the tree to fill out. This ensures the cut encourages new growth in the right place. If you see suckers (shoots growing from the base or trunk), remove them now—they’ll compete with your main branches for nutrients.
✂️ Step 2: Thin Out Overcrowded or Crossing Branches
Next, focus on branches that are rubbing against each other or growing inward toward the center of the tree. These “crossing branches” can create wounds where disease or pests can enter. Use your shears to cut one of the two branches at its base, making sure to leave a smooth, slanted cut just outside the branch collar (the swollen area where the branch meets the trunk).
Thinning also improves airflow, which is critical for preventing fungal issues like fig rust. Aim to remove about 20-30% of the tree’s total branches—this keeps the tree’s shape open and sunlight reaching the inner growth. If you’re unsure which branch to keep, choose the one that’s thicker and more vigorous.
✂️ Step 3: Shape the Tree for Better Fruit Production
Fig trees naturally grow in a sprawling, multi-trunk habit, but you can guide them into a more manageable shape. Start by selecting 3-5 of the strongest, most upright branches to serve as the main framework. Prune back any competing branches that grow too close to these leaders, cutting them back to a lateral bud or side branch.
For open-grown figs, I like to encourage a vase-like shape by shortening branches that grow too horizontally. Make your cuts just above a bud that’s angled outward—this directs energy into new growth that will fill out the tree’s canopy. Avoid cutting back more than ⅓ of the tree’s total growth in one season, or you’ll stress the tree.
✂️ Step 4: Clean Up and Seal Larger Cuts
After pruning, collect all the clippings and dispose of them in the trash—not your compost pile. Fig tree debris can harbor diseases like root rot or fungal spores that might reinfect your tree. Wipe your pruning tools with rubbing alcohol between cuts to prevent spreading any pathogens.
For cuts larger than ½ inch in diameter, apply a thin layer of pruning sealant to protect the wound from moisture loss and pests. I use a high-quality, tree-safe sealant and only apply it to the fresh cut—not the surrounding bark. This step is optional for small cuts, but it helps larger wounds heal faster, especially in wet climates.
🌱 Step 5: Fertilize and Water for Spring Growth
Once pruning is done, give your fig tree a light feeding with a balanced, slow-release fertilizer (like a 10-10-10 formula) to replenish nutrients lost during the process. Water deeply right after fertilizing to help the roots absorb the nutrients. Figs are drought-tolerant once established, but they’ll reward you with stronger new growth if you keep the soil consistently moist during the first few weeks of spring.
Watch for new buds to swell along the branches—this is your sign that the tree is responding well to the pruning. If you see any signs of stress, like yellowing leaves or wilting, cut back on watering slightly and give the tree a few extra days to recover. By late spring, you’ll see fresh, vibrant foliage and a framework ready for fruit production.
Tips & tricks for pruning fig trees in late winter
Late-winter pruning sets the stage for a bountiful harvest—here's how to avoid common mistakes and maximize your tree's potential.
Cutting Technique Matters: When making your cuts in Step 1 and Step 2, always use a sharp, clean pair of pruning shears to avoid crushing the bark. I make my cuts just outside the branch collar (that swollen area where the branch meets the trunk) at a 45-degree angle. This creates a natural barrier that helps the wound heal faster. For branches thicker than ½ inch, make sure your cut slopes away from the trunk to prevent water from pooling and causing rot.
Shape with Purpose: In Step 3, when shaping your tree, focus on creating an open center that allows sunlight to reach all branches. I like to visualize a vase shape—taller in the middle and wider at the top. This not only improves fruit production but also makes harvesting easier. Remember to avoid cutting back more than ⅓ of the tree's total growth in one season, as this can stress the tree unnecessarily.
Sanitation is Key: After pruning, don't forget to clean up thoroughly. Step 4 emphasizes removing all clippings from the area—they can harbor diseases like fig rust. I also recommend wiping your pruning tools with rubbing alcohol between cuts to prevent spreading any pathogens. This small step can make a big difference in keeping your tree healthy for years to come.
Post-Pruning Care: Once you've finished pruning, don't just walk away! Step 5 highlights the importance of fertilizing and watering. I like to apply a balanced, slow-release fertilizer right after pruning to replenish nutrients. Then, water deeply to help the roots absorb the nutrients. Keep the soil consistently moist for the first few weeks of spring—this encourages strong new growth without overwhelming the tree.
Pro Tips for Fig Tree Pruning Winter
- Late-winter pruning sets the stage for a bountiful harvest—here's how to avoid common mistakes and maximize your tree...
- Cutting Technique Matters: When making your cuts in Step 1 and Step 2, always use a sharp, clean pair of pruning shea...
- Shape with Purpose: In Step 3, when shaping your tree, focus on creating an open center that allows sunlight to reach...
Frequently asked questions
Got questions about pruning your fig tree in winter?
You’re not alone! Here are answers to the most common concerns—from timing to tools—to help you prune with confidence.
When is the exact best time to prune a fig tree in winter?
The ideal window is late winter, after the last hard frost but before new growth starts—typically February to early March in most U.S. zones (5–9). Prune too early, and cold damage risks; too late, and you’ll cut off spring’s energy boost. Pro tip: Check your local frost dates for precision!
Can I prune a fig tree in winter if it’s still dormant?
Yes! Dormant pruning (when leaves are gone) is perfect for shaping and removing dead wood. However, avoid heavy cuts if your fig is in USDA zones 7–9—these areas can experience late frosts. Wait until after the last frost for tropical figs (like Ficus carica varieties).
What if I prune too much—will my fig tree die?
Fig trees are resilient, but never remove more than 25–30% of the canopy in one season. Heavy pruning can stress the tree, reducing fruit production. Focus on selective cuts: dead branches, crossing limbs, and overgrowth. Pro tip: Thin out the center to improve airflow and sunlight!
Do I need special tools for winter fig pruning?
Basic tools work: bypass pruners (for small branches), loppers (thicker limbs), and a pruning saw for large cuts. Sterilize blades with rubbing alcohol to prevent disease. Bonus: Wear gloves—fig tree sap can irritate skin!
Will pruning in winter affect next year’s fig harvest?
Not if done right! Pruning in late winter encourages stronger growth and more fruit by removing weak or crowded branches. Just avoid heavy pruning on young trees (under 3 years old) or those recovering from stress. Patience pays off—your tree will thank you with a bountiful harvest!
Wrapping up and next steps
Winter is the perfect time to give your fig tree a fresh start!
By pruning now, you’ll encourage stronger growth, better fruit production, and a healthier tree for seasons to come. 🌱 Whether you’re trimming for shape, removing dead wood, or opening up the canopy, your efforts will pay off with vibrant new leaves and bountiful harvests.
Ready to take action? Grab your pruners, review your notes, and get pruning! If you’re unsure about any step, consult a local arborist or gardening community for personalized advice. Your fig tree—and future figs—will thank you!