
Pruning
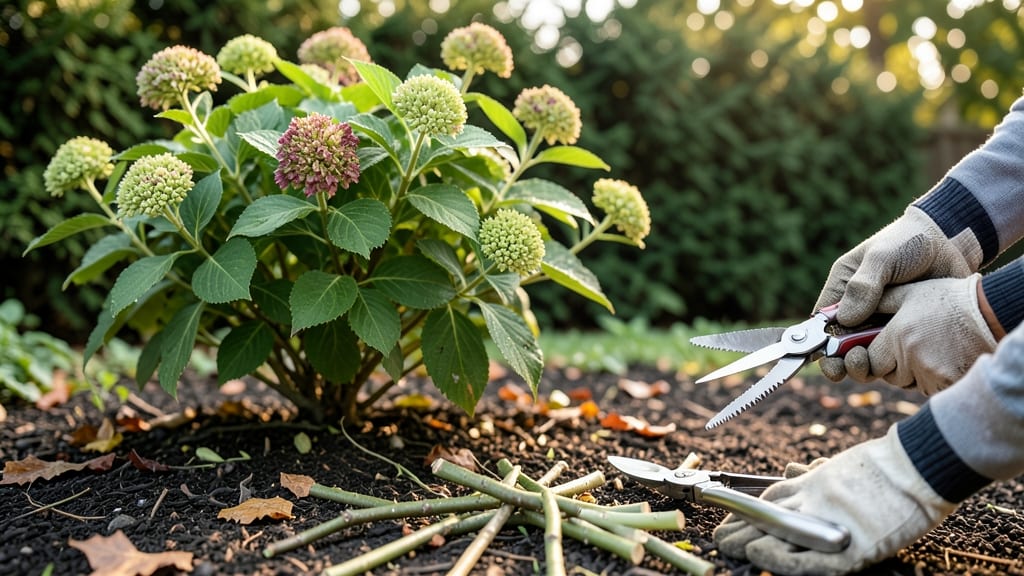
Your hand pruner in spring isn’t just a tool—it’s the secret to exploding blooms and healthier plants. ✂️ After years of watching overgrown shrubs struggle, I learned that a few sharp cuts in early spring can transform woody stems into lush, productive growth.
The key? Timing—prune too late, and you risk stunting new shoots; too early, and you cut off next year’s flowers. Start with 3 simple tasks**: shaping shrubs like lilacs and hydrangeas, cutting back dead stems on perennials, and trimming back last year’s growth on fruit bushes.
A clean cut at a 45-degree angle, just above an outward-facing bud, ensures fresh growth heads in the right direction. I’ve seen roses go from scraggly to showstopping in just 6 weeks after a proper spring prune.
The payoff is immediate: more flowers, stronger stems, and plants that look like they’ve been professionally tended. Plus, you’ll avoid the mid-summer struggle of tangled branches and missed blooms.
Your pruners will stay sharp all season if you clean and oil them after each use—rust is the enemy of a good cut. This works for almost any woody plant, from roses to berry bushes, and even container-grown shrubs. Grab your pruners and let’s get those branches back in shape!
📚 In This Guide
- What you need
- Instructions
- Tips and common mistakes
- Wrapping up and next steps
What you need
- ● Hand pruners (bypass or anvil type) – Choose sharp, high-quality pruners (e.g., Felco or Fiskars) with a spring-loaded mechanism for effortless cutting. Size: 6-8" blades for most gardening tasks.
- ○ Pruning shears (optional) – For thicker branches (½"–1"), opt for ratcheting or compound-action shears for leverage.
- ● Disinfectant (70% isopropyl alcohol or bleach solution) – 1 part bleach to 9 parts water to sterilize tools between cuts and prevent disease spread.
- ● Gloves (cut-resistant) – Heavy-duty gardening gloves (e.g., Mechanix or Wolverine) to protect hands from thorns and sharp edges.
- ○ Pruning sealant (optional) – Tree wound dressing (like Tanglefoot) for large cuts (>½") to minimize sap loss and infection risk.
- ● Safety glasses – Protect your eyes from debris, especially when pruning near your face or in windy conditions.
- ● Long sleeves/pants – Wear lightweight, breathable fabric to shield against scratches and sun exposure.
- ● Ladder or step stool – For hard-to-reach branches (height-dependent; ensure it’s stable and rated for your weight).
- ● Trash bags or bucket – Collect pruned branches for composting or disposal.
- ● Weather check – Prune on a dry, calm day (avoid rain or high winds) for safety and cleaner cuts.
Step-by-step guide to spring pruning with hand pruners
Here's how to wake up your plants with clean cuts and vibrant growth.
🌿 Step 1: Identify Dead, Diseased, or Weak Branches
Start by examining each branch carefully. Dead wood feels brittle and snaps easily when bent—remove these first. Diseased branches often have dark spots, mold, or oozing sap. Weak or crossing branches (those rubbing against others) should also go. I like to use a small notepad to mark branches to prune before I start cutting.
Look for branches that haven't produced leaves or flowers in years—they're likely dead. Healthy branches have a firm, greenish-brown interior when you cut a small section. If you're unsure, make a small cut and check the color inside. Gray or black means it's dead; green or white means it's still alive.
✂️ Step 2: Sterilize Your Hand Pruners and Make Clean Cuts
Before you begin, wipe your pruners with rubbing alcohol or a 10% bleach solution to prevent spreading disease between cuts. I keep a small bottle of alcohol handy for quick sterilization between branches. Sharp pruners make clean cuts that heal faster, so take a moment to sharpen the blades if they feel dull.
When pruning, cut just outside the branch collar—the swollen area where the branch meets the trunk. This ensures the plant can seal the wound properly. Avoid leaving stubs, as they can trap moisture and invite rot. For larger branches, cut at a slight angle to help water run off, but for small branches, a straight cut is fine.
🌱 Step 3: Prune for Shape and Airflow
Step back and look at your plant as a whole. Remove branches that grow inward or cross others to improve airflow and sunlight penetration. I aim for an open, vase-like shape in shrubs, which encourages new growth at the center. For flowering plants, avoid cutting back more than one-third of the plant in a single season—this keeps them from getting stressed.
Focus on thinning out dense areas rather than just cutting back the ends. This reduces competition for nutrients and helps the plant redirect energy to new growth. If you're pruning a flowering shrub, wait until after it blooms to avoid removing next year's flowers. For spring-blooming plants like lilacs or forsythia, prune right after they finish flowering.
☀️ Step 4: Encourage New Growth with Strategic Cuts
To stimulate fresh growth, cut just above a outward-facing bud or leaf. This encourages the plant to grow in the direction you want. For example, if a branch is growing straight up and you want it to fill out, cut above a bud that points outward. Avoid cutting into a bud or you'll damage the new growth.
After pruning, step back and admire your work. You should see an open, airy structure with room for new shoots to emerge. Water the plant deeply after pruning to help it recover. Mulch around the base to retain moisture and protect roots. In a few weeks, you'll see new leaves and buds forming—proof that your pruning paid off.
⏰ Step 5: Clean Up and Monitor Progress
Rake up and dispose of all pruned branches, especially if they were diseased. Bagging them prevents the spread of spores. I like to compost healthy prunings, but diseased ones should go in the trash. Keep an eye on the plant over the next few weeks. If you see any signs of stress—like wilting or yellowing leaves—reduce watering slightly and avoid fertilizing until new growth appears.
In about 4-6 weeks, you should see fresh, vibrant growth emerging from the pruned areas. This is your reward for a job well done. If any branches look weak or don't produce new growth, they might need another round of pruning later in the season. Regular pruning keeps your plants healthy, encourages blooms, and keeps them looking their best all year.
Tips & tricks for perfect spring pruning
Spring pruning transforms your garden—here's how to avoid common mistakes and get professional results every time.
Branch Identification: For branches you're unsure about, make a small test cut at the base—healthy wood should reveal green or white interior, while dead wood appears gray or black. This quick check saves you from accidentally pruning live branches. I always carry a small pocket knife for these tests, especially with thick branches where a full cut would be wasteful.
Pruner Maintenance: Keep your hand pruners sharp and clean between uses to prevent spreading disease. After each session, wipe blades with rubbing alcohol and store them in a dry place. Dull blades crush rather than cut cleanly, which can damage the plant and make wounds heal poorly. A quick sharpening with a file every few uses makes all the difference in clean cuts.
Strategic Pruning: When shaping shrubs, aim for an open center that allows sunlight to reach all parts of the plant. This prevents dense, shaded areas where pests and diseases thrive. I like to visualize the plant's natural shape—think of how it would grow without interference—and work toward that ideal form. For flowering plants, never remove more than one-third of the plant in a single season to avoid shocking it.
Post-Pruning Care: After finishing, water deeply and apply a 2-3 inch layer of mulch around the base to retain moisture and protect roots. This helps the plant recover faster from the stress of pruning. I also avoid fertilizing immediately—wait until you see new growth emerging, usually within 4-6 weeks, before adding any nutrients.
Pro Tips for Hand Pruner Spring
- Spring pruning transforms your garden—here's how to avoid common mistakes and get professional results every time.
- Branch Identification: For branches you're unsure about, make a small test cut at the base—healthy wood should reveal...
- Pruner Maintenance: Keep your hand pruners sharp and clean between uses to prevent spreading disease. After each sess...
Frequently asked questions
Got questions about hand pruner springs and keeping your garden tools in top shape?
You’re in the right place! Here are answers to the most common queries to help you prune like a pro this spring.
When is the best time to replace a hand pruner spring?
Replace your spring if it’s weak, stretched, or broken—even if your pruners still close. A worn spring reduces cutting power and can damage blades. Spring is ideal for maintenance, but replace it anytime you notice sluggish performance. Pro tip: Test by squeezing handles—if resistance feels uneven, it’s time for a swap!
How often should I sharpen my pruners after replacing the spring?
Sharpen your blades every 5–10 cuts if they’re dull, but with a new spring, aim for every 15–20 cuts for optimal performance. Use a file or whetstone at a 25–30° angle. Never skip sharpening! Dull blades tear branches, stressing plants and inviting disease.
Can I use a hand pruner with a broken spring?
Not safely! A broken spring means uneven pressure on the blades, risking slippage, injury, or damage to your plants. Temporarily use long-handled loppers or bypass pruners with springs while you replace the spring. Safety first—never force a broken tool!
What’s the difference between a spring-loaded and bypass pruner?
A spring-loaded pruner uses a spring to close blades with one-handed ease, ideal for quick cuts. A bypass pruner (spring or manual) has two sharp blades that slide past each other for cleaner cuts—perfect for live plants, flowers, and shrubs. For spring blooms, bypass wins!
Are expensive pruner springs worth the upgrade?
Premium springs (e.g., titanium or hardened steel) last longer and resist corrosion, but mid-range options work great for most gardeners. If you prune heavily or in harsh climates, invest in durable springs. Balance cost with frequency of use! A $5 spring can save $50 on a new pruner.
Still stumped?
Drop your question below—we’re happy to help you prune with confidence!
Wrapping up and next steps
Revitalizing your garden with a hand pruner spring is simpler than you think—and the rewards are worth every snip! 🌿 Whether you’re trimming deadwood, shaping shrubs, or encouraging lush blooms, the right technique and tools make all the difference.
With your newfound confidence, it’s time to roll up those sleeves and transform your outdoor space into a thriving haven.
Your next step? Grab those pruners, step outside, and start pruning! Need a refresher? Bookmark this guide and revisit it before your next gardening session. Happy pruning—your plants will thank you! 🌸