
How To
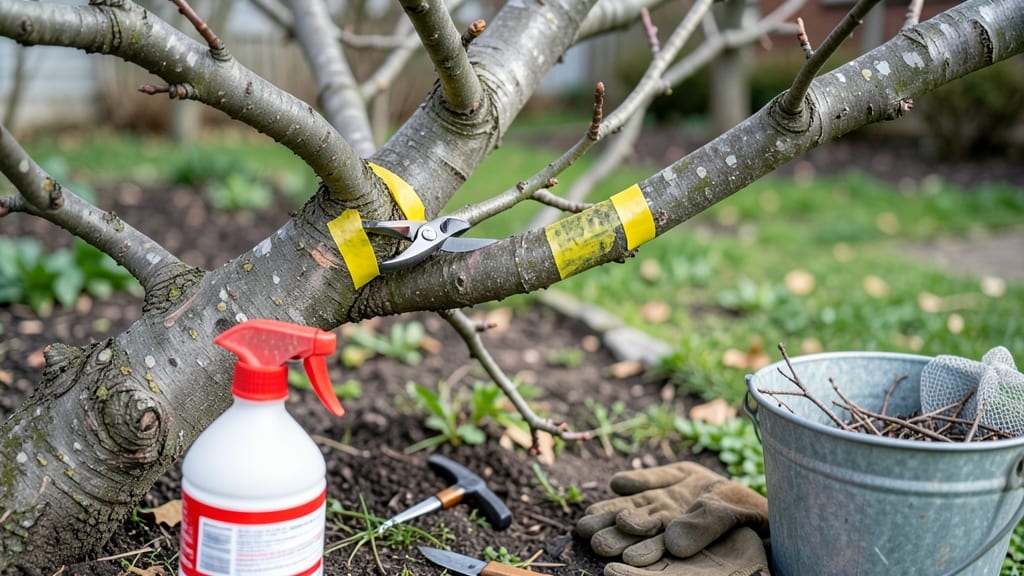
Pruning apple trees in winter transforms next summer's harvest. ✂️ When you prune now—between late winter and early spring—you're shaping the tree's energy for stronger branches, better air flow, and fewer disease problems. The dormant season makes it easier to see the tree's structure without leaves in the way.
You'll need sharp pruners, a saw for thicker branches, and a clean workspace. Cut just outside the branch collar (that swollen area where the branch meets the trunk) at a slight angle. Remove dead, crossing, or crowded branches first, then thin out the canopy to let light reach the center.
A 30-minute session can make all the difference for your tree's health and fruit production.
📚 In This Guide
- What you need
- Instructions
- Tips and common mistakes
- Wrapping up and next steps
What you need
- ● Pruning shears: Sharp, bypass-style shears (for cuts up to ½ inch thick). Pro tip: Invest in high-quality shears—dull blades can damage branches and spread disease. 🌡️
- ● Pruning saw: A curved-tooth saw for thicker branches (½ inch to 2 inches in diameter). Look for a folding saw for portability.
- ● Loppers: For medium-sized branches (½ to 1½ inches thick). Choose ratchet-style loppers for easier cutting.
- ○ Extension pole saw: Optional but handy for high branches (2–4 inches thick). A 10–12-foot pole works well for most trees.
- ● Gloves: Heavy-duty, cut-resistant gloves (e.g., leather or Kevlar) to protect your hands from thorns and rough bark.
- ● Safety glasses: Protect your eyes from debris—ANSI-rated goggles are ideal.
- ● Disinfectant: A 10% bleach solution (1 part bleach to 9 parts water) or rubbing alcohol to clean tools between cuts and prevent disease spread. ✨
- ○ Pruning sealant: Optional for large cuts (over ½ inch), but not recommended for most apple trees (they heal naturally). If used, choose a water-based sealant.
- ● Rake or broom: To clear fallen debris and leaves from the base of the tree.
- ● Trash bags: For disposing of pruned branches (check local regulations for yard waste).
- ● Notebook or app: To sketch a simple map of your tree’s structure before and after pruning. Pro tip: Snap photos for reference! 📸
- ● Weather: Prune on a dry, calm day (avoid frost or rain). Ideal temps: 40–60°F.
- ● Tree condition: Ensure your tree is dormant (no buds or leaves) but not frozen solid. Late winter (after the worst cold snaps) is perfect.
- ● Safety first: Wear sturdy shoes with grip and avoid working alone if the tree is large or unstable.
Step-by-Step guide to pruning apple trees in winter
Winter's the perfect time to revitalize your apple tree—here's how to do it right.
✂️ Step 1: Gather Tools and Safety Gear
Start with clean, sharp tools—dull blades tear wood, inviting disease. I use a pruning saw for thick branches over 1 inch in diameter and bypass pruners for smaller cuts. Always sterilize tools with rubbing alcohol between trees to prevent spreading bacterial fire blight.
Wear gloves and long sleeves to protect against thorns and sap. A ladder is essential for reaching high branches safely. I mark my cuts with a piece of chalk to visualize the shape before making any cuts—this keeps me from over-pruning or removing too much at once.
✂️ Step 2: Remove Dead, Diseased, or Crossing Branches First
Scan the tree for branches that are brown, brittle, or without buds—these are dead and must go. Cut them back to the trunk or a healthy lateral branch. Next, look for branches rubbing against each other—these create wounds that invite rot. Remove the smaller of the two crossing branches at its base.
I always cut just outside the branch collar (the swollen area where the branch meets the trunk) to encourage faster healing. If a branch is diseased, like with black spots or oozing sap, cut back 6-12 inches below the affected area to ensure the disease doesn’t spread.
✂️ Step 3: Thin the Canopy for Better Airflow and Light
Apple trees need sunlight to reach the inner branches, so thin out any branches that are growing inward or too densely packed. Aim to remove 20-25% of the tree’s total branches—this opens up the canopy and reduces disease risk. Start from the bottom and work your way up.
Look for branches that are growing straight up—these compete with the central leader (the main vertical trunk). Cut these back to a lateral branch or bud that grows at a 45-degree angle. You’ll see the tree’s natural shape emerge as you work, with a strong central leader and evenly spaced branches.
✂️ Step 4: Shape the Tree for Optimal Growth
Now it’s time to refine the tree’s shape. For young trees, I focus on creating an open-center form where branches spread outward like a vase. For mature trees, I maintain this shape by removing any branches that grow too close to the center or block light from reaching the interior.
Make cuts just above an outward-facing bud or branch to encourage growth in the right direction. Avoid cutting back to a stub—this invites decay. If you’re unsure where to cut, follow the branch’s natural angle and aim for a smooth, sloping cut that leaves a small bump of wood behind.
⏰ Step 5: Clean Up and Apply Wound Treatment
After pruning, rake up all debris and dispose of it away from the tree to prevent disease. Wipe down your tools again with rubbing alcohol to ensure they’re clean. For larger cuts over ½ inch in diameter, apply a wound dressing like tree sealant to protect the exposed wood from pests and moisture.
Water the base of the tree deeply to help it recover from the stress of pruning. In 4-6 weeks, new growth will emerge from the buds you left behind—this is your sign that the tree is healing and preparing for spring. Keep an eye on the pruning cuts over the next few months to ensure they’re sealing properly.
Tips & tricks for pruning apple trees in winter
Here's what nobody tells you—these tricks will help you prune like a pro without stressing your tree.
Tool Prep is Non-Negotiable: Before you even touch the tree, sharpen your pruning saw and bypass pruners—dull tools crush wood fibers, creating wounds that invite disease. I test sharpness by cutting through a paper bag; if it tears instead of cleanly cutting, sharpen it. Sterilizing tools between cuts (especially if you have multiple trees) prevents spreading bacterial fire blight, which can devastate your orchard.
Visualize First, Cut Second: That chalk marking trick in Step 1 isn't just for show—it forces you to plan each cut before making it. Step back and look at the tree's natural shape: young trees should develop an open-center form (like a vase), while mature trees need branches spaced 8-12 inches apart. I sketch a rough outline on paper first to avoid over-pruning, which stresses the tree.
The 45-Degree Rule: When shaping branches in Step 4, always cut just above an outward-facing bud at a 45-degree angle. This creates a natural growth direction while leaving a small bump of wood that seals better than a flat cut. Pro tip: Look for buds that face the outside of the tree—these will grow outward, opening up the canopy. If you're unsure which bud is facing outward, make your cut slightly higher than you think you need to.
Timing is Everything: While winter pruning is ideal (dormant trees heal faster), don't prune during extreme cold snaps below 20°F. The 4-6 week healing window mentioned in Step 5 assumes mild winter conditions. In colder climates, wait until late winter when buds begin to swell slightly—this signals the tree is ready to heal. And always prune on dry days to prevent fungal infections from setting in through fresh cuts.
Pro Tips for Prune Apple Trees In Winter
- Here's what nobody tells you—these tricks will help you prune like a pro without stressing your tree.
- Tool Prep is Non-Negotiable: Before you even touch the tree, sharpen your pruning saw and bypass pruners—dull tools c...
- Visualize First, Cut Second: That chalk marking trick in Step 1 isn't just for show—it forces you to plan each cut be...
Frequently asked questions
Got questions about winter pruning your apple trees?
You’re not alone! Here are answers to the most common concerns—so you can prune with confidence and set your tree up for a bountiful harvest.
When is the exact best time to prune apple trees in winter?
Prune during late winter (February to early March) when the tree is fully dormant but before buds swell. Avoid pruning too early—cold snaps can stress fresh cuts. If you miss winter, wait until early spring before blooms open. Pro tip: Check your USDA hardiness zone—warmer climates (Zones 7-9) can prune slightly earlier (January-February).
What if I prune at the wrong time? Will my tree die?
Your tree won’t die, but wrong timing can cause stress or disease. Pruning too early (deep winter) risks frost damage to cuts, while late pruning (after buds swell) may remove potential fruit. If you’ve already pruned at the wrong time, monitor for signs of stress (wilting, discolored leaves) and ensure the tree stays hydrated. Fix: Focus on minor trims in future years and prioritize late winter for major cuts.
Can I prune apple trees in winter without special tools?
You can use basic tools like hand pruners (for small branches) and loppers (thicker branches), but a pruning saw is ideal for large limbs. Clean tools with rubbing alcohol or bleach to prevent disease spread. No tools? Avoid pruning—dirty or dull tools can harm the tree. Invest in a $20 pruning kit for long-term success!
How much should I cut back? Will pruning reduce my apple harvest?
Remove 20-30% of the tree’s canopy to improve airflow and sunlight. Focus on dead, crossing, or overcrowded branches first. Don’t panic: Pruning increases fruit quality over time by reducing competition. In the first year, you might see fewer apples, but future harvests will be healthier and larger! Rule of thumb: Never remove more than 1/3 of the tree’s foliage in one season.
Will winter pruning attract pests or diseases?
Pruning in winter minimizes pest risks since most insects are dormant. However, open wounds can invite bacteria or fungi. Seal large cuts with pruning sealant (optional) or let them heal naturally. Prevent disease: Sterilize tools between cuts, avoid pruning when wet, and remove fallen debris. Watch for: Signs of fire blight (blackened branches) or canker—prune infected areas 6 inches below the damage.
Wrapping up and next steps
Winter pruning is your secret weapon for a bountiful apple harvest—it’s all about shaping your tree’s future while giving it a fresh start. By removing dead wood, thinning crowded branches, and encouraging airflow, you’re setting the stage for healthier growth and sweeter fruit this summer. 🍏✨
Now that you’re armed with the know-how, grab those pruners and get to work! Start small if you’re new—confidence grows with practice. And remember, every cut is a step toward a thriving orchard.
Ready to see your apple tree bloom? Head to our gardening tools guide for more tips on keeping your yard in tip-top shape!