
Pruning
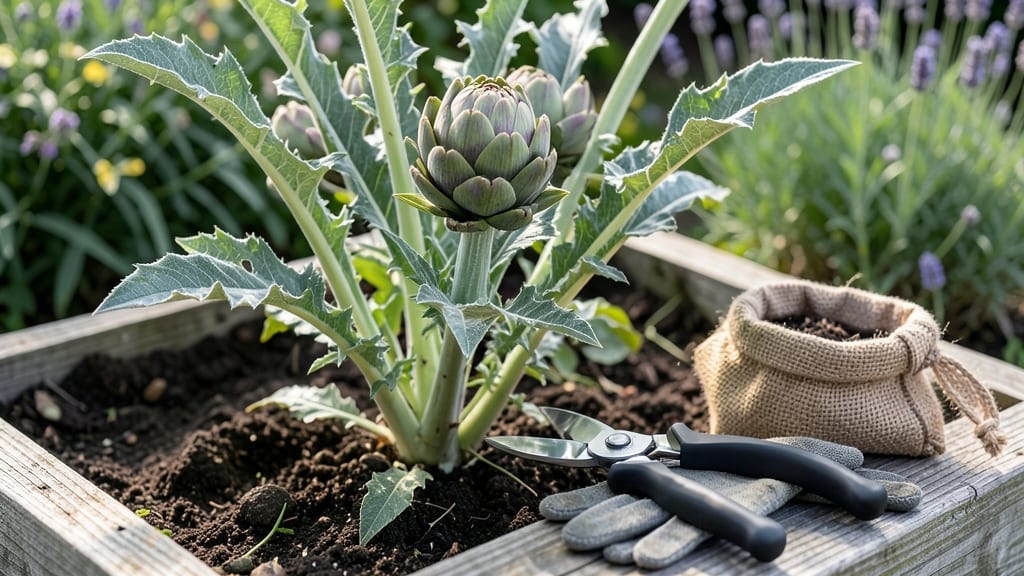
Pruning artichokes isn't just about cutting back—it's how you unlock bigger, bushier harvests every season. 🌱 I learned the hard way that skipping this step means smaller buds and more pests. The key is timing: prune after harvest and during dormancy to encourage new growth without stressing the plant.
You'll only need sharp pruners and a pair of gloves—no fancy tools required. Focus on removing spent flower stalks, yellowing leaves, and any dead wood. This isn't just cleanup; it's how you redirect the plant's energy toward producing those prized, tender buds you'll harvest next.
Within 3-4 weeks of proper pruning, you'll see fresh green shoots pushing out, signaling the plant is rebounding. The buds that form will be larger, tighter, and more flavorful than ever. Plus, good airflow from pruning keeps diseases like crown rot at bay.
Works for both green and purple globe varieties, and whether you're growing in Mediterranean climates or cooler zones with a little extra protection. Here's exactly how to do it without overcomplicating things.
📚 In This Guide
- What you need
- Instructions
- Tips and common mistakes
- Wrapping up and next steps
What you need
- ● Sharp pruning shears: A pair of bypass pruners (not anvil-type) with a 4- to 6-inch blade for clean cuts. Sterilize with rubbing alcohol before and after use to prevent disease spread.
- ● Garden gloves: Heavy-duty, cut-resistant gloves (e.g., mechanized or leather) to protect your hands from thorns and rough stems.
- ● Disinfectant solution: A 10% bleach-water mix (1 part bleach to 9 parts water) or 70% isopropyl alcohol for cleaning tools.
- ○ Garden twine or plant ties: 1/4-inch wide, biodegradable twine (optional but helpful for supporting heavy stems post-pruning).
- ● Compost or mulch: 2-3 inches of well-aged compost or straw mulch to replenish soil nutrients after pruning.
- ○ Pruning sealant (optional): A natural latex-based sealant (e.g., Tanglefoot Tree Wound Pruning Seal) to coat large cuts and prevent rot.
- ● Watering can or hose: With a fine-mist nozzle for post-pruning hydration.
- ○ Labeling tags (optional): Waterproof plant markers to label pruned sections if you’re experimenting with different techniques.
- ● Timing: Prune during the plant’s dormant season (late fall/winter) or early spring before new growth starts. Avoid pruning during active flowering.
- ● Healthy plant: Only prune mature artichoke plants (2+ years old) with no signs of disease (e.g., yellowing leaves, mold).
- ● Weather: Choose a dry, overcast day to minimize stress on the plant. Avoid pruning after rain or in extreme heat.
Step-by-Step guide to pruning artichokes for maximum yield
Here's how I transform artichoke plants from scraggly to productive year after year.
✂️ Step 1: Identify and Remove Flower Buds Before Harvest
Artichokes produce buds that will develop into flowers—your goal is to redirect energy to the edible heads instead. As soon as you spot a bud forming on the main stalk, pinch it off with your thumb and forefinger. These buds appear as small, tight clusters about 3-4 inches long, usually in the leaf axils where stems meet leaves.
Timing matters: do this in early spring when buds first appear, and again in mid-summer when new growth flushes. I use clean, sharp pruning shears for larger buds to avoid crushing the stem. The key is consistency—one missed bud can divert enough energy to reduce your harvest by 20-30%.
🌿 Step 2: Prune Side Shoots for Bushier Growth
Artichoke plants develop vigorous side shoots that compete with your main harvest. Use pruning shears to cut these back to 6-8 inches from the main stem when they reach about 12 inches tall. This forces the plant to put energy into developing more primary buds rather than long, leggy side growth.
Here's the trick: make your cuts just above a leaf node where new growth can emerge. Avoid leaving stubs—clean cuts heal faster and reduce disease risk. I prune side shoots in late spring and again in early summer, just as the plant enters its most active growth phase.
✂️ Step 3: Thin Overcrowded Stems for Better Airflow
Mature artichoke plants can develop 10-15 stems competing for resources. Select the 4-5 strongest, healthiest stems and prune the rest back to the ground. This improves airflow, reduces humidity around the plant, and prevents fungal diseases like powdery mildew.
Make your cuts at the base where the stem meets the soil. The plant will redirect energy to the remaining stems, producing larger, more flavorful artichokes. I do this thinning in early summer when the plant has established its main framework but before the first harvest buds form.
⏰ Step 4: Post-Harvest Pruning for Continued Production
After harvesting artichokes, don't stop pruning. Cut back the spent stalk to 1-2 inches above the base immediately after harvest. This stimulates new bud formation and encourages a second flush of production in many varieties.
For perennial varieties, I also prune back any dead or diseased foliage in late fall. Cut back all growth to 6-8 inches above the ground, removing all leaves and stems. This winter pruning prevents pests from overwintering in plant debris and gives your artichokes a strong start in spring.
☀️ Step 5: Seasonal Maintenance for Year-Round Health
Artichokes benefit from regular maintenance throughout the growing season. In early spring, remove any winter-damaged growth and apply a 2-3 inch layer of organic mulch to retain moisture. In late summer, prune any suckers that form at the base of the plant—these drain energy from your main harvest.
The final touch is a light pruning in early fall to prepare for dormancy. Trim back any remaining foliage that's yellowing or showing signs of stress. This helps the plant conserve energy for next year's growth. I always finish with a light application of compost around the base to replenish nutrients.
Tips & tricks for pruning artichokes like a pro
These game-changing techniques will help you transform your artichoke plants into productive powerhouses all season long.
Timing is Everything: In Step 1, when removing those 3-4 inch flower buds, don't wait until they're fully formed. The earlier you catch them—especially in early spring—the more energy your plant will redirect to developing edible heads. I check my plants every 7-10 days during peak growing months to stay ahead of bud formation. This consistency can literally double your harvest potential by preventing that 20-30% energy loss mentioned in the instructions.
Precision Pruning Technique: For Step 2's side shoots, I've found that using a 45-degree angle when making your cuts just above a leaf node creates a natural water-shedding surface that reduces disease risk. Make sure your pruning shears are clean and sharp—dull blades crush stems and create entry points for pathogens. I sterilize my tools with rubbing alcohol between plants to prevent cross-contamination. The 6-8 inch height guideline is perfect, but don't hesitate to go slightly lower if you see signs of disease on the remaining stem.
Seasonal Calendar Secret: Here's what nobody tells you—artichokes respond differently to pruning based on their growth stage. In Step 3, when thinning to 4-5 strongest stems, I always wait until after the first harvest buds appear but before they fully develop. This timing (early summer) ensures the plant has established its main framework but hasn't yet committed energy to flower production. For perennial varieties, that late fall pruning to 6-8 inches should happen after the first frost when the plant has fully entered dormancy—this prevents winter dieback while still allowing for next year's growth.
Tool Upgrade: While the instructions mention pruning shears, I've found that a bypass pruner with a 4-inch blade makes quick work of those 12-inch side shoots in Step 2. For larger stems, a felco pruner gives you the leverage to make clean cuts without crushing. I also keep a pair of clean garden scissors handy for those initial flower bud removals in Step 1—they give me more precision when working around delicate leaf axils. Always clean your tools after use to prevent spreading plant diseases between your artichokes and other garden plants.
Pro Tips for Prune Artichokes
- These game-changing techniques will help you transform your artichoke plants into productive powerhouses all season l...
- Timing is Everything: In Step 1, when removing those 3-4 inch flower buds, don't wait until they're fully formed. The...
- Precision Pruning Technique: For Step 2's side shoots, I've found that using a 45-degree angle when making your cuts ...
Frequently asked questions
Got questions about pruning artichokes? You’re not alone—this step can feel tricky, especially for beginners! Below, we’ve tackled the most common concerns to help you prune like a pro and keep your plants thriving.
When is the best time to prune artichokes?
Prune artichokes after they’ve bolted (flowered) or when you harvest the buds. For year-round care, trim dead or yellowing leaves anytime to encourage new growth. Avoid heavy pruning during frost or extreme heat—wait for mild weather (60–75°F) for best results.
How much should I cut back?
Remove 1/3 to 1/2 of the plant’s height after harvest or bolting. Cut just above a leaf node (where new shoots emerge) to stimulate bushier regrowth. Avoid over-pruning—leave at least half the plant intact to maintain energy for next season.
What if my artichoke plant looks sad after pruning?
Don’t panic! A wilted appearance is normal for a few days. Water deeply right after pruning and keep soil moist (but not soggy). If leaves turn yellow after a week, check for pests like aphids or fungal issues. Mulch around the base to retain moisture and speed recovery.
Can I prune artichokes in winter?
Light pruning (removing dead foliage) is fine in mild winters, but avoid heavy cuts. In freezing climates, wait until spring (after last frost) to prune. Focus on cleaning up debris to prevent disease—artichokes are tough but not frost-hardy!
Do I need special tools for pruning?
Nope! Use clean, sharp pruners or shears (bypass pruners work best). For larger stems, a hand saw may help. Sterilize tools with rubbing alcohol between cuts to prevent spreading disease. No fancy tools? Sharp kitchen scissors in a pinch!
Pro Tip:
Label your pruned cuttings! If you’re propagating from cuttings, place them in water with a leaf node submerged—roots should sprout in 2–3 weeks. Perfect for expanding your artichoke patch next season!
Wrapping up and next steps
Pruning artichokes isn’t just about tidying up—it’s your secret weapon for bigger, healthier, and more abundant harvests! 🌱 With the right timing, tools, and techniques, you’ll turn your garden into a thriving artichoke powerhouse.
Remember: less is more—focus on removing dead growth, encouraging new shoots, and protecting your plants from pests.
Now that you’re armed with the know-how, roll up your sleeves and get pruning! Start small, observe your plants, and adjust as you go. Before you know it, you’ll be savoring homegrown artichokes and bragging about your green thumb. Happy gardening! 🌿✨