
How To
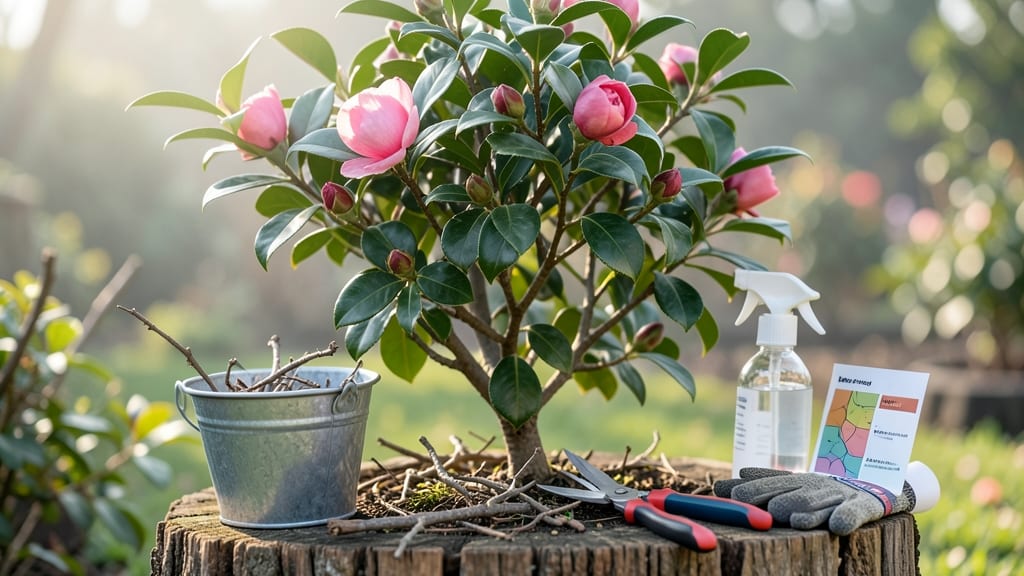
Pruning camellias isn't just about shaping—it's how you unlock next year's blooms. ✂️ After my first overzealous trim left my plant bare, I learned the real secret: timing matters more than snips.
The best time depends on whether your camellia flowers in spring or fall, but there's a simple rule that works for both. Start by gathering your tools: sharp bypass pruners (dull blades tear bark), thick gloves (those thorns pack a punch), and a clean bucket for trimmings.
The goal is to remove dead wood, shape naturally, and encourage new growth where you want it—never more than one-third of the plant at once.
I still flinch when I see a camellia with too many cuts, but the results speak for themselves: fuller foliage and more abundant flowers the following season.
📚 In This Guide
- What you need
- Instructions
- Tips and common mistakes
- Wrapping up and next steps
What you need
- ● Bypass pruners – Sharp, clean pruners (4-6 inch blades) for cutting stems up to ½ inch thick. Must be sanitized with rubbing alcohol or bleach solution (1 part bleach to 9 parts water) to prevent disease spread. 🔥
- ● Loppers – For thicker branches (½ to 1½ inches). Choose bypass-style loppers for clean cuts.
- ● Hand saw – A pruning saw with a fine-tooth blade for branches over 1½ inches thick.
- ● Garden gloves – Cut-resistant gloves (e.g., leather or heavy-duty nylon) to protect from thorns and sap.
- ● Disposable pruning bags or bucket – To collect clippings and debris for easy disposal.
- ● Rubbing alcohol or bleach wipes – For quick tool sanitization between cuts.
- ○ Pruning sealant – Optional for sealing large cuts (over ½ inch) to prevent disease.
- ● Step stool or ladder – For reaching taller branches safely.
- ● Sharpie or marker – To mark branches you plan to remove (helps visualize your cuts).
- ● Know your camellia’s blooming season – Prune at the right time (early spring for spring-bloomers, late winter for fall-bloomers).
- ● Check the weather – Prune on a dry, overcast day to reduce stress on the plant.
- ● Gather safety gear – Long sleeves/pants to avoid thorns and sap irritation.
Step-by-step instructions for pruning camellias
Here's the method I trust to keep my camellias blooming like crazy year after year.
✂️ Step 1: Prune Immediately After Flowering
This is the moment that matters: right after your camellias finish blooming. I wait until all spent flowers drop naturally—usually 2-4 weeks after flowering—before making a single cut. This timing ensures you don't accidentally remove next year's buds, which form on old wood.
Use sharp, clean pruners to make cuts at a 45-degree angle, about ¼ inch above a leaf node. This angle helps water run off and prevents rot. I like to shape the plant lightly here, removing any dead, crossing, or weak branches first. Think of this as a light haircut—not a drastic makeover.
✂️ Step 2: Thin Out Crowded Branches in Late Winter
Between January and early March, when your camellia is still dormant but before new growth starts, focus on opening up the center. I look for branches growing inward or rubbing against others—these compete for energy and create weak spots. Cut these back to the nearest outward-facing bud or branch.
Don't remove more than 25% of the plant's total branches in one session. You'll see a more open framework that allows air and light to reach all parts of the plant. This step is all about creating space for next year's blooms to shine.
☀️ Step 3: Lightly Shape and Clean Up in Early Spring
Once new growth appears in early spring, do a final light shaping pass. I focus on balancing the plant's form—no more than 10% of the plant's total foliage should be removed. Trim any branches that are growing too upright or leggy to encourage a fuller, bushier shape.
Remove any dead, diseased, or damaged branches you missed earlier. Sterilize your pruners with rubbing alcohol between cuts to prevent spreading any potential infections. This is your last chance to tidy up before the growing season kicks into high gear.
⏰ Step 4: Maintain Through the Growing Season
Throughout the growing season, keep an eye out for any branches that are growing out of balance or rubbing against others. I make small, strategic cuts to maintain the shape you've established. Never prune more than 10% of the plant's total foliage in any one session.
Watch for new growth at the base of the plant—these are your future blooming branches. Let them grow naturally, but trim any suckers that appear below the graft union if you have a grafted camellia. This ensures energy stays focused on the main plant rather than unwanted growth.
✂️ Step 5: Prepare for Winter Dormancy
In late fall, after the first frost but before the ground freezes, do a final cleanup. Remove any dead or diseased branches that may have appeared over the summer. This prevents pests and diseases from overwintering in your plant.
I also like to give the plant a light shaping at this time to remove any branches that are growing in awkward directions. This keeps the plant looking neat and tidy as it prepares for dormancy. Avoid heavy pruning now—you want the plant to enter winter with as much energy as possible stored in its roots.
Tips & tricks for pruning camellias
These simple tricks will help you keep your camellias looking their best without sacrificing next year's blooms.
Timing is Everything: The 2-4 week window after flowering is critical because this is when your camellia's buds for next season are already forming. I've learned the hard way that cutting too early can remove these precious buds, so mark your calendar after your camellias finish blooming. If you miss this window, don't panic—just wait until late winter for your next chance to prune.
Tool Prep Matters: Before you make a single cut, sterilize your pruners with rubbing alcohol. I keep a small bottle of 70% isopropyl alcohol in my gardening toolkit specifically for this purpose. Clean tools prevent spreading diseases between cuts, and sharp blades make cleaner cuts that heal faster. I also like to oil my pruners occasionally to keep them in good working condition.
Visual Cues for Pruning: When shaping your camellia, look for branches that form a natural "V" shape with others—these are your plant's natural framework. In Step 2, when you're thinning crowded branches, cut back to the nearest outward-facing bud to encourage new growth in the right direction. Think of it like sculpting: you're shaping the plant to its most beautiful form while maintaining its natural structure.
Seasonal Maintenance: Throughout the growing season (Step 4), I keep a small pair of pruners handy to make quick adjustments. Whenever I notice branches growing in awkward directions or rubbing against each other, I make a small cut to redirect growth. This ongoing maintenance prevents problems from becoming major issues later on and keeps your camellia looking its best year-round.
Pro Tips for Prune Camellias
- These simple tricks will help you keep your camellias looking their best without sacrificing next year's blooms.
- Timing is Everything: The 2-4 week window after flowering is critical because this is when your camellia's buds for n...
- Tool Prep Matters: Before you make a single cut, sterilize your pruners with rubbing alcohol. I keep a small bottle o...
Frequently asked questions
Got questions about pruning camellias? You’re not alone! Here are some of the most common concerns—plus expert answers to keep your plants thriving.
When is the best time to prune camellias?
The ideal window is right after flowering (late spring to early summer) or in early spring before buds swell. Avoid pruning in fall—it can stimulate tender new growth that may freeze. For heavy shaping, late spring works best!
Can I prune camellias in winter?
Winter pruning is not recommended unless you’re in a mild climate (USDA Zones 8-10). Cold snaps can stress freshly cut branches. If you must prune, wait until late winter (just before buds break) and avoid heavy cuts.
Will pruning reduce next year’s flowers?
No—pruning encourages more blooms by improving airflow and sunlight. Just avoid cutting back over 1/3 of the plant at once. Focus on removing dead wood, crossing branches, and shaping for a fuller, healthier shrub.
What if my camellia doesn’t bloom after pruning?
Bloom issues often stem from over-pruning or cutting into old wood (which won’t rebloom). Prune lightly, and fertilize with acid-loving plant food in early spring. If blooms are sparse, check for pests or nutrient deficiencies too.
Can I prune camellias into a tree shape?
Yes! Choose a strong central stem and remove lower branches to create a trunk. Prune selectively to maintain a balanced shape, and avoid heavy cuts that could stress the plant. Mulch well afterward to support recovery.
Pro Tip:
Always sterilize your shears with rubbing alcohol between cuts to prevent disease spread. And remember: Less is more! Camellias bloom on old wood, so prune with patience for the best results.
Wrapping up and next steps
Pruning camellias doesn’t have to be intimidating—with the right timing, tools, and techniques, you can transform your shrubs into lush, fragrant bloomers that steal the show! 🌸 Whether you’re shaping for aesthetics or boosting next year’s flowers, remember: patience and precision are your best friends.
Start small, observe your plant’s response, and soon you’ll be the proud gardener of thriving, bushier camellias.
Ready to take the next step? Grab your pruners and schedule a quick session—your camellias will thank you with vibrant blooms for seasons to come! 🌿✨