
Pruning
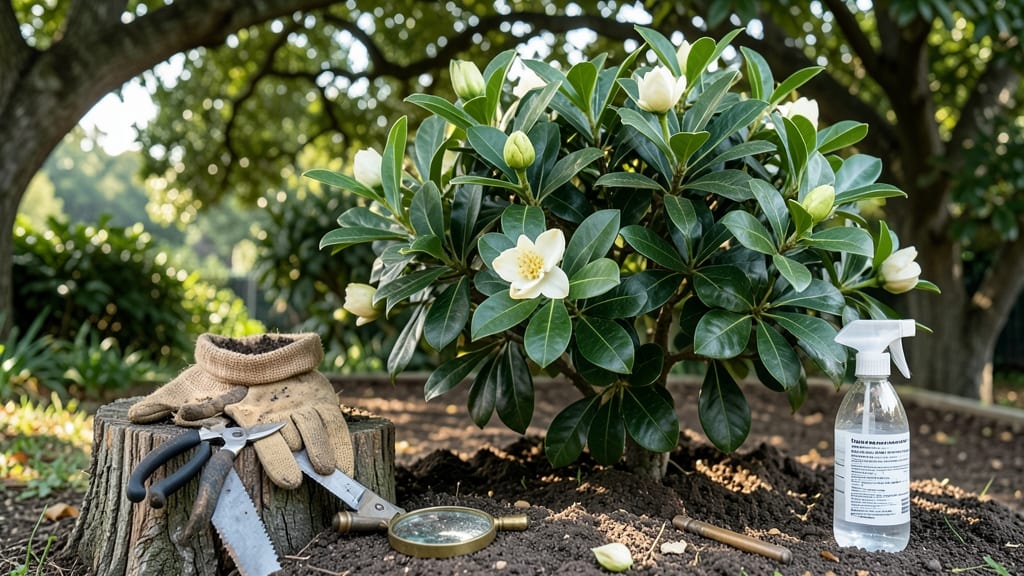
Pruning gardenia bushes transforms your yard from merely fragrant to shockingly lush—and the secret starts with timing. ✨ I’ve watched gardenias go from sparse, leggy shrubs to dense, blooming powerhouses just by adjusting when and how I prune.
The key isn’t just cutting back; it’s understanding how these tropical beauties grow and when they’re ready for a trim.
You’ll need sharp bypass pruners, rubbing alcohol for sterilizing cuts, and a clear day to work—gardenias hate soggy soil or wet leaves. The best time? Right after the last frost in spring or right before new growth starts in late winter.
Avoid heavy pruning in fall, or you’ll sacrifice next year’s blooms. Think of it like giving your plant a fresh start, not a haircut.
Start by removing dead or crossing branches first—they’re the eyesore holding back your gardenia’s potential. Then, cut back overgrown stems by about a third, always just above a leaf node or outward-facing bud.
This encourages bushier growth and more blooms. Within weeks, you’ll see fresh green shoots pushing out, and by summer, your gardenia will be covered in those iconic white flowers.
Here’s the thing—gardenias respond to gentle encouragement, not brute force. Over-pruning stresses them, while light, strategic cuts keep them thriving. And if you’re in a warmer climate? A light trim after each bloom cycle keeps them compact and productive all year. Let’s get those shears ready!
📚 In This Guide
- What you need
- Instructions
- Tips and common mistakes
- Wrapping up and next steps
What you need
- ● Bypass pruners: Sharp, clean bypass pruners (not anvil pruners) to make precise cuts without crushing stems. Size: 6-8 inches (for medium-sized branches).
- ● Hand pruners (felco or equivalent): A backup pair for smaller stems or tight spaces. Quantity: 1-2.
- ● Loppers: For thicker stems (½ inch or larger). Size: 18-24 inches, with a long handle for leverage.
- ● Disinfectant (70% isopropyl alcohol or bleach solution): 1 part bleach to 9 parts water to sterilize tools between cuts and prevent disease.
- ● Garden gloves: Heavy-duty, nitrile-coated gloves to protect against thorns and sap.
- ● Sharpie or permanent marker: For labeling cuts if you’re doing structured pruning (e.g., marking new growth points).
- ○ Buckets or bags: 2-3 gallon-sized for collecting pruned branches (optional but handy for composting or disposal).
- ● Horticultural oil or pruning sealant: To seal larger cuts (½ inch or thicker) and reduce sap oozing. Brand tip: Use Tanglefoot Tree Wound Pruning Seal.
- ● Extension pole saw: For high branches (if your gardenia is a towering shrub!).
- ● Pruning saw: A curved-tooth saw for stubborn, woody stems.
- ● Rubbing alcohol wipes: Quick clean-ups for tools mid-pruning.
- ● Notebook & pen: To sketch your gardenia’s shape before/after pruning (great for beginners!).
- ● Timing knowledge: Prune after flowering (late spring/early summer) for best results, but light shaping can happen year-round.
- ● Weather check: Choose a cloudy day or late afternoon to avoid stressing the plant with midday sun.
- ● Clean workspace: Lay down cardboard or a tarp to catch debris and make cleanup easier.
- ● Patience: Gardenia bushes respond best to gradual pruning—never trim more than ⅓ of the plant in one session!
Step-by-Step instructions for pruning gardenia bushes
Here's my foolproof method for keeping gardenias blooming abundantly year after year.
✂️ Step 1: Time Your Pruning for Optimal Growth
Prune gardenias immediately after their spring blooming season ends—typically in late May or early June. This timing ensures you never cut off next year's flower buds, which form on old wood. I always wait until I see spent blooms drop completely before reaching for the shears. Early pruning also prevents the plant from putting energy into new growth that won't flower until next season.
If you missed the spring window, you can do a light shaping prune in late summer after the final flush of blooms. Never prune in fall or winter when the plant is dormant—you'll stimulate tender new growth that won't survive cold snaps. Gardenias bloom on old wood, so timing is everything for that signature fragrance.
✂️ Step 2: Prepare Tools and Assess the Bush
Use only clean, sharp pruning shears—dull blades crush stems and invite disease. I sterilize my tools with rubbing alcohol between cuts to prevent spreading any potential infections. Before you start, examine the bush for any dead, diseased, or crossing branches. These are your first targets—they rob energy from healthy growth and blooms.
Step back and look at the overall shape. Gardenias naturally grow in a rounded form, so aim to maintain that silhouette. Remove any branches growing inward or rubbing against others. You'll know you're on the right track when you can see light filtering through to the center of the bush—this encourages dense, healthy growth all the way through.
✂️ Step 3: Make Clean Cuts for Healthier Growth
Always cut just above a leaf node at a 45-degree angle, about ¼ inch above the outward-facing bud. This angled cut prevents water from pooling on the stem, which can cause rot. I make my cuts just above where the branch naturally narrows—this is where the plant will heal cleanly. Never leave stubs or tear the bark, as this invites disease.
For larger branches, use your pruning shears to make two cuts: first to undercut the branch, then to complete the cut just outside the branch collar. This prevents the bark from tearing. After each cut, I step back to check the overall balance. Gardenias respond well to gradual shaping, so remove no more than 25% of the bush's total growth in one session—this prevents shock.
☀️ Step 4: Post-Pruning Care for Rapid Recovery
Water the bush deeply right after pruning to help it recover. I give it 1 inch of water at the base, avoiding the foliage to prevent fungal issues. For the first 2-3 weeks after pruning, keep an eye out for any signs of stress—yellowing leaves or wilting branches. This is normal as the plant adjusts, but if you see dark, mushy spots, you may have over-pruned or introduced disease.
Apply a balanced, slow-release fertilizer with equal parts nitrogen, phosphorus, and potassium. I use a 10-10-10 formula at half strength to encourage new growth without burning the plant. Avoid high-nitrogen fertilizers, which promote leafy growth at the expense of flowers. Within 4-6 weeks, you should see fresh, vibrant new growth emerging from the pruned areas.
⏰ Step 5: Maintain Year-Round for Continuous Blooms
After the initial spring prune, do a light maintenance trim in late summer to remove any spent blooms and shape as needed. This encourages a second, though smaller, flush of flowers. I also remove any suckers or water sprouts that appear at the base of the plant—they drain energy from the main bush. Deadhead regularly throughout the blooming season to redirect the plant's energy into producing more flowers instead of seeding.
In fall, apply a 2-3 inch layer of mulch around the base of the plant, keeping it 6 inches away from the trunk to prevent rot. This insulates the roots and protects against winter cold. Gardenias thrive in 60-70°F temperatures, so if you live in a colder climate, consider moving potted gardenias to a sheltered location or wrapping the pot in burlap for winter protection.
Tips & tricks for perfect gardenia pruning
Timing and technique make all the difference with gardenias—here's how to avoid common pitfalls and get the most fragrant blooms.
Timing is Everything: That late May/early June window is critical because gardenias bloom on old wood. If you prune too early, you risk cutting off next year's flower buds before they form. I've seen gardeners miss this timing and end up with sparse blooms the following season. If you're unsure about the exact date, watch for spent blooms to drop completely—that's your cue to start. For those who miss spring, a light summer trim after the final flush works, but never prune in fall or winter when the plant is dormant.
Tool Prep Prevents Problems: Sterilizing your pruning shears between cuts is non-negotiable—rusty or dirty tools can introduce fungal infections that spread quickly through the plant. I keep rubbing alcohol handy and wipe down blades after every 3-4 cuts, especially when dealing with diseased branches. Also, invest in quality shears with sharp blades; dull tools crush stems instead of making clean cuts, which stresses the plant and invites disease. The 45-degree angle cut mentioned in Step 3 isn't just for looks—it prevents water from pooling on the stem, which can cause rot.
Gradual Shaping Wins: The 25% growth removal rule in Step 3 exists for a reason—gardenias are sensitive to drastic changes. I've learned this the hard way after seeing plants go into shock from aggressive pruning. Instead, think of each session as a conversation with your plant: remove just enough to maintain that natural rounded shape while encouraging airflow. You'll know you're doing it right when you can see light filtering through the center—this is when the plant starts putting energy into new growth rather than struggling to reach for sunlight.
Post-Pruning Recovery Matters: That 1 inch of water right after pruning isn't just a suggestion—it's essential for helping the plant recover. I've noticed gardenias that don't get this immediate hydration often show signs of stress within days. For the first two weeks, monitor closely for yellowing leaves or wilting branches. If you see dark, mushy spots, it's a sign you've either over-pruned or introduced disease. The 10-10-10 fertilizer at half strength is another key detail—this balanced approach encourages blooms rather than leafy growth, which is what many gardeners accidentally promote with too much nitrogen.
Pro Tips for Prune Gardenia Bush
- Timing and technique make all the difference with gardenias—here's how to avoid common pitfalls and get the most frag...
- Timing is Everything: That late May/early June window is critical because gardenias bloom on old wood. If you prune t...
- Tool Prep Prevents Problems: Sterilizing your pruning shears between cuts is non-negotiable—rusty or dirty tools can ...
Frequently asked questions
Got questions about pruning your gardenia bush? You’re not alone—these fragrant beauties can be a little tricky! Here are some of the most common concerns gardeners have, answered in simple terms to keep your gardenia thriving.
When is the best time to prune a gardenia bush?
The ideal time is right after flowering (late spring to early summer) to encourage new growth. Avoid heavy pruning in fall or winter, as gardenias are sensitive to cold and may struggle to recover. Light shaping can be done anytime, but never prune into old wood—it won’t regrow!
How much can I prune a gardenia bush?
Gardenias respond best to moderate pruning. Remove no more than 1/3 of the plant’s total growth per year to avoid stress. Focus on dead, diseased, or overcrowded branches first, then shape lightly. Over-pruning can reduce blooms—think of it as a haircut, not a buzz cut!
Why won’t my gardenia bloom after pruning?
If your gardenia skips blooms post-pruning, it might be due to over-trimming, poor light, or nutrient deficiency. Ensure it gets 6+ hours of sunlight, well-draining soil, and regular feeding with acidic fertilizer (like a 8-3-9 formula). Patience helps—new growth takes time to flower!
Can I prune a gardenia bush in winter?
Winter pruning is risky for gardenias, especially in colder climates. If you must trim, wait until late winter (just before new growth starts) and keep cuts minimal. Gardenias are semi-evergreen—pruning too late can expose tender wood to frost damage. Better to wait for spring!
How do I prune a gardenia bush for more flowers?
To boost blooms, prune to open up the center of the bush for better airflow and light penetration. Cut back overly leggy stems just above a leaf node (where new growth emerges). Avoid "topping" (cutting the top flat)—this stresses the plant. Feed with bloom-boosting fertilizer after pruning for extra encouragement!
What if my gardenia looks sad after pruning?
Don’t panic! A slightly wilted look is normal as the plant adjusts. Water deeply (but avoid soggy soil) and keep it in bright, indirect light. If leaves yellow or drop, it may be root-bound—consider repotting or fertilizing with an acid-loving plant mix. With care, it’ll bounce back!
Wrapping up and next steps
Pruning your gardenia bush doesn’t have to be intimidating—with the right timing, tools, and techniques, you’ll reward yourself with vibrant blooms and a healthier plant. 🌸 Remember to focus on light, strategic cuts to encourage growth while maintaining that lush, fragrant shape you love.
Whether you’re a seasoned gardener or just starting, every snip brings you closer to a thriving gardenia.
Now that you’re armed with the know-how, grab those shears and get pruning! 🌿 For extra care, consider fertilizing after trimming or exploring companion plants to boost your gardenia’s beauty. Happy gardening!