
Pruning
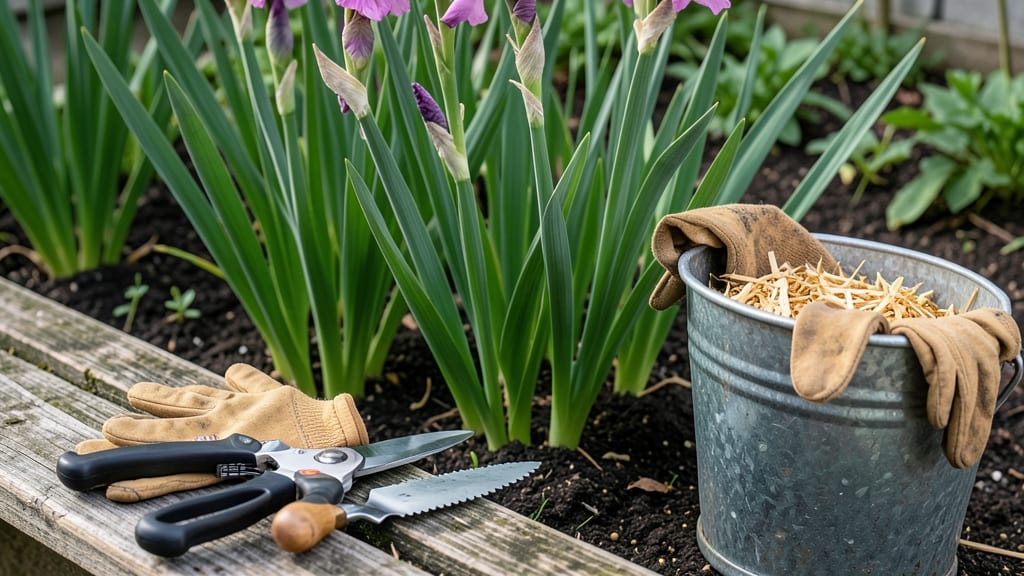
Pruning gladiolus in late fall isn’t just cleanup—it’s the secret to next year’s showstopping blooms. 🌱 I’ve learned that skipping this step means weaker stems, fewer flowers, and bulbs that struggle to store energy.
The right cuts in the right season make all the difference for those dramatic spikes of color. You’ll need sharp pruners (clean blades prevent disease), gloves, and a sunny day to work.
Cut back the foliage to about 2-3 inches above the soil once the leaves turn yellow and the plant goes dormant. This might feel drastic, but it’s what the bulbs need to rest and rebuild. What you’ll get is a garden that bursts with taller, healthier blooms the following summer.
The bulbs stay disease-free, the roots recover faster, and you avoid the common mistake of leaving dead foliage that traps moisture and rot. Works for both in-ground and container-grown gladiolus. The timing is everything—too early and you starve the bulb, too late and you risk winter damage.
Let’s get those cuts right!
📚 In This Guide
- What you need
- Instructions
- Tips and common mistakes
- Wrapping up and next steps
What you need
- ● Pruning shears or sharp garden scissors – Choose a pair with sterilized, sharp blades (bypass pruners work best to avoid crushing stems).
- ● Gloves – Opt for gardening gloves (heavy-duty if your gladiolus has thorns or sharp edges).
- ○ Disinfectant (optional but recommended) – A 70% isopropyl alcohol or bleach solution (1 part bleach to 9 parts water) to clean tools between cuts.
- ● Garden twine or plant tags – For labeling pruned stems or marking areas for next season’s planting.
- ● Compost bin or trash bag – To dispose of pruned foliage (avoid composting if diseased).
- ● Watering can or hose – To hydrate plants before and after pruning (gladiolus needs moisture!).
- ● Pruning saw – For thick, woody stems (rare but useful for mature gladiolus).
- ● Fungicide spray – If your plants show signs of rust or botrytis (apply after pruning).
- ● Notebook & pen – To jot down variety names or pruning dates for future reference.
- ● Knee pads or stool – For comfort if you’re working in a large garden bed.
Step-by-step guide to pruning gladiolus for next season's blooms
Here’s how to clean up your gladiolus beds now so you’ll get bigger, healthier blooms next year.
✂️ Step 1: Wait Until Frost or Flower Fade
Don’t prune too early—wait until after the first frost or when the flower stalks turn brown and wither naturally. Cutting back too soon leaves the plant vulnerable to rot or pests. If your climate stays mild, wait until the foliage yellows completely. This ensures the plant has absorbed all its stored energy back into the corms for next season.
Use clean, sharp pruners or shears to avoid crushing stems. Cut the flower stalks down to about 1-2 inches above the ground. This prevents disease from lingering in old stems while leaving enough foliage for the corms to photosynthesize until dormancy.
✂️ Step 2: Remove All Dead and Diseased Foliage
Pull up any remaining dead leaves or stems by hand—this prevents fungal spores from overwintering in the soil. If you notice brown, mushy spots on leaves, those are signs of rot. Bag and discard infected material immediately. Healthy foliage should be crisp and dry; if it crumbles easily, it’s ready to remove.
Dig around the base of the plant to check for corms that might be exposed. If any corms look soft or shriveled, remove them and compost them separately. Healthy corms feel firm and plump. This step keeps your garden free of pathogens that could weaken next year’s blooms.
✂️ Step 3: Apply Mulch for Winter Protection
Spread a 2-3 inch layer of mulch (like straw or shredded leaves) over the soil around the corms. This insulates them from freezing temperatures and prevents heaving during freeze-thaw cycles. Avoid using fresh wood chips, as they can draw moisture away from the soil.
Water the area lightly before mulching to help settle the soil. The mulch should cover the ground but not pile directly on top of the corms. This protects the dormant bulbs while allowing them to breathe. In colder climates, add an extra layer of mulch for extra insulation.
☀️ Step 4: Mark and Monitor for Spring Planting
Place small stakes or flags where you’ve planted gladiolus corms to remember their location. This prevents accidental digging in spring. If you’re in a region with mild winters, you can leave the corms in the ground year-round. In colder zones, dig them up in fall, store them in a cool, dry place, and replant in spring.
Check the area in early spring for any signs of new growth. Healthy corms will send up shoots within a few weeks of warming soil. If you see mold or slimy spots, remove the mulch and let the soil dry out before replanting. Proper winter care now means stronger, more vibrant blooms next summer.
Tips & tricks for pruning gladiolus like a pro
Gladiolus pruning might seem simple, but these small details make all the difference for next year's showstopping blooms.
Timing is Everything: The instructions mention waiting until after the first frost or when foliage yellows, but here's the thing: if you're in a mild climate, don't wait for frost—watch for that complete yellowing of the leaves. That's your golden cue that the plant has finished storing energy in the corms. I've seen people prune too early and end up with weak corms that don't bloom well next season.
Tool Selection: While the instructions mention clean, sharp pruners, I'll save you the headache I went through: invest in a good pair of bypass pruners specifically for garden work. They cut cleaner than anvil pruners and won't crush the stems. Also, sterilize your tools with rubbing alcohol before you start—this prevents spreading any diseases between plants.
Mulch Matters More Than You Think: That 2-3 inch layer of mulch isn't just decoration. In colder climates, I've found that adding an extra layer (up to 4-5 inches total) makes a world of difference. The key is to use organic mulch like straw or shredded leaves—it breaks down slowly and adds nutrients to the soil as it decomposes. Just remember to keep it away from the corms themselves to prevent rot.
Spring Monitoring Secret: When checking for new growth in spring, look for those tiny green shoots that emerge from the soil. But here's what nobody tells you—if you see mold or slimy spots, don't just remove the mulch. Let the area dry out completely for at least 48 hours first. Wet conditions create the perfect environment for fungal growth, and you don't want to start the season with compromised corms.
Pro Tips for Prune Gladiolus
- Gladiolus pruning might seem simple, but these small details make all the difference for next year's showstopping blo...
- Timing is Everything: The instructions mention waiting until after the first frost or when foliage yellows, but here'...
- Tool Selection: While the instructions mention clean, sharp pruners, I'll save you the headache I went through: inves...
Frequently asked questions
Got questions about pruning gladiolus? You’re not alone! Here are answers to the most common concerns—so you can confidently trim your blooms and prep for next season’s showstopper flowers.
When is the best time to prune gladiolus after blooming?
Prune gladiolus after the flowers fade but before the first frost hits (typically late fall, depending on your climate). Cut back the foliage to about 2–3 inches above the ground once the leaves turn yellow or brown. This gives the corms energy to store for next year’s growth!
Should I cut the stems or the leaves first?
Start by cutting the flower stems once they’re spent (wilted or brown). Then, wait until the leaves yellow naturally before trimming them. Removing leaves too soon robs the corms of nutrients they need to thrive. Think of it like tucking your plants in for winter!
What if I miss the pruning window?
Don’t panic! If frost hits before you prune, simply wait until spring to clean up dead foliage. The corms can survive mild cold, but remove any remaining growth in early spring to prevent disease. Just avoid pruning in winter if the ground is frozen—it can damage the corms.
Can I reuse the cut flowers from gladiolus?
Cut gladiolus stems when they’re fully open (early morning is best) and place them in water immediately. Change the water every 2–3 days to keep them fresh for up to 2 weeks. Pro tip: Trim the stems at an angle to maximize water absorption.
Why did my gladiolus corms rot after pruning?
Overly wet soil or pruning too close to the ground (within 1–2 inches) can cause rot. Always prune above the corm and ensure the area has good drainage. Avoid waterlogging by mulching lightly in fall. If rot occurs, remove the affected corms and treat the soil with fungicide next season.
Wrapping up and next steps
Pruning gladiolus at the right time and with the right technique is your secret weapon for vibrant blooms next season!
By cutting back dead foliage, dividing corms, and fertilizing properly, you’re setting the stage for a stunning display in your garden. Don’t let hesitation hold you back—grab those shears and get pruning!
Ready to take your gladiolus game to the next level? Plan your fall garden tasks now—like mulching, soil prep, or even experimenting with new varieties. Your future flowers will thank you! 🌸