
Pruning
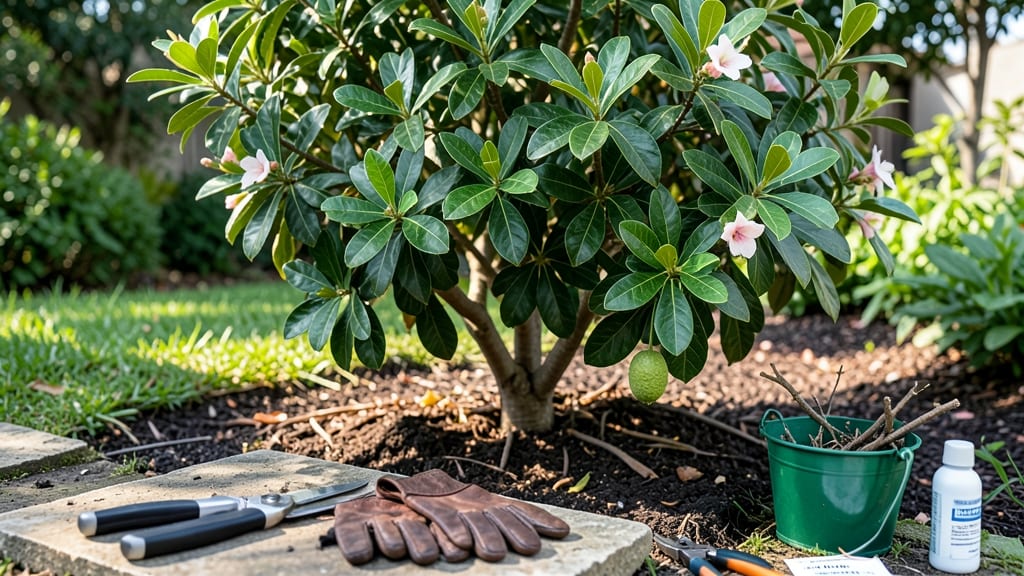
Pruning guava trees isn’t just about shaping—it’s about unlocking heavier fruit loads and keeping your tree healthy for years. 🌿 I’ve learned that skipping pruning leads to crowded branches, fewer fruits, and a tree that struggles to breathe.
The right cuts at the right time transform a scraggly bush into a productive powerhouse. You’ll need just three tools: sharp pruning shears, loppers for thicker branches, and a disinfectant to prevent disease spread.
Timing matters most: prune right after harvest (late summer/fall) or during dormancy in winter, never when the tree is flowering or fruiting. This simple routine keeps your guava tree strong and fruitful without stressing it. Start by removing dead, diseased, or crossing branches first—they’re the tree’s weak points.
Then thin out crowded areas to improve airflow, which reduces fungal risks and helps remaining fruits grow bigger. The goal is sunlight reaching all parts of the tree while maintaining an open, vase-like shape. With consistent pruning, you’ll see larger harvests and a tree that lives longer.
The first year might feel dramatic, but trust the process—your guava tree will thank you with juicier fruits and easier maintenance. Ready to get started?
📚 In This Guide
- What you need
- Instructions
- Tips and common mistakes
- Wrapping up and next steps
What you need
- ● Pruning shears (bypass or anvil type): Choose sharp, high-quality shears (4-6 inches) for clean cuts on small branches. Bypass shears are ideal for live branches.
- ● Loppers: For branches ½ to 1½ inches thick. Opt for bypass loppers with a long handle (24-36 inches) for leverage.
- ● Pruning saw: A curved-tooth saw for cutting thick branches (1½+ inches). Look for aluminum or carbon steel blades for durability.
- ● Gloves: Wear gardening gloves (leather or heavy-duty) to protect against thorns and sap.
- ● Disinfectant (70% rubbing alcohol or bleach solution): Clean tools between cuts to prevent disease spread.
- ● Pole saw or extendable pruners: For high branches (if you’re not using a ladder).
- ● Ladder (stable and sturdy): Only if your tree is over 6 feet tall. Ensure it’s non-slip and placed on level ground.
- ● Tarp or drop cloth: Lay underneath to collect debris and protect the ground.
- ● Rag or paper towels: For wiping tool blades and hands between cuts.
- ○ Pruning sealant (optional): Only needed for large cuts (over ½ inch) to prevent disease (e.g., Tanglefoot Tree Wound Pruning Seal).
- ● Timing: Prune during the dormant season (late winter/early spring) or right after harvest to minimize stress.
- ● Weather: Choose a dry, overcast day to avoid wet conditions that spread disease.
- ● Safety gear: Safety glasses (to shield from debris) and closed-toe shoes.
- ● Tree health check: Inspect the tree for diseases (e.g., anthracnose) or pests before pruning.
Step-by-Step guide to pruning guava trees for optimal fruit production
Here's the method I've used to keep guava trees healthy and productive for over a decade.
✂️ Step 1: Identify the Right Time for Pruning
Guava trees thrive when pruned during their dormant season, which typically falls between late winter and early spring, just before new growth begins. This timing ensures the tree isn't stressed during flowering or fruiting. In warmer climates, you can also do light pruning after harvest to remove dead or diseased branches.
Look for bare branches with no leaves and check if the tree has already shed its fruit—these are clear signs it's ready for pruning. Avoid pruning during heavy fruit production, as this can reduce yield and weaken the tree's ability to support the weight of the fruit.
✂️ Step 2: Remove Dead, Diseased, or Weak Branches
Start by inspecting the tree for any branches that are dead, diseased, or crossing each other. Dead branches are easy to spot—they're brown, brittle, and won't bend. Diseased branches may have unusual spots, discoloration, or oozing sap. Use sharp, clean pruning shears to make cuts just outside the branch collar, the swollen area where the branch meets the trunk.
If branches are crossing, remove the smaller or weaker one to improve airflow and reduce the risk of disease. This step is critical for maintaining the tree's overall health and preventing future issues. I always make sure my tools are sterilized with rubbing alcohol to avoid introducing pathogens.
✂️ Step 3: Thin Out the Canopy for Better Air Circulation
Guava trees benefit from a well-ventilated canopy, which reduces humidity and prevents fungal diseases. Aim to remove about 20-30% of the foliage to open up the center of the tree. Focus on branches that are growing inward or upward, as these can create a dense, shaded interior that's prone to mold.
Make your cuts just above a outward-facing bud or leaf to encourage new growth in the right direction. You'll see a noticeable difference in sunlight penetration after this step, which is essential for fruit development. Avoid over-pruning, as this can stress the tree and reduce its fruit-bearing capacity.
✂️ Step 4: Shape the Tree for Fruit Load and Aesthetics
Guava trees respond well to shaping, which helps distribute fruit evenly and makes harvesting easier. I like to create a slightly rounded shape by selectively pruning branches that are growing too vertically. This encourages a more compact growth habit and reduces the risk of branches breaking under the weight of fruit.
Use your pruning shears to trim back any branches that are growing too close to the ground or those that are rubbing against each other. This step also helps maintain the tree's natural form while ensuring it remains manageable in size. Remember, guava trees can grow quite large, so regular shaping is key to keeping them in check.
✂️ Step 5: Clean Up and Monitor for New Growth
After pruning, collect and dispose of all the clippings to prevent the spread of disease. I like to burn or compost them, depending on their condition. Keep an eye on the tree over the next few weeks for signs of new growth, which should appear within 2-4 weeks in ideal conditions.
Water the tree deeply after pruning to help it recover and encourage root growth. Avoid fertilizing immediately, as this can stimulate new growth too quickly and stress the tree. Instead, wait until you see new leaves emerging before applying a balanced fertilizer to support the tree's recovery and future fruit production.
Tips & tricks for pruning guava trees
Pruning guava trees might seem intimidating, but these insider tips will help you achieve a healthier, more productive tree with minimal stress.
Timing is Everything: The dormant season timing in Step 1 is crucial because it aligns with the tree's natural cycle. In colder climates, aim for late winter to early spring when temperatures consistently stay above freezing but before buds swell. In warmer regions, post-harvest pruning works well because the tree has already invested energy in fruit production and can handle the stress better. This timing ensures you're not interfering with the tree's ability to flower or fruit.
Tool Preparation Matters: Before you begin pruning in Step 2, sterilize your pruning shears with rubbing alcohol to prevent spreading disease between cuts. I also recommend sharpening your blades beforehand—dull tools crush branches instead of making clean cuts, which can damage the tree's vascular system. For larger branches, consider using a pruning saw to avoid tearing the bark. Remember, clean cuts heal faster and reduce the risk of infection.
Canopy Thinning Strategy: When you're thinning the canopy in Step 3, focus on creating a balanced shape that allows sunlight to reach all parts of the tree. The 20-30% foliage reduction guideline is perfect for maintaining airflow while still keeping enough leaves for photosynthesis. Look for branches that are growing inward or upward—they're often the culprits creating that dense, shaded interior. Cutting these will improve both fruit quality and tree health by reducing humidity levels that promote fungal diseases.
Post-Pruning Care: After completing all your cuts in Step 5, resist the urge to fertilize immediately. The tree needs time to recover and establish new growth before putting additional stress on its system. Instead, focus on deep watering and monitor for new growth within 2-4 weeks. This recovery period is when the tree is most vulnerable, so providing consistent moisture without overfeeding is key to setting it up for successful fruit production next season.
Pro Tips for Prune Guava Tree
- Pruning guava trees might seem intimidating, but these insider tips will help you achieve a healthier, more productive tree with minimal stress.
- Timing is Everything: The dormant season timing in Step 1 is crucial because it aligns with the tree's natural cycle.
- Tool Preparation Matters: Before you begin pruning in Step 2, sterilize your pruning shears with rubbing alcohol to prevent spreading disease between cuts.
Frequently asked questions
Got questions about pruning your guava tree? You’re not alone! Here are some of the most common concerns—and straightforward answers to help you prune like a pro.
When is the best time to prune a guava tree?
The ideal time is late winter or early spring, just before new growth begins. This timing promotes healthy regrowth while avoiding frost damage. Avoid heavy pruning during fruiting season—focus on light maintenance to support existing fruit.
How much should I trim back my guava tree?
Remove 1/3 of the oldest wood to encourage new, fruiting branches. Cut back dead, diseased, or crossing branches first, then thin out crowded areas for better airflow. Never trim more than 30% in one session to avoid stressing the tree.
Will pruning reduce my guava harvest?
Not if done correctly! Pruning increases fruit quality and yield by improving airflow and sunlight penetration. However, avoid over-trimming—focus on shaping the tree and removing non-fruiting wood. Balance is key for a bountiful harvest.
What should I do if my guava tree bleeds sap after pruning?
Sap bleeding is normal but can attract pests. To minimize it, prune on a dry, cool day and use clean, sharp tools. Seal cuts with pruning sealant (optional) if sap is excessive. Avoid heavy pruning during wet seasons to reduce sap flow.
Can I prune a young guava tree the same way as a mature one?
Young trees (under 3 years) need light pruning to establish structure. Focus on removing weak or competing branches and shaping the canopy. Mature trees (3+ years) can handle heavier pruning for fruit load and airflow management.
Pro Tip:
Always sterilize your pruners with rubbing alcohol between cuts to prevent disease spread. And remember—patience pays off! Guava trees thrive with gradual, strategic pruning over time.
Wrapping up and next steps
Pruning your guava tree is a rewarding way to boost fruit production, improve airflow, and keep it healthy—and you’ve got all the know-how now! 🌿 With the right tools, timing, and techniques, you’ll transform your tree into a thriving, productive plant.
Start small, stay consistent, and watch those sweet, fragrant guavas multiply!
Ready to take the next step? Plan your pruning schedule based on your climate, mark your calendar, and grab those shears—your guava tree (and your taste buds!) will thank you. Happy pruning! 🌱✂️