
Pruning
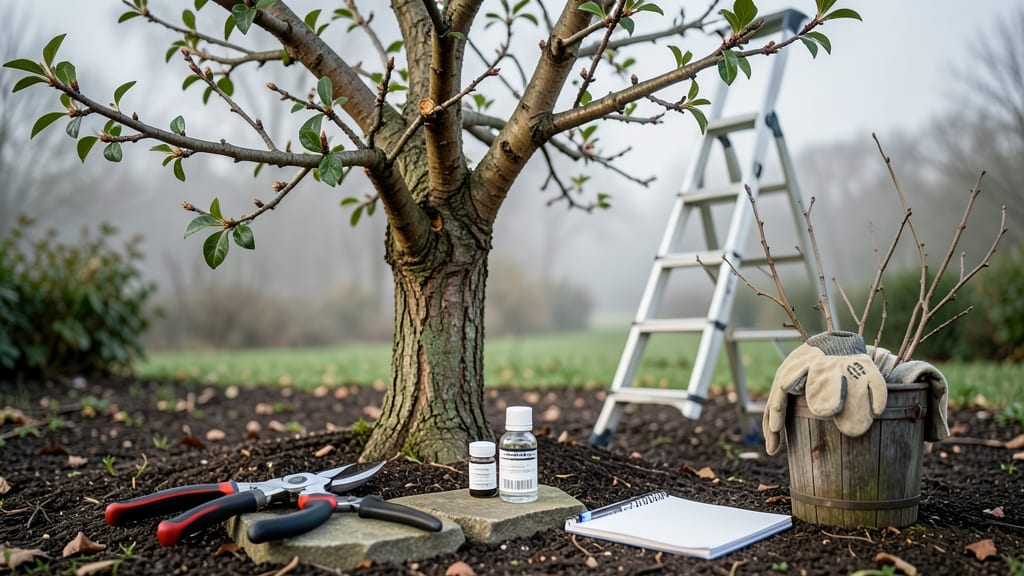
Pruning your Japanese plum tree in late winter isn’t just about shaping—it’s about setting the stage for a bountiful fruit harvest next summer. ✨ I’ve watched my own trees go from scraggly and overcrowded to sturdy, productive powerhouses after mastering this timing.
The key is working before buds swell but after the worst cold passes, usually in February or March depending on your zone.
You’ll need just a few tools: sharp bypass pruners for clean cuts, loppers for thicker branches, and a 3% hydrogen peroxide solution to sterilize between cuts. Start by removing any dead, diseased, or crossing branches—these are the ones that rob energy from fruit production.
Thinning the interior lets light and air circulate, preventing fungal issues that plague plums.
After your cuts, step back and admire the open framework you’ve created. The tree will respond with vigorous new growth in spring, and those blossoms? They’ll translate to juicier, sweeter fruit by harvest time. Just avoid heavy pruning in fall—it stresses the tree when it’s already preparing for dormancy.
Here’s the secret weapon: mark your calendar now for next winter. Consistent pruning turns a Japanese plum from a decorative shrub into a reliable fruit producer that neighbors will envy. And trust me—once you see the difference, you’ll never skip this step again.
📚 In This Guide
- What you need
- Instructions
- Tips and common mistakes
- Wrapping up and next steps
What you need
- ● Pruning shears (bypass or anvil type) – Sharp, clean, and sized for small to medium branches (6–8 inches).
- ● Loppers – For thicker branches (1–2 inches in diameter). Choose bypass-style for cleaner cuts.
- ● Pruning saw – For branches thicker than 2 inches. A curved blade works best for precision.
- ● Garden gloves – Heavy-duty, cut-resistant (e.g., leather or synthetic blend) to protect your hands from thorns and rough bark.
- ● Disinfectant (rubbing alcohol or 10% bleach solution) – To sterilize tools between cuts and prevent disease spread.
- ● 5-gallon bucket or trash bag – For collecting pruned branches and debris.
- ○ Permanent marker or tape – Optional but helpful for marking branches to remove.
- ● Hand pruners with a ratcheting mechanism – Reduces hand fatigue for larger jobs.
- ● Extension pole pruners – For high branches (if you’re not using a ladder).
- ● Tree wound dressing (pruning sealant) – Controversial but useful for large cuts (over ½ inch) to prevent disease.
- ● Ladder (stable, 4–6 ft tall) – Only if your tree is tall—prioritize safety!
- ● Work boots or closed-toe shoes – For protection against dropped branches or uneven ground.
Step-by-Step instructions for pruning Japanese plum tree
Late-winter pruning transforms your Japanese plum into a fruit powerhouse—here’s how to do it right.
✂️ Step 1: Assess the Tree’s Structure and Identify Key Branches
Start by examining the tree’s overall shape and growth pattern. Japanese plums benefit from an open-center form, where branches spread outward to allow sunlight penetration and airflow. Look for three main categories of branches: scaffold branches (the largest, permanent limbs), water sprouts (fast-growing, vertical shoots), and dead/diseased wood. I always begin by marking branches that need removal with a piece of twine or flagging tape.
Focus on removing branches that cross or rub against each other—these create wounds where disease can enter. Also, prioritize any branches growing inward toward the center of the tree, as they block light and air circulation. Use your hands to gently bend branches to visualize how sunlight will reach the interior after pruning. This step ensures you’re not just cutting randomly but strategically shaping the tree for future fruit production.
✂️ Step 2: Remove Dead, Diseased, and Weak Growth First
Begin with the most obvious fixes: dead, diseased, or dying branches. These are easy to spot—they’ll be brown, brittle, or devoid of leaves, and may have cracks or fungal growth. Cut these out first, making your cuts just outside the branch collar (the swollen area where the branch meets the trunk or larger branch). I use sharp, clean loppers or a pruning saw for branches thicker than ½ inch.
Next, tackle weak or poorly attached branches. These often have thin stems or grow at sharp angles from the trunk. Weak branches rarely produce quality fruit and can break under the weight of plums. Make your cuts at a 45-degree angle, slanting downward away from the branch collar. This angle helps water run off the cut and reduces the risk of rot. Always sterilize your tools with rubbing alcohol between cuts to prevent spreading disease.
✂️ Step 3: Thin Out Crowded Branches for Better Airflow
Japanese plums thrive when they receive ample sunlight and airflow, which is why thinning is critical. Aim to reduce branch density by about 20-30%, focusing on the interior of the tree first. Remove branches that grow too closely together or compete for the same space. I look for branches that are smaller than ⅓ the diameter of the branch below it—these are prime candidates for removal.
When thinning, prioritize branches that grow straight up or downward, as these often create a dense canopy. Cut these back to a lateral branch or bud that grows outward. This encourages a more open structure and reduces the risk of fungal diseases like brown rot, which thrives in crowded, humid conditions. Step back frequently to visualize the tree’s shape—you’re sculpting it to maximize fruit production while maintaining balance.
✂️ Step 4: Shape the Tree for Optimal Fruit Production
Now it’s time to refine the tree’s shape by selectively pruning to encourage fruiting spurs (short, stubby branches where fruit develops). Focus on the outer third of the tree, as this is where most of the fruit will form. Reduce the length of scaffold branches by about ¼ to ⅓, cutting just above a outward-facing bud or lateral branch. This promotes bushier growth and more fruiting sites.
For branches that are too long or leggy, make your cuts just above a bud that grows in the direction you want the branch to grow. Avoid leaving stubs—always cut back to the branch collar or a lateral branch. If you’re unsure where to make a cut, look for buds that are slightly larger or more prominent; these are more likely to grow into strong, fruitful branches. Prune on a dry, sunny day to ensure wounds heal quickly and reduce the risk of infection.
⏰ Step 5: Clean Up and Monitor for Recovery
After pruning, remove all debris from the ground beneath the tree to prevent disease and pests from taking hold. Rake up fallen leaves and small branches, and dispose of them in the trash—not the compost—since diseased material can spread pathogens. Sterilize your tools again with rubbing alcohol or a bleach solution (1 part bleach to 10 parts water) to ensure they’re ready for the next pruning session.
Monitor the tree closely over the next few weeks. You’ll see new growth emerge from the buds you left behind, and the tree will begin to fill out more evenly. Japanese plums respond well to late-winter pruning, so you should notice stronger, more productive branches by the following fruiting season. If you notice any signs of stress, like excessive wilting or leaf drop, provide supplemental water and avoid further pruning until the tree recovers.
Tips & tricks for pruning Japanese plum trees
Late-winter pruning sets the stage for a bountiful harvest—here's how to avoid common pitfalls and maximize your tree's potential.
Branch Collar Precision: The branch collar is your guidepost—never cut flush with the trunk. In Step 2, when removing dead wood, make your cut just outside the collar's swollen ridge. This preserves the tree's natural healing tissue and prevents disease entry points. I've seen too many pruning wounds fail because people cut too close to the trunk, leaving vulnerable spots where pathogens can attack. Use your thumbnail to feel for that ridge before making each cut.
Visualizing the Canopy: In Step 3, when thinning crowded branches, step back every 10 minutes to reassess your work. The goal is an open-center form where sunlight reaches all branches. I learned this the hard way—after pruning a dense interior, I realized I'd accidentally created a tunnel effect that blocked light from the center. Look for branches that cast shadows on others; these are your first candidates for removal. The 20-30% thinning guideline isn't arbitrary—it's the sweet spot for maximizing airflow without over-pruning.
Bud Selection Strategy: For Step 4's shaping cuts, focus on buds that point in the direction you want new growth to go. These buds are slightly larger and more prominent than others. I always look for outward-facing buds when cutting scaffold branches—this encourages the tree to grow away from the center. Pro tip: If you're unsure which bud to target, make a small notch on the branch above your intended cut. This creates a visual marker and helps you visualize where new growth will emerge.
Tool Sterilization: This is non-negotiable between every cut in Step 2 and Step 5. I keep a small bottle of 70% rubbing alcohol in my pruning kit and wipe tools after each cut, especially when dealing with diseased wood. The bleach solution mentioned in Step 5 works too, but alcohol evaporates quickly and doesn't leave residue. Sterilizing prevents spreading brown rot and other fungal diseases that can devastate your harvest. Don't skip this—it's the difference between a healthy tree and one that struggles for years.
Pro Tips for Prune Japanese Plum Tree
- Late-winter pruning sets the stage for a bountiful harvest—here's how to avoid common pitfalls and maximize your tree...
- Branch Collar Precision: The branch collar is your guidepost—never cut flush with the trunk. In Step 2, when removing...
- Visualizing the Canopy: In Step 3, when thinning crowded branches, step back every 10 minutes to reassess your work. ...
Frequently asked questions
Got questions about pruning your Japanese plum tree? You’re not alone! Here are some of the most common concerns—and straightforward answers—to help you prune like a pro.
When is the best time to prune a Japanese plum tree?
The ideal window is late winter, just as buds swell but before new growth starts—typically February to early March in most climates. This timing promotes vigorous spring growth and fruit production. Avoid pruning in fall, as it can stimulate tender new shoots vulnerable to frost damage.
Should I remove all the dead wood, or just some?
Always remove all dead, diseased, or crossing branches first—they’re breeding grounds for pests and weak structure. Then, thin out about 20-30% of the canopy to improve airflow. Never remove more than 25% in one year, or you’ll stress the tree.
Will pruning reduce my plum harvest?
Not if done right! Pruning actually boosts fruit quality by redirecting energy to larger, sweeter plums. Focus on open-center shaping and removing water sprouts (those vertical shoots). Just avoid heavy cuts in fruit-bearing years—balance is key!
What if I prune at the wrong time? Can I still save my tree?
Mistakes happen! If you prune in late spring/summer, the tree may bleed sap (messy but harmless). For fall pruning, the risk of frost damage to new growth is higher. If you’ve already pruned too late, focus on wound care (sterilized cuts, proper sealing) and monitor for stress signs like wilting. Most trees bounce back!
Can I prune a Japanese plum tree without sharp tools?
Absolutely not! Dull tools cause jagged cuts that heal poorly and invite disease. Invest in bypass pruners for small branches and a pruning saw for thicker limbs. Sterilize blades with rubbing alcohol between cuts to prevent spreading pathogens.
Pro Tip:
Label your cuts! Use masking tape to mark branches you’re unsure about—revisit them in a few weeks to confirm if they’re dead or just dormant. This trick saves time and guesswork.
Wrapping up and next steps
Pruning your Japanese plum tree in late winter isn’t just about shaping—it’s about setting the stage for a bountiful harvest and a healthier tree.
By removing dead wood, thinning crowded branches, and encouraging airflow, you’re giving your tree the best chance to thrive. Remember: patience and precision are key—your efforts will pay off in beautiful blossoms and delicious fruit!
Now that you’re armed with the know-how, grab those pruners and get started! If you’re feeling inspired, consider exploring other seasonal care tips to keep your tree in top shape year-round. Happy pruning! 🌸✂️