
Pruning
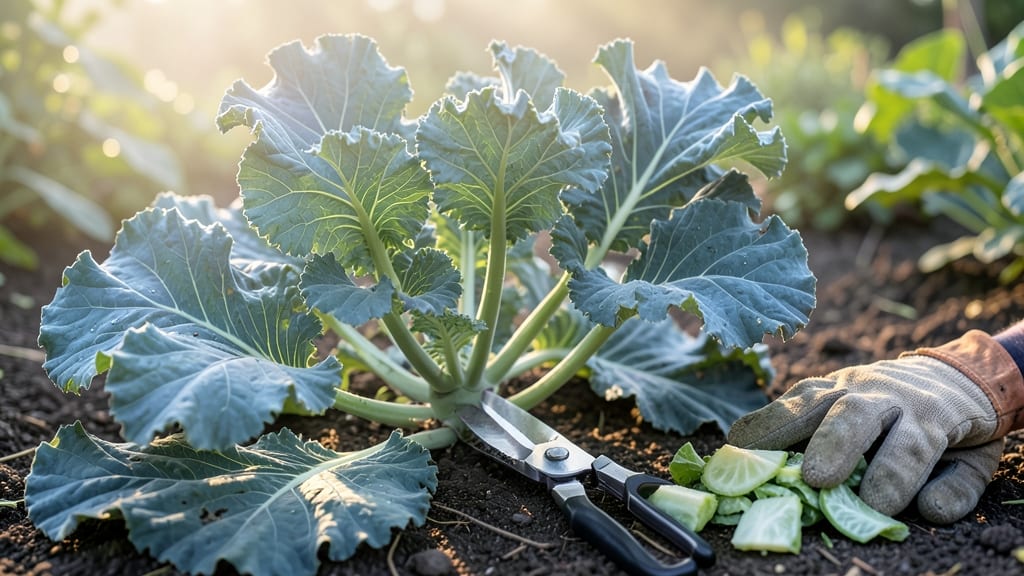
Pruning kale isn’t just about trimming—it’s the secret to year-round harvests that keep your garden producing long after store-bought greens have wilted. 🌱 I’ve learned that cutting back at the right time turns a single plant into a bushy, self-replenishing machine, giving you tender leaves for months.
The key? Timing and technique—cut too much, and you stunt regrowth; cut too little, and you miss out on the plant’s full potential. What you’ll discover is how to coax your kale into a second, third, or even fourth harvest, all while keeping it healthy and disease-free.
You’ll only need three simple tools: sharp pruning shears (or clean kitchen scissors in a pinch), a small bucket for trimmings, and a notebook to track growth.
The real magic happens in the how: always cut just above the lowest set of mature leaves—never the stem itself—and never remove more than one-third of the plant at once.
This method works for all kale varieties, from curly to lacinato, but Dwarf Blue Curled and Winterbor respond especially well, giving you harvests even in cooler months. The goal isn’t perfection; it’s consistency.
By following these steps, you’ll end up with plants that look like mini trees, packed with leaves ready for snacking, salads, or sautéing.
The first harvest might take 4-6 weeks from transplanting, but with proper pruning, you’ll keep picking for 6-8 months—or until frost forces a final flush of sweet, cold-hardy greens. The best part?
Each cut you make encourages the plant to branch out, turning a single stalk into a lush, leafy bush that produces more than you could buy in a bag.
This method works in containers, raised beds, or in-ground gardens, so whether you’re growing in a backyard plot or a sunny windowsill, the principles stay the same. The only real mistake is skipping the pruning—once you try it, you’ll wonder how you ever lived without it.
Let’s get those shears ready and turn your kale into a never-ending harvest machine.
📚 In This Guide
- What you need
- Instructions
- Tips and common mistakes
- Wrapping up and next steps
What you need
- ● Sharp pruning shears or garden scissors: A bypass pruner (4-6 inch blades) works best for clean cuts. Avoid dull tools—they crush stems and invite disease. (1 pair)
- ● Gloves: Heavy-duty gardening gloves (nitrile-coated for durability) to protect against thorns and blisters. (1 pair)
- ● Disinfectant: 70% isopropyl alcohol or a 10% bleach solution (1 part bleach to 9 parts water) to sterilize tools between cuts. (Small spray bottle or wipe)
- ○ Watering can or hose: For post-pruning hydration. (Optional but helpful)
- ● Compost bin or bucket: To collect pruned leaves for mulch or compost. (Medium-sized, 5+ gallons)
- ● Pruning saw: For thick, woody stems (rare in kale but useful for older plants).
- ● Plant marker or notebook: To track pruning dates and plant health.
- ● Knee pad or stool: For comfort during long sessions.
- ● Epsom salt or fertilizer: A 1 tbsp per gallon of water solution to boost nutrient recovery after pruning.
Step-by-Step instructions for pruning kale
Here's how I keep my kale plants producing leaf after leaf—no matter the season.
✂️ Step 1: Identify the Right Leaves to Harvest
Look for the largest, most mature outer leaves—these are ready for cutting. Kale grows in a rosette shape, so focus on leaves that are at least 6-8 inches long and have fully developed stems. These leaves won't regrow, but removing them encourages the plant to produce more in their place.
I always start with the lower leaves first. This keeps the plant's center open to sunlight, which is where new growth emerges. If you snip from the middle, you'll shade the plant and slow production. Wait until the leaves are fully grown—young, tender leaves don't have the same flavor or texture.
✂️ Step 2: Use the Right Technique for Clean Cuts
Grab a pair of clean, sharp pruning shears or a knife. Make your cut at a 45-degree angle, about ½ inch above a leaf node (the small bump where leaves attach to the stem). This angle helps water run off the cut and prevents rot. If you cut too close to the stem, the plant may develop disease.
For larger leaves, I sometimes make two cuts—one near the base and another to free the leaf from the plant. This reduces tearing and keeps the plant looking tidy. Always disinfect your tools between plants to avoid spreading any potential diseases. A quick wipe with rubbing alcohol does the trick.
🌿 Step 3: Encourage Regrowth After Pruning
After harvesting, give your kale a light watering to help it recover. The plant will start sending energy to the remaining leaves and new growth within 1-2 weeks. You'll notice new leaves emerging from the center of the rosette—this is your signal that the pruning worked.
If your kale looks leggy or sparse after harvesting, it might need more sunlight. Move it to a sunnier spot or add a grow light for 6-8 hours daily. Kale thrives in full sun (6+ hours)**, but it can tolerate partial shade. Just don’t let it get too crowded—space plants 12-18 inches apart to allow airflow and prevent disease.
⏰ Step 4: Plan Year-Round Pruning for Continuous Harvests
In warm months, harvest every 2-3 weeks to keep the plant producing. In cooler weather, you can stretch this to 3-4 weeks since growth slows down. The key is consistency—don’t wait until the plant is overcrowded or the leaves get too tough.
Here’s the thing—kale keeps producing even in winter if you protect it. In cold climates, add a layer of mulch or a frost blanket to shield the roots. If you live in a mild zone, you can harvest straight through the winter. Just avoid pruning when temperatures drop below 20°F, as the plant may struggle to recover.
Tips & tricks for pruning kale like a pro
These simple tricks will help you maximize your kale harvest all year long—without stressing your plants.
Leaf Selection Strategy: When choosing leaves to harvest in Step 1, look for a deep green color and firm texture—these are signs of maturity. Avoid leaves with yellowing edges or holes, as they won't regrow well. I've found that harvesting every other leaf from the outer edge leaves room for new growth while maintaining the plant's structure. This method keeps your kale bushy and productive for months.
Tool Technique: In Step 2, the 45-degree angle cut isn't just about looks—it's about plant health. That angle creates a larger surface area for water to evaporate, reducing rot risk. For stubborn leaves, I use a second cut technique: make the first cut about 1 inch from the base, then angle the second cut upward to free the leaf completely. This prevents tearing and makes the plant look cleaner right away.
Regrowth Timing: The 1-2 week regrowth window in Step 3 is your best friend. After pruning, I always check for new growth at the center by gently brushing aside the outer leaves. If you see tiny new leaves (about 1-2 inches tall), that's your plant telling you it's ready for another harvest soon. In hot weather, this happens faster—sometimes in just 7-10 days.
Winter Protection: That 20°F temperature warning in Step 4 is crucial. When winter hits, I cover my kale with a frost blanket during the day and remove it when temps rise above freezing. This simple trick lets me harvest fresh kale even in January! Just make sure to secure the cover tightly—wild animals love kale too, and they'll tear through flimsy protection.
Pro Tips for Prune Kale
- These simple tricks will help you maximize your kale harvest all year long—without stressing your plants.
- Leaf Selection Strategy: When choosing leaves to harvest in Step 1, look for a deep green color and firm texture—thes...
- Tool Technique: In Step 2, the 45-degree angle cut isn't just about looks—it's about plant health. That angle creates...
Frequently asked questions
Got questions about pruning kale?
Here are answers to the most common ones—so you can keep your plants thriving and your harvests plentiful!
When is the best time to prune kale?
Prune kale before it bolts (goes to seed) to encourage regrowth. In mild climates, you can prune year-round, but avoid heavy cuts during extreme heat or frost. Focus on early spring or fall for the best results—just trim outer leaves when they reach 6–12 inches tall.
How much of the plant should I cut off?
Never remove more than ⅓ of the plant at once. Focus on harvesting the outer leaves first, leaving the inner growth intact. This prevents stress and keeps the plant producing. Think of it like trimming your hair—small, frequent cuts keep it healthy!
Can I prune kale in winter?
Yes! Kale is cold-hardy, so you can prune lightly in winter (if temperatures stay above 20°F) to harvest tender leaves. Just avoid heavy cuts—focus on selective harvesting. Mulch around the base to protect roots, and prune on dry days to prevent disease.
What if my kale looks yellow or wilted after pruning?
Yellowing or wilting can happen if you cut too aggressively or the plant is stressed. Check for pests (like aphids) or overwatering first. If the issue persists, reduce pruning frequency and ensure the plant gets 6+ hours of sunlight and well-draining soil. A light fertilizer (like compost tea) can also help recovery.
Can I regrow kale from cuttings?
Kale doesn’t regrow from stem cuttings like some herbs, but you can propagate it by planting seeds from mature plants. Save seeds from healthy, open-pollinated varieties, dry them, and replant in spring. For quick harvests, stick to pruning existing plants—it’s easier and more reliable!
Wrapping up and next steps
Pruning kale is your secret weapon for bigger, healthier harvests—no matter the season! 🌱 By following these simple steps, you’ll encourage bushier growth, prevent pests, and enjoy fresh greens for months. Start small, stay consistent, and watch your kale thrive.
Now that you’re armed with the know-how, grab your shears and get pruning! Want to take it further? Try experimenting with companion planting or harvesting tips to maximize your garden’s potential. Happy growing! 🌿