
Pruning
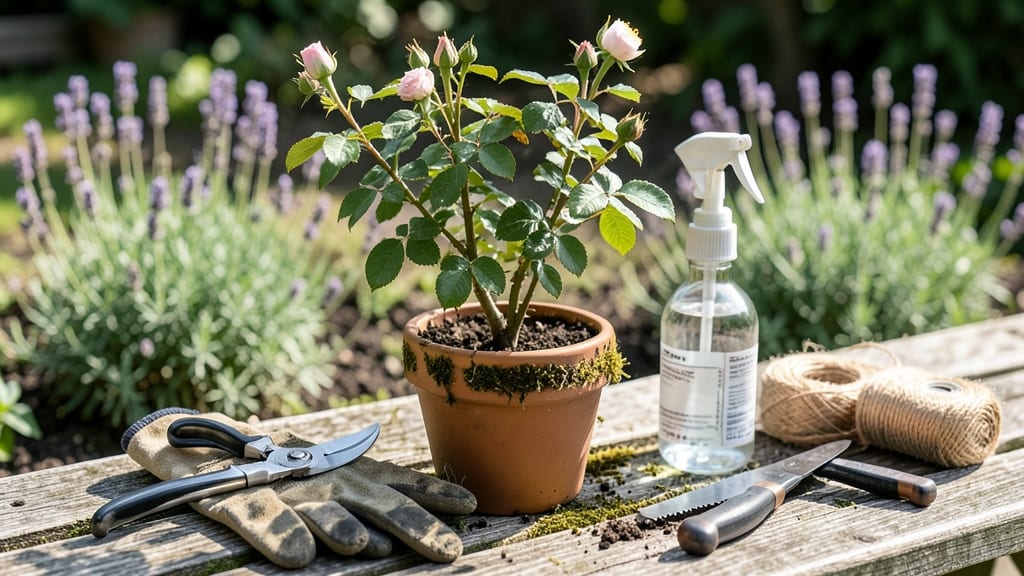
Pruning mini roses transforms your tiny bushes into nonstop blooming powerhouses—and I’ve learned the hard way that sharp cuts in early spring are the secret to year-round beauty. 🌹 My first attempt left them looking like overgrown twigs, but now they’re compact, healthy, and covered in blooms from spring to frost.
The key? Timing, tools, and knowing where to cut without sacrificing next year’s flowers.
You’ll need just three tools: sharp bypass pruners (dull blades crush stems), clean hand pruners for small cuts, and rubbing alcohol to sterilize between cuts. Prune in early spring (just before new growth starts) or right after flowering to encourage a second flush.
Avoid cutting into old, woody stems—focus on younger canes and buds that face outward to shape the plant. This keeps them bushy and full of blooms.
After pruning, your mini roses will bounce back with new growth within 2-3 weeks, and the first wave of blooms arrives in 4-6 weeks. The plants stay compact, resist disease better, and produce more flowers per stem than neglected bushes.
Just avoid the temptation to over-prune—you’re not trying to make them look like bonsai trees, just healthy and happy.
This method works for all mini rose varieties, whether you’re growing in containers, garden beds, or even hanging baskets. The same principles apply, just scaled to your plant’s size. Ready to give your mini roses the revival they deserve?
📚 In This Guide
- What you need
- Instructions
- Tips and common mistakes
- Wrapping up and next steps
What you need
- ● Bypass pruners – Sharp, clean, and sized for small stems (1 pair). Avoid anvil pruners, as they can crush delicate mini rose stems.
- ● Hand pruners (felco or similar) – For thicker stems or stubborn growth (1 pair). Look for ergonomic handles to reduce hand fatigue.
- ● Disinfectant (70% isopropyl alcohol or bleach solution) – To sterilize tools between cuts (small bottle or spray). Prevents disease spread!
- ● Garden gloves – Thin, flexible material (e.g., nitrile or latex) (1 pair). Protects hands from thorns and sap.
- ● Sharpie or permanent marker – For marking stems if needed (1). Useful for identifying cuts or tracking growth.
- ● Rake or small broom – For clearing debris (1). Helps keep the pruning area tidy.
- ● Loppers (small, 6-8 inch) – For stubborn branches (1 pair). Only needed if your mini roses have unusually thick growth.
- ● Pruning saw (miniature) – For very thick woody stems (1). Rarely needed for most mini roses.
- ● Compost bin or bag – For disposing of pruned material (1). Keeps your workspace clean and recycles nutrients.
- ● Plant food or fertilizer – Balanced, water-soluble type (small bottle). Apply after pruning to boost recovery.
Step-by-step instructions for pruning mini roses
Here's how I revive my mini roses each spring—sharp cuts, strategic shaping, and a few key tricks to keep them blooming all season.
✂️ Step 1: Time Your Prune for Peak Growth
Prune mini roses in early spring as new growth begins, ideally 2-3 weeks before your last frost date. This timing ensures you remove dead wood while giving the plant time to recover before summer heat. I look for swollen buds along the stems—that's your signal to start. Avoid pruning in fall or winter, as the plant needs its energy reserves for dormancy.
If you missed spring, you can do a light shaping trim in summer after blooms fade, but avoid heavy pruning. The goal is to remove no more than 1/3 of the plant's total growth in any one session. This prevents stress and maintains the rose's compact form. I always prune on a dry, cloudy day to reduce stress on the plant and minimize disease risk from open wounds.
✂️ Step 2: Gather Tools and Sanitize Everything
Use sharp, clean pruning shears (bypass pruners work best for mini roses) to make clean cuts. Dull blades crush stems and invite disease. I sanitize my tools with 70% isopropyl alcohol between cuts—this prevents spreading fungal spores or bacterial infections. For stubborn stems, I use hand pruners for better control, especially when working close to the base.
Remove any dead, diseased, or crossing branches first. Dead wood is easy to spot—it's brown, brittle, and doesn't bend. Diseased stems often have black spots or oozing sap. Crossing branches compete for energy and create poor airflow, which encourages mildew. I cut these out at the base, making the cut just above a bud that faces outward on the stem.
✂️ Step 3: Make Clean Cuts at the Right Angle
Cut 45-degree angles about 1/4 inch above an outward-facing bud. This angle helps water run off the cut and prevents rot. I make sure the cut is smooth and even—no jagged edges. For thicker stems, I use my thumb to steady the stem while cutting to avoid crushing it. If a branch is too thick for shears, I use loppers but still aim for the same clean cut.
Remove any weak, spindly growth that doesn't have buds. These stems won't produce blooms and just take energy from the plant. I also look for suckers—shoots growing from the base or below the graft. These are genetically weaker and should be cut off at the base. After each cut, I step back to check the plant's shape—this helps me visualize the final form before making more cuts.
☀️ Step 4: Shape for Airflow and Light Penetration
Step back and assess the plant's open, vase-like shape. Mini roses need good airflow to prevent fungal diseases like black spot. I aim for a rounded, slightly conical form, with branches spaced evenly. Cut back longer branches to half their length if they're growing too tall or leggy. This encourages bushier growth and more blooms.
Thin out crowded areas by removing every other branch if needed. This might seem drastic, but it pays off with larger, healthier blooms. After shaping, I give the plant a light feeding with a balanced rose fertilizer (10-10-10) to support new growth. Water deeply at the base—1-2 gallons—to help the plant recover from the pruning stress.
🌿 Step 5: Monitor and Maintain Through the Season
After pruning, watch for new growth within 2-3 weeks. You'll see pinkish buds forming along the stems—that's your reward for a job well done. Deadhead spent blooms regularly by cutting just above the next set of leaves. This encourages more flowers and keeps the plant tidy. I also mulch around the base with 2-3 inches of organic mulch to retain moisture and suppress weeds.
Keep an eye out for pests like aphids or diseases like powdery mildew. Mini roses are generally hardy, but stress from pruning can make them vulnerable. If you spot issues, treat them immediately with neem oil or horticultural soap. Prune lightly again in late summer to remove any overly leggy growth and encourage a final flush of fall blooms.
Tips & tricks for pruning mini roses
These sharp insights will help you transform your pruning session from good to exceptional—minimizing stress on your plants while maximizing their blooming potential.
Timing is Everything: The 2-3 week window before your last frost date is non-negotiable for spring pruning. This timing gives your mini roses enough recovery time before summer's heat stress begins. I've learned this the hard way—pruning too early in cold snaps can shock the plant, while waiting too long means you're removing new growth that could have bloomed. For summer maintenance trims, always wait until after blooms fade completely to avoid cutting off potential flowers.
Tool Technique: Your pruning shears should be sharper than your focus when working with mini roses. Dull blades don't just make messy cuts—they crush stems, creating larger wounds that invite disease. I keep a small bottle of 70% isopropyl alcohol handy to sanitize between cuts. For thicker stems, use loppers but maintain the same 45-degree angle technique. And here's what nobody tells you: wrap your hand pruners in a damp cloth before cutting thick stems—they'll glide through with less resistance and cleaner cuts.
Shape Matters More Than You Think: The open, vase-like shape isn't just aesthetic—it's crucial for airflow that prevents fungal diseases like black spot. When shaping, visualize light penetrating all parts of the plant. I find it helpful to step back every few cuts and rotate around the plant to check for balanced spacing. For leggy branches, cutting back to half their length might seem drastic, but it's what transforms those skinny stems into bushier, bloom-producing branches. Think of it as giving your rose a haircut that creates volume rather than just trimming length.
Post-Prune Care: After your work is done, don't just walk away! The 2-3 weeks following pruning are critical for recovery. I've found that giving your plants 1-2 gallons of deep water right after pruning helps them bounce back faster. And here's my secret weapon: a light feeding with 10-10-10 fertilizer right after pruning provides the nutrients needed for new growth. The mulch layer should be 2-3 inches thick—this isn't just decoration, it's insulation that protects roots from temperature swings and retains moisture.
Pro Tips for Prune Mini Roses
- These sharp insights will help you transform your pruning session from good to exceptional—minimizing stress on your plants while maximizing their blooming potential.
- Timing is Everything: The 2-3 week window before your last frost date is non-negotiable for spring pruning.
- Tool Technique: Your pruning shears should be sharper than your focus when working with mini roses.
Frequently asked questions
Got questions about pruning mini roses? You’re not alone! Here are answers to the most common queries—from timing to tools—to help you keep your roses thriving with confidence.
When is the best time to prune mini roses?
Prune mini roses twice a year: late winter/early spring (just before new growth starts) and after blooming (summer). Avoid pruning in fall or extreme cold—wait until temps rise above freezing. For container-grown roses, you can prune lightly year-round to shape them!
Do I need special tools for pruning mini roses?
No fancy tools required! Use clean, sharp bypass pruners (or small hand pruners) for most cuts. For thicker stems, a small pruning saw works. Disinfect tools with rubbing alcohol between cuts to prevent disease. A glove and sharpener are nice extras but not mandatory.
What if I accidentally prune too much?
Don’t panic! Mini roses are hardy and fast-growing. If you over-prune, your plant may take a few weeks to recover, but it’ll bounce back with vigorous new growth. Focus on leaving 3–5 healthy buds per stem next time. Over-pruning in winter can delay spring blooms, so err on the side of caution.
Can I prune mini roses in hot or cold weather?
Avoid pruning during heatwaves or freezing temps. Ideal conditions are cool, overcast days (60–70°F). Pruning in heat stresses plants, while cold can damage fresh cuts. If you must prune in summer, do it early morning or late evening to reduce shock.
How do I encourage more blooms after pruning?
To boost blooms, prune just above a leaf node (where leaves meet the stem) at a 45-degree angle. Remove dead, crossing, or weak stems to improve airflow. After pruning, fertilize lightly with a balanced rose food (10-10-10) and water deeply to support new growth.
Wrapping up and next steps
Pruning your mini roses doesn’t have to be intimidating—with the right tools, timing, and technique, you’ll keep them thriving and blooming year after year. Remember, the key is patience and precision: clean cuts, strategic shaping, and seasonal care will reward you with lush, vibrant plants.
Now that you’re equipped with expert tips, grab those shears and give your mini roses the TLC they deserve!
🌱 Next Step: Observe & Celebrate!
Watch your mini roses bounce back with fresh growth—you’ve got this! For extra care, consider:
- 🌿 Mulching to retain moisture and protect roots.
- 💧 Watering deeply (but not overdoing it) after pruning.
- 🌸 Feeding with a balanced fertilizer in spring for a bloom boost.