
Pruning
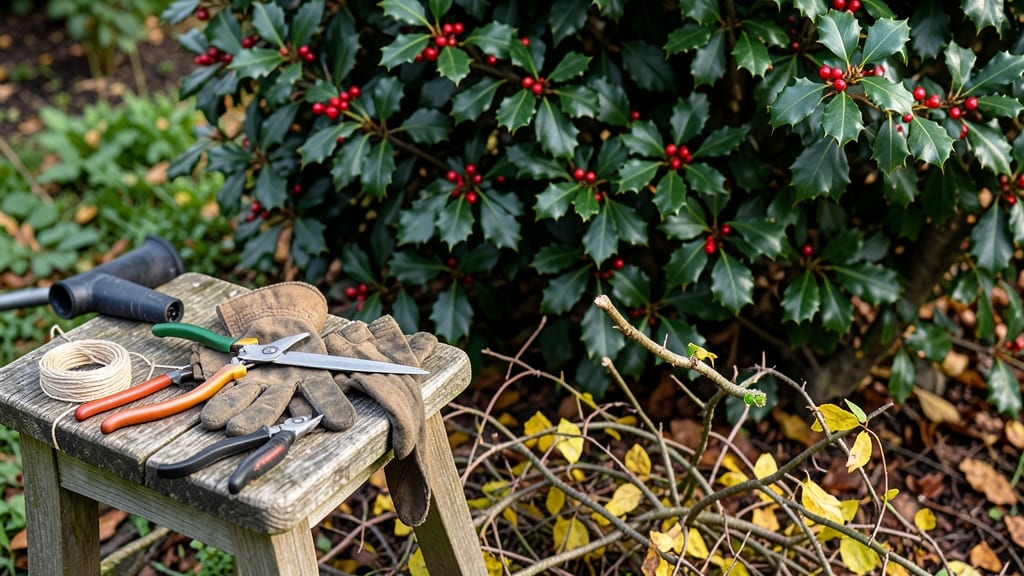
Pruning overgrown holly bushes in late winter unlocks a dense, glossy comeback that transforms tangled messes into structured showstoppers. 🌿 I’ve turned my own unruly hollies from chaotic thickets into neat, productive shrubs with just a few strategic cuts—and the key is timing, technique, and patience.
The best time to prune is right after flowering (late winter/early spring) before new growth starts. Grab sharp bypass pruners, loppers for thicker branches, and disinfectant to prevent disease spread. Focus on removing dead, crossing, or inward-growing branches first—this opens up airflow and sunlight for the remaining foliage.
After shaping, you’ll see new growth in 4-6 weeks that’s fuller and more vibrant than before. The glossy leaves return with vigor, and those prized berries (if female) will form more abundantly. Just avoid cutting into old wood—hollies struggle to regrow from severe pruning.
This method works for both evergreen and deciduous hollies, and the results last for years. Let’s get those bushes back in shape—without sacrificing their signature beauty.
📚 In This Guide
- What you need
- Instructions
- Tips and common mistakes
- Wrapping up and next steps
What you need
- ● Pruning shears (bypass or anvil): Choose bypass for clean cuts (recommended for holly) or anvil for thicker branches (up to ½ inch). Quantity: 1 pair.
- ● Loppers: For branches ½ to 1½ inches thick. Opt for bypass-style to avoid crushing. Quantity: 1 pair.
- ● Pruning saw: For branches 1½+ inches thick. A bow saw or curved blade works best. Quantity: 1.
- ● Garden gloves: Heavy-duty, cut-resistant (e.g., leather or reinforced nylon) to protect from thorns and sap. Quantity: 1 pair.
- ● Disinfectant (70% isopropyl alcohol or bleach solution): To sterilize tools between cuts and prevent disease spread. Quantity: Small spray bottle or wipe.
- ● Heavy-duty trash bags or compost bin: For collecting pruned branches and debris. Quantity: 2–3 bags (adjust based on size).
- ● Step stool or ladder: For reaching higher branches safely. Note: Ensure it’s stable and rated for your weight.
- ● Hand pruners with ratcheting mechanism: Reduces hand fatigue for large jobs.
- ● Extension pole pruners: For high branches without a ladder (up to 10–12 feet).
- ● Sharpener (file or electric tool sharpener): Keeps blades in top condition for clean cuts.
- ● Safety glasses: Protects eyes from flying debris or sap splashes.
- ● Marking spray or tape: Helps visualize pruning points before cutting.
- ○ Mulch or wood chips: To protect the base of the bush post-pruning (optional but beneficial).
Step-by-Step instructions for pruning overgrown holly bushes
Revive your holly's lush, structured shape with these precise cuts timed for late winter.
✂️ Step 1: Assess the Bush and Plan Your Cuts
Start by examining the holly's structure from all sides. Holly bushes thrive when pruned to maintain a balanced, pyramidal shape—look for areas where growth has become too dense or leggy. Use a sharp pair of pruning shears to make clean cuts rather than tearing branches, which can damage the plant and invite disease.
Focus on removing dead, diseased, or crossing branches first. These are your priority cuts—holly responds poorly to overcrowding, and removing these problematic branches immediately improves air circulation and sunlight penetration. Mark your cuts with a piece of twine or chalk if needed; holly's glossy leaves make it easy to spot where branches need thinning.
✂️ Step 2: Thin Out the Interior for Light Penetration
Holly bushes often develop thick, woody interiors that block sunlight from reaching the center. Your goal is to open up the bush by removing 20-30% of the oldest, thickest branches from the inside. Start at the base and work your way up, cutting branches back to their point of origin or to a lateral branch that faces outward.
You'll notice holly branches have buds along their length—these are your visual guide. When thinning, always cut just above a bud that faces outward to encourage new growth in the right direction. Avoid cutting into the center of the bush unless absolutely necessary; holly regenerates slowly, and excessive pruning can leave it vulnerable to pests.
✂️ Step 3: Shape the Outer Canopy for Balance
Now focus on refining the bush's pyramidal silhouette. Holly responds well to light shaping cuts, so avoid heavy pruning—stick to no more than 10-15% of the outer growth in any given season. Use hand pruners for smaller branches and loppers for thicker stems up to 1.5 inches in diameter. For anything larger, a pruning saw is your best tool.
Step back frequently to check your progress. Holly's glossy leaves make it easy to spot uneven growth—aim for a gradual taper from the base to the top. If you see a branch growing straight up, cut it back to encourage outward growth. The key is patience; holly grows slowly, so subtle adjustments over time yield the best results.
✂️ Step 4: Clean Up and Monitor for Recovery
After pruning, remove all debris from the base of the bush and surrounding area. Holly prunings can harbor pests or diseases, so dispose of them in a sealed bag or compost pile if your compost is disease-free. Water the bush deeply but not excessively—holly prefers well-draining soil and doesn’t tolerate soggy roots.
Watch for new growth in 4-6 weeks, which signals the bush is recovering well. If you see yellowing leaves or wilting, it may indicate over-pruning or stress—holly is resilient but not indestructible. In most cases, a single late-winter pruning session is all your holly needs to bounce back with denser foliage and brighter berries by next season.
Tips & tricks for perfect holly bush pruning
Late-winter pruning transforms your holly from overgrown to showstopping—here's how to avoid common pitfalls and achieve professional results.
Precision Over Speed: In Step 1, when assessing your holly, take time to identify branches that are dead or diseased—these are often hidden beneath healthy foliage. Use a clean pair of pruning shears to make a small cut first, then examine the inner wood. If it's dark or crumbly, remove the entire branch. Healthy wood should be light-colored and firm. This targeted approach prevents spreading potential problems to other parts of the bush.
Bud Direction Matters: During Step 2's interior thinning, pay close attention to those outward-facing buds—they're your secret to maintaining that perfect pyramidal shape. When cutting branches back to their origin, always leave at least one healthy bud facing outward*. This ensures new growth will continue expanding the bush's structure rather than filling in the center. I've seen too many holly bushes end up looking like overgrown spheres because of this common oversight.
Equipment Strategy: For Step 3's shaping work, keep this tool hierarchy in mind: hand pruners for branches under ¼-inch thick, loppers for ¼- to 1.5-inch stems, and a pruning saw for anything thicker. Never use dull tools—they tear rather than cut cleanly, creating larger wounds that invite infection. I always sharpen my tools before starting and wipe them down with rubbing alcohol between cuts on different bushes to prevent cross-contamination.
Recovery Timing: The 4-6 week recovery period mentioned in Step 4 is your best indicator of success. If you don't see new growth by week 6, you may have been too aggressive. Holly typically responds within 4 weeks if pruned correctly, so if you're waiting past week 6 with no signs of regrowth, consider whether you removed too many branches during the thinning process. A good rule of thumb is to never remove more than 30% of the bush's total growth in any single pruning session.
Pro Tips for Prune Overgrown Holly Bushes
- Late-winter pruning transforms your holly from overgrown to showstopping—here's how to avoid common pitfalls and achieve professional results.
- Precision Over Speed: In Step 1, when assessing your holly, take time to identify branches that are dead or diseased—these are often hidden beneath healthy foliage.
- Bud Direction Matters: During Step 2's interior thinning, pay close attention to those outward-facing buds—they're your secret to maintaining that perfect pyramidal shape.
Frequently asked questions
When is the absolute best time to prune holly bushes?
The ideal window is late winter (February–March), before new growth starts. This prevents stressing the plant during its active growing season. Avoid pruning in fall—it can stimulate tender new growth that won’t survive winter frost. Pro tip: If you miss late winter, wait until early spring, but never prune after mid-summer.
Can I prune holly bushes in summer?
Pruning holly bushes in summer is not recommended because it stresses the plant during peak heat and drought. If you must prune, do it early summer (June) and only lightly. Heavy summer pruning can lead to weak growth or even dieback. Alternative: Focus on shaping in late winter instead.
Will pruning my holly bush affect next year’s berries?
Pruning correctly won’t harm berry production—it actually encourages healthier, more abundant berries! Holly bushes produce berries on old wood, so avoid cutting back into mature branches. Focus on removing dead wood and thinning out crowded growth. Key: Leave at least ⅓ of the bush’s structure intact for berry-bearing branches.
What if my holly bush looks too messy after pruning?
If your holly looks uneven, don’t panic! Holly bushes tolerate layered pruning—prune ⅓ of the bush over three years to avoid shock. For a quick fix, use hand pruners to shape gradually rather than hacking everything at once. Fix: Step back often and trim small sections to maintain a natural look.
Should I fertilize my holly bush after pruning?
Yes! After pruning, apply a balanced, slow-release fertilizer (like 10-10-10) in early spring to support new growth. Avoid high-nitrogen fertilizers—they promote leafy growth over berries. Bonus: Add 2–3 inches of mulch around the base to retain moisture and improve soil health.
Wrapping up and next steps
Pruning overgrown holly bushes doesn’t have to be daunting—with the right tools, timing, and technique, you can transform them into lush, healthy specimens that shine year-round. 🌿 Remember, patience and precision go a long way, so take your time and celebrate each step toward a revitalized bush. Now that you’re armed with the know-how, why not treat yourself to a well-deserved break with a fresh cup of coffee or a stroll through your newly refreshed garden?
- Next step: Schedule a follow-up trim in early summer to maintain shape and encourage new growth.
- Pro tip: Snap a before-and-after photo—you’ll be amazed at the transformation!