
Pruning
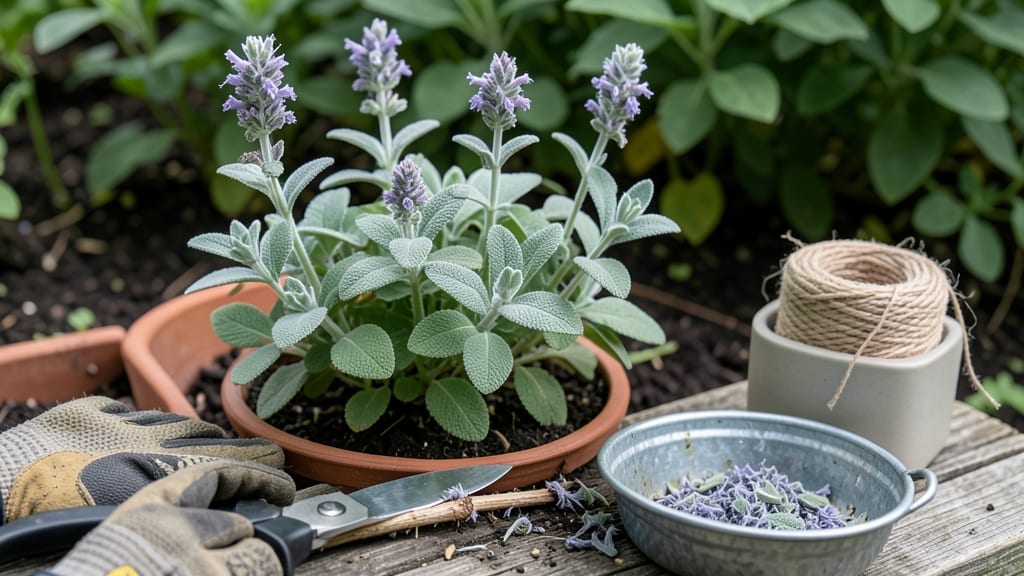
Pruning sage herb isn’t just about trimming—it’s about unlocking bushier growth and stronger stems that last for years. 🌿 I’ve learned the hard way that cutting too late or too aggressively turns woody plants into sad sticks, but the right timing and technique keeps sage thriving whether it’s in pots or the ground.
The best time to prune is right after harvest or in early spring, before new growth starts. You’ll need sharp pruners, gloves (sage can be prickly!), and a clear morning to work—cutting in the heat stresses plants.
For potted sage, trim back by one-third to encourage fuller shapes, while in-ground plants benefit from shaping after flowering.
After pruning, water deeply but don’t overdo it—sage hates soggy roots. A light fertilizer in early spring helps, but sage is tough and often doesn’t need extra feeding. Watch for fresh green shoots within 2-3 weeks; that’s your sign you’ve done it right.
Avoid cutting into woody stems—they won’t regrow—and never prune more than a third at once. Over-pruning stresses the plant, while deadheading spent flowers keeps energy focused on new growth. With these tricks, your sage will stay lush, fragrant, and productive for seasons to come.
📚 In This Guide
- What you need
- Instructions
- Tips and common mistakes
- Wrapping up and next steps
What you need
- ● Pruning shears (bypass or anvil type): 1 pair, sharp and clean (sterilize with rubbing alcohol if reusing on multiple plants).
- ● Bypass shears (preferred for clean cuts) with a 4–6-inch blade.
- ● Garden gloves: 1 pair (nitrile or leather) to protect hands from thorns or sap.
- ○ Disinfectant (optional but recommended): Rubbing alcohol (70% isopropyl) or hydrogen peroxide (3%) for sterilizing tools.
- ● Pruning saw (for thick stems): 1 (only if sage stems exceed ½-inch in diameter).
- ○ Garden twine or plant ties (optional): For securing heavy branches post-pruning.
- ● Weather check: Prune on a dry, overcast day or early morning to avoid stressing the plant.
- ● Water source: A hose or watering can to hydrate sage 24–48 hours before and after pruning.
- ● Compost bin or mulch: To dispose of pruned clippings (sage decomposes well!).
- ○ Hand lens (optional): For inspecting buds or pests up close.
- ○ Notebook & pen (optional): To track pruning dates and plant responses.
Step-by-Step instructions for pruning sage herb
Here’s how to keep your sage lush, vigorous, and productive—no matter the season.
🌿 Step 1: Prune for Shape and Airflow in Early Spring
Start by removing any dead, diseased, or crossing branches with clean, sharp pruning shears. Sage thrives when it gets good airflow, so trim back any stems that are rubbing against each other or growing inward. I like to work when the plant is just waking up from dormancy—usually in late February or early March—before new growth begins.
Focus on the outer third of the plant first. Cut back about one-third of the oldest stems to the base, making clean cuts at a 45-degree angle just above a leaf node. This encourages fresh, bushier growth from the center. Avoid cutting into the woody center unless the plant is severely overgrown—sage has a limited number of growth points, and you don’t want to sacrifice its structure.
✂️ Step 2: Encourage Bushiness Mid-Season
Once your sage has finished flowering—typically in late spring or early summer—it’s time to shape it up for the growing season. Pinch back the tips of new growth to encourage branching. Use your fingers or shears to snip just above a set of leaves where you want new shoots to form. This is where the magic happens: you’ll see denser foliage and stronger stems within a few weeks.
Watch for leggy growth—those long, bare stems that stretch toward the light. These are a sign your sage isn’t getting enough sunlight or is overcrowded. Trim them back to a leaf node, and you’ll prompt the plant to focus energy on producing fuller, more compact growth. Sage responds well to this pruning, so don’t be shy—it’s hardier than it looks.
🌱 Step 3: Light Pruning for Harvests and Maintenance
Throughout the growing season, you can lightly prune sage to encourage new leaf growth and make harvesting easier. Simply snip off the top 1-2 inches of non-flowering stems just above a leaf node. This keeps the plant tidy and ensures you’re always harvesting from the newest, most flavorful growth. I do this every 4-6 weeks during the active growing months, usually from May through September.
Here’s the thing—sage doesn’t need heavy pruning to stay healthy, but a little maintenance goes a long way. After each harvest, give the plant a quick once-over to remove any spent flowers or damaged leaves. This prevents the plant from wasting energy on seed production and keeps it focused on growing lush, aromatic foliage. Plus, it looks neater in your garden or container.
⏰ Step 4: Prepare for Winter Dormancy in Late Fall
As temperatures drop and growth slows in October or November, it’s time to give your sage a final trim for the year. Cut back any dead or weak stems to the base, and lightly shape the plant to remove any overgrowth. Sage is a hardy perennial in many climates, so a little pruning now helps it enter dormancy stronger and bounce back in spring.
If you’re growing sage in a container or in a colder climate, you can also prune it back by half its height to protect it from frost damage. Just avoid heavy pruning in late fall—you don’t want to stimulate new growth that could be damaged by winter cold. Mulch around the base with 2-3 inches of organic mulch to insulate the roots and keep moisture in. This simple step makes all the difference in keeping your sage healthy year after year.
🌿 Step 5: Revive and Renew Older Plants Annually
Every 2-3 years, older sage plants can become woody and less productive. If you notice your sage looking tired—with lots of bare stems and sparse foliage—it might be time for a rejuvenating prune. In early spring, cut the entire plant back to 4-6 inches above the ground. This might sound drastic, but sage is surprisingly resilient. New shoots will sprout from the base, and you’ll have a fresh, vigorous plant in no time.
This is also a great opportunity to divide your sage if it’s become too large for its space. Simply dig up the plant, separate the stems at the base, and replant the divisions. Each new section will establish quickly, giving you multiple plants for your garden or to share with friends. Just make sure to water them well after transplanting—sage needs consistent moisture while it recovers from such a dramatic prune.
Tips & tricks for perfect sage herb pruning
A few strategic cuts can transform your sage from sparse to spectacular. Here's how to optimize each pruning step for maximum growth and flavor.
Timing is Everything: The late February/March window for Step 1 isn't arbitrary—it's when sage emerges from dormancy but before rapid growth begins. If you miss this, wait until new shoots appear. I've seen gardeners prune too early in winter and get no response. The plant needs that dormancy break to respond properly to pruning. For container-grown sage, which warms up faster, you might start as early as late January.
The 45-Degree Angle Secret: When cutting back those one-third of oldest stems in Step 1, that 45-degree angle isn't just aesthetic—it prevents water from pooling on the cut, which can cause rot. Make your cuts just above a leaf node where new growth will emerge. Pro tip: Use your pruning shears to make a clean cut, then run your thumb along the cut edge to check for smoothness. Rough cuts create entry points for pests and diseases.
Seasonal Growth Hack: During the May-September maintenance pruning (Step 3), focus on harvesting from the top 1-2 inches of non-flowering stems. This might seem counterintuitive, but you're actually encouraging the plant to produce more flavorful new growth lower down. I've noticed that stems pruned this way develop more intense aromatic oils within 2-3 weeks. For maximum flavor, harvest just before the plant flowers—this is when the essential oils are most concentrated.
Winter Protection Strategy: That 2-3 inches of organic mulch in Step 4 isn't just for insulation—it's also moisture retention. Sage roots are surprisingly sensitive to winter desiccation. In particularly cold climates, I've had success doubling the mulch thickness to 4-5 inches for container-grown plants. Just be sure to pull back the mulch in early spring to prevent rot as temperatures rise.
Pro Tips for Prune Sage Herb
- A few strategic cuts can transform your sage from sparse to spectacular. Here's how to optimize each pruning step for...
- Timing is Everything: The late February/March window for Step 1 isn't arbitrary—it's when sage emerges from dormancy ...
- The 45-Degree Angle Secret: When cutting back those one-third of oldest stems in Step 1, that 45-degree angle isn't j...
Frequently asked questions
Got questions about pruning sage? You’re not alone! Here are answers to the most common concerns to help you keep your sage thriving—whether you’re a beginner or a seasoned gardener.
When is the best time to prune sage?
Prune sage after it flowers in early summer or late spring, but avoid heavy cuts in fall or winter. This encourages new growth before winter dormancy. For container-grown sage, you can trim lightly year-round to maintain shape—just skip harsh pruning in cold months.
How much can I cut back sage without harming it?
Never remove more than one-third of the plant at once. For woody sage, trim just above a leaf node (the bump where leaves grow) to promote bushiness. Over-pruning can stress the plant, especially in its first year. Think of it like a haircut—too much too soon = sad sage!
What if my sage looks leggy or woody after pruning?
Leggy or woody sage often means it’s overgrown or under-pruned. Next time, trim back to a third of the plant’s height in early summer to encourage compact growth. For severely woody stems, cut them to the ground—sage is tough and will regrow from the base!
Can I prune sage in winter?
Light shaping (like removing dead leaves) is fine in winter, but avoid heavy pruning. Sage goes dormant in cold weather, and cutting too much can weaken it. Wait until spring or early summer for major trims. If you live in a mild climate, a very light trim in late winter can help.
What if my sage turns brown or crispy after pruning?
Brown edges or crispy leaves usually mean stress—often from pruning too late in the season, overwatering, or sudden temperature changes. Let the soil dry slightly between waterings, and avoid pruning in extreme heat. If it’s just a few leaves, don’t worry; sage is resilient and will bounce back!
Wrapping up and next steps
Pruning sage isn’t just about keeping your plants tidy—it’s your secret weapon for bushier growth, stronger stems, and a bountiful harvest all year round. 🌿 Whether you’re trimming for shape, health, or flavor, remember: timing, technique, and consistency are key.
With the right tools and a little patience, your sage will thrive, rewarding you with fragrant leaves for cooking, medicine, or simply admiring its beauty.
Ready to take your pruning skills to the next level? Start small—pick one plant this season, follow these steps, and watch your sage flourish! For even more tips, explore how to propagate your pruned cuttings or dive into seasonal sage care to keep your herb garden in peak condition.