
Pruning
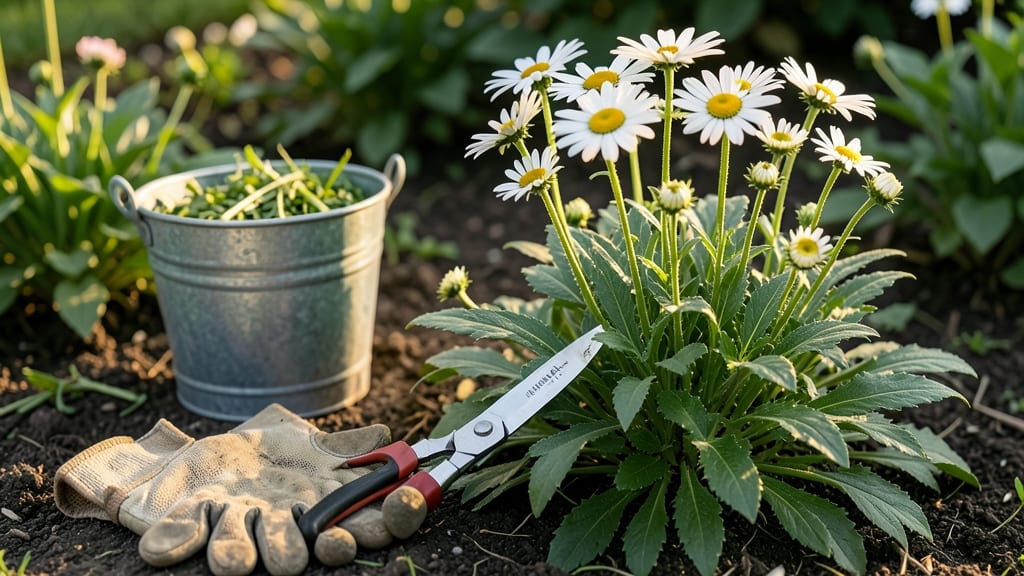
Pruning Shasta daisies transforms them from floppy, overgrown clumps into bushier, longer-blooming showstoppers. ✨ I’ve watched my own plants go from scraggly to spectacular just by following these simple cuts—no fancy tools or secret techniques required.
The key is timing: deadhead spent blooms in summer to encourage more flowers, trim back 1/3 of the plant after the first frost, and give them a light haircut in early spring. Each cut serves a purpose—more blooms, better shape, and fewer pests.
You’ll end up with plants that bloom from June through September, look fuller from every angle, and even resist powdery mildew better. The best part? It takes less than 15 minutes per plant. Works for both garden beds and containers—here’s exactly how to do it right without overcomplicating things.
📚 In This Guide
- What you need
- Instructions
- Tips and common mistakes
- Wrapping up and next steps
What you need
- ● Bypass pruners – Sharp, clean pruners (4-6" blades) for precise cuts on stems and foliage.
- ● Garden shears or loppers – For thicker stems (6-8" blades, if needed).
- ● Disinfectant (70% isopropyl alcohol or bleach solution) – 1 part bleach to 9 parts water to sterilize tools between cuts.
- ● Garden gloves – A pair of durable gloves to protect your hands from thorns and dirt.
- ● Compost or mulch – A small bag (5-10 gallons) to collect pruned debris or enrich the soil.
- ● Watering can or hose – For post-pruning hydration (1-2 gallons of water).
- ● Hand pruners with ergonomic grips – Reduces hand fatigue for longer pruning sessions.
- ● Rubbing alcohol wipes – Quick tool disinfection on the go.
- ● Plant tie or twine – To support heavy stems after pruning (if needed).
- ● Pruning saw (for stubborn woody stems) – Only if your daisies have thick, mature growth.
- ● Garden kneeler or stool – For comfort when working close to the ground.
Step-by-Step instructions for pruning Shasta daisy plants
Here's the method I rely on to keep Shasta daisies blooming abundantly for years.
✂️ Step 1: Deadhead Finished Blooms Regularly
As soon as a daisy bloom fades completely—when the center turns brown and the petals droop—I snip the stem back to the nearest healthy leaf or bud using sharp bypass pruners. This prevents the plant from wasting energy on seed production. I always make clean cuts at a 45-degree angle just above a leaf node to encourage new growth from that point.
Timing matters here: wait until the bloom is fully spent, but don't let it linger. I check my plants every 2-3 days during peak bloom season. You'll notice new buds forming within 1-2 weeks of consistent deadheading, signaling the plant is redirecting energy toward fresh flowers.
🌿 Step 2: Thin Overcrowded Stems After First Flush
After the initial summer bloom cycle, I examine each plant for stems that are growing too close together or appear weak. Using sterilized pruners, I remove 1/3 of the oldest, thickest stems at the base, cutting just above the soil line. This opens up airflow and prevents fungal diseases that thrive in dense foliage.
The reason I do this is simple: Shasta daisies naturally produce multiple stems, but too many compete for nutrients. You'll see stronger, thicker stems emerge within 3-4 weeks as the plant focuses its energy on fewer, more vigorous growth points. I always prune on a dry morning to reduce splashing water onto fresh cuts.
⏰ Step 3: Perform Late-Season Renewal Pruning
In early fall, when the first frost threatens, I give my Shasta daisies a dramatic haircut. Using clean shears, I cut all stems back to within 2-3 inches of the ground. This might seem drastic, but it prevents the plant from putting energy into seed heads over winter and encourages fresh growth in spring.
I never remove more than 80% of the foliage—that's the magic number for Shasta daisies. The remaining stems provide some protection against winter winds while still allowing sunlight to reach the crown. You'll notice new shoots emerging from the base in early spring, ready for another season of blooms.
🌱 Step 4: Light Spring Maintenance Pruning
In early spring, before new growth appears, I inspect each plant and remove any dead or damaged stems at the base. Then, as the first new shoots emerge—typically in late March or April depending on your climate—I trim back any overly leggy growth to encourage bushier development.
Here's the thing about spring pruning: I only remove stems that are growing at odd angles or crossing others. The goal is to maintain an open center that allows air circulation. You'll see the plant respond within 2-3 weeks with more compact, fuller growth and an abundance of new buds.
☀️ Step 5: Summer Shape-Up for Continuous Blooms
Throughout the growing season, I do light maintenance pruning every 4-6 weeks to keep the plants looking their best. This involves removing any stems that are growing toward the center of the plant or are crossing others, as well as any leaves that show signs of disease.
I also pinch back the tips of new growth if the plant starts to look too leggy. This encourages branching and results in more flowers. You'll notice a difference in the plant's shape within 1-2 weeks, with a fuller, bushier appearance and more blooms throughout the season.
Tips & tricks for pruning Shasta daisy plants
These practical strategies will help you maximize your Shasta daisies' blooming potential while keeping them healthy year-round.
Tool Selection: Invest in a pair of sharp, clean bypass pruners for all pruning tasks. Dull blades tear stems and create entry points for disease. I sterilize my pruners between plants by wiping them with rubbing alcohol—this prevents spreading fungal spores from one plant to another. For larger stems in Step 2 or Step 3, I use clean, sharp garden shears instead of pruners to avoid crushing the stem.
Visual Cues for Timing: In Step 1, when deadheading, look for these telltale signs: the center should be completely brown (not just yellowing), and petals should droop noticeably. This is your cue to act. I've found that checking plants every 2-3 days during peak bloom prevents missed opportunities—waiting too long means the plant has already started directing energy toward seed production instead of new blooms.
Seasonal Adjustments: For Step 3's late-season renewal pruning, I recommend doing this after your first frost but before temperatures drop below 30°F. If you live in a milder climate where frost isn't a factor, aim for early November instead. The key is to time it after the plant has finished its final bloom cycle but before winter dormancy sets in completely. This timing ensures the plant has time to heal before winter.
Growth Observation: After performing Step 2's thinning, mark the plants with small flags or use plant ties to identify which stems you removed. This helps you monitor the new growth that emerges within 3-4 weeks. I've seen remarkable transformations—plants that looked overcrowded and weak suddenly develop thick, sturdy stems ready for another round of blooms. This visual feedback confirms you're on the right track.
Pro Tips for Prune Shasta Daisy Plants
- These practical strategies will help you maximize your Shasta daisies' blooming potential while keeping them healthy year-round.
- Tool Selection: Invest in a pair of sharp, clean bypass pruners for all pruning tasks.
- Visual Cues for Timing: In Step 1, when deadheading, look for these telltale signs: the center should be completely brown (not just yellowing), and petals should droop noticeably.
Frequently asked questions
Got questions about pruning your Shasta daisies? You’re not alone! Here are answers to the most common concerns—so you can keep those blooms thriving without the guesswork.
When is the best time to prune Shasta daisies?
Prune after the first frost (late fall) to remove dead foliage, then again in early spring (before new growth) to shape the plant. Light trims can happen mid-season to encourage more blooms, but avoid heavy cuts during peak flowering. Pro tip: Never prune when flowers are fully open—wait until they’ve faded!
Can I prune Shasta daisies in summer?
Yes, but lightly! Summer pruning should focus on removing spent blooms (deadheading) to redirect energy to new flowers. Avoid cutting back more than 1/3 of the plant—this can stress it in hot weather. Pro tip: Water deeply after pruning to help recovery.
What if I prune too much? Will my Shasta daisy die?
Over-pruning (cutting back more than 1/3 of the plant at once) can weaken it, but Shasta daisies are hardy! If you’ve gone overboard, don’t panic—just reduce future cuts and fertilize lightly. Focus on deadheading and spring shaping next year. Pro tip: Mulch around the base to protect roots.
Do I need special tools to prune Shasta daisies?
Nope! Clean, sharp hand pruners or bypass pruners work best for small stems, while loppers handle thicker growth. Avoid dull tools—they crush stems instead of cleanly cutting. Pro tip: Sterilize blades with rubbing alcohol to prevent disease spread.
How do I encourage more blooms after pruning?
After pruning, feed your Shasta daisies with a balanced fertilizer (10-10-10) to boost growth. Deadhead regularly, and ensure they get 6+ hours of sunlight. Overcrowded plants? Thin them out—space them 18–24 inches apart for better airflow and blooms. Pro tip: Pinch back young plants in spring to promote bushiness!
Wrapping up and next steps
Pruning your Shasta daisies isn’t just about keeping them tidy—it’s the secret to longer blooms, healthier growth, and stunning displays year after year. 🌸 With the right tools, timing, and techniques, you’ll transform your garden into a vibrant haven.
Now that you’re armed with the know-how, grab those shears and give your daisies the love they deserve!
Ready to take it further? Try experimenting with deadheading for even more flowers or share your pruning tips with fellow gardeners—your green thumb might inspire someone else’s!