
Pruning
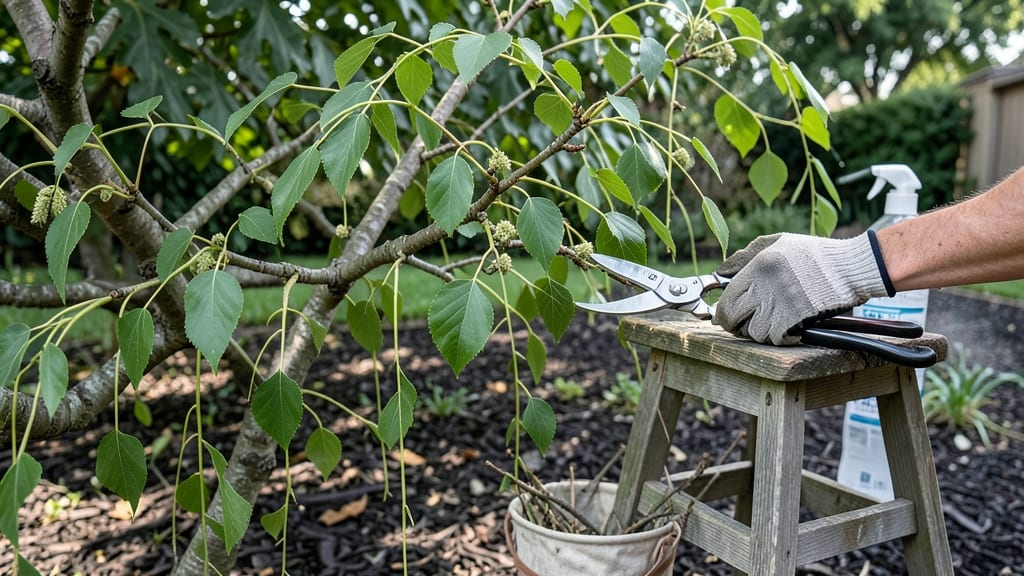
Pruning a weeping mulberry transforms it from a tangled mess into a graceful, sun-dappled centerpiece. ✨ I’ve spent years watching these trees go from scraggly to stunning—all it takes is knowing when and how to cut.
The key is working with the tree’s natural shape, not against it, and timing cuts to avoid stress. You’ll need sharp bypass pruners, a folding saw for thicker branches, and rubbing alcohol to sanitize tools between cuts.
Look for dead wood (gray, brittle branches), water sprouts (fast-growing vertical shoots), and crossing branches—these are your first targets. Start with 10-15% of the canopy in late winter or early spring to avoid over-stressing the tree.
After pruning, seal larger cuts with pruning sealant to prevent disease, and give the tree a deep watering to help it recover. You’ll see fresh green growth within 4-6 weeks, with a fuller, more balanced shape by next season.
The goal isn’t perfection—it’s healthier branches that support more berries and lush foliage. This method works for young trees and mature specimens alike, whether you’re shaping a new planting or reviving an overgrown one. Just remember: patience is your best tool—weeping mulberries reward gentle care with dramatic results.
📚 In This Guide
- What you need
- Instructions
- Tips and common mistakes
- Wrapping up and next steps
What you need
- ● Pruning shears – Bypass pruners (sharp, 6-8" blades) for small branches (up to ½ inch thick). Anvil pruners are a backup but can crush stems.
- ● Loppers – Bypass-style, 18-24" long, for branches ½ to 1½ inches thick.
- ● Pruning saw – Curved-tooth, 16-20" blade, for thicker branches (1½+ inches). Avoid cheap saws—they tear wood.
- ● Gloves – Heavy-duty, cut-resistant (e.g., leather or Kevlar) to protect from thorns and sap.
- ● Safety glasses – ANSI-rated to shield eyes from debris.
- ● Ladder or step stool – Sturdy, non-slip (4-6 ft tall) for high branches. Never stand on unstable surfaces!
- ○ Disinfectant (optional but recommended) – 70% isopropyl alcohol or a 10% bleach solution to clean tools between cuts and prevent disease spread.
- ● Plastic bags or bucket – For collecting pruned branches (compost or dispose of them).
- ● Rubbing alcohol or hand sanitizer – To clean hands after handling sap (which can irritate skin).
- ● Marking twine or flags – Colored twine or biodegradable flags to tag branches for removal (if pruning in stages).
- ○ Pruning sealant (optional) – Tree wound sealant for large cuts (controversial—skip if your mulberry is young or healthy).
- ● Weather check – Prune on a dry, calm day (avoid rain or high winds).
Step-by-step guide to pruning weeping mulberry trees
Here’s how I keep my weeping mulberry looking graceful and vigorous—no guesswork, just proven techniques.
✂️ Step 1: Time Your Pruning for Optimal Growth
Prune weeping mulberries during their dormant season, typically late winter or early spring before buds swell. This timing prevents stressing the tree when it’s actively growing. I avoid heavy pruning in summer or fall, as it can stimulate weak growth that won’t harden off before winter.
For minor shaping or dead branch removal, you can prune anytime, but major cuts should wait. Look for bare branches or those crossing the main canopy—these are your first targets. The goal is to open the center for airflow and light while maintaining that elegant, cascading form.
✂️ Step 2: Remove Dead, Diseased, or Weak Branches First
Start by cutting out any branches that are dead, diseased, or rubbing against others. Use clean, sharp pruners to make cuts just outside the branch collar—the swollen area where the branch meets the trunk. This ensures the tree can seal the wound properly and prevents decay.
If a branch is larger than 2 inches in diameter, use a pruning saw for a clean cut. I always sterilize my tools with rubbing alcohol between cuts to avoid spreading disease. Watch for mushroom growths or oozing sap—these are red flags for infection.
✂️ Step 3: Thin the Canopy for Airflow and Light
Weeping mulberries need airflow to prevent fungal issues, so thin the canopy by removing 10-20% of the smallest branches each year. Focus on branches growing inward or downward, which block light and air. Cut these back to a lateral bud or side branch to encourage outward growth.
Step back often to visualize the tree’s shape. You’re aiming for an open, airy structure that still maintains that graceful weeping silhouette. Avoid over-thinning—too many cuts at once can stress the tree. If you’re unsure, remove fewer branches and reassess next year.
✂️ Step 4: Shape the Tree for Balance and Form
Now’s the time to refine the tree’s shape. Weeping mulberries naturally grow downward, so I focus on evenly distributing branches along the scaffold. Trim back any overly long or leggy branches to a lateral bud to encourage bushier growth.
For a more formal look, I lightly prune the outer branches to create a rounded canopy while preserving the weeping effect. Avoid cutting more than 25% of the tree’s foliage in one season—this keeps it healthy without shocking the system. If you’re aggressive, spread cuts over multiple years.
✂️ Step 5: Clean Up and Monitor for Recovery
After pruning, rake up and dispose of all clippings to reduce disease risk. Seal larger wounds with pruning sealant if they’re over ½ inch in diameter, but skip it for small cuts—the tree’s natural healing is usually sufficient.
Water the tree deeply after pruning to help it recover, especially if you’ve made significant cuts. Watch for new growth in 4-6 weeks—this is your sign that the tree is responding well. If you see wilting or yellowing leaves, you may have over-pruned; next time, go lighter.
Tips & tricks for pruning weeping mulberry trees
Real talk: Pruning weeping mulberries can feel intimidating, but these details make all the difference between a stressed tree and one that thrives. Here's what nobody tells you—
Seasonal Timing Secret: The late winter to early spring window (just before buds swell) is non-negotiable for major pruning. This timing aligns with the tree's natural dormancy, allowing it to heal efficiently. I've seen trees recover beautifully when pruned in this period, but summer cuts can stimulate weak growth that won't survive winter. For minor maintenance like dead branch removal, anytime works—but don't overdo it.
Tool Technique That Changed Everything: Sterilizing your pruners between cuts with rubbing alcohol isn't just about hygiene—it's about preventing disease spread. I learned this the hard way after seeing fungal infections develop from contaminated tools. For branches over 2 inches, use a pruning saw to make clean cuts just outside the branch collar. This precise technique ensures proper wound sealing and prevents decay from creeping into the trunk.
Canopy Thinning Strategy: That 10-20% annual thinning recommendation isn't arbitrary—it balances airflow and light penetration while preventing stress. Focus on removing branches growing inward or downward, cutting back to lateral buds. This creates that open, airy structure while maintaining the tree's signature weeping silhouette. Pro tip: Step back frequently to visualize the shape—what looks balanced from close up can appear lopsided from a distance.
Recovery Monitoring: Watching for new growth in 4-6 weeks is your best indicator of successful pruning. If you see wilting or yellowing leaves instead, you've likely over-pruned. In that case, next year's cuts should be even lighter. Deep watering after significant pruning helps the tree recover, especially during dry periods. I've found that trees pruned correctly in winter often produce more vigorous growth the following spring.
Pro Tips for Prune Weeping Mulberry
- Real talk: Pruning weeping mulberries can feel intimidating, but these details make all the difference between a stressed tree and one that thrives.
- Seasonal Timing Secret: The late winter to early spring window (just before buds swell) is non-negotiable for major pruning.
- Tool Technique That Changed Everything: Sterilizing your pruners between cuts with rubbing alcohol isn't just about hygiene—it's about preventing disease spread.
Frequently asked questions
Got questions about pruning your weeping mulberry? You’re not alone! Here are some of the most common concerns—and straightforward answers—to help you keep your tree thriving.
When is the best time to prune a weeping mulberry?
The ideal time is late winter or early spring (before buds swell) to encourage vigorous growth. You can also do light pruning in summer to shape the tree, but avoid heavy cuts then. Never prune in fall—it can stimulate tender new growth that won’t survive winter’s chill.
How much can I trim off without harming the tree?
For healthy weeping mulberries, limit pruning to no more than 25% of the canopy per year. Over-pruning stresses the tree and weakens its structure. Focus on removing dead, diseased, or crossing branches first, then shape gently. Think of it like a haircut—small adjustments keep it looking great!
What if my tree has pests or diseases after pruning?
Pruning opens wounds, so sterilize tools with rubbing alcohol between cuts to prevent infections. If you spot pests (like aphids) or fungal issues (e.g., powdery mildew), treat with neem oil or horticultural oil. Remove heavily infested branches immediately and dispose of them in sealed bags.
Can I prune a weeping mulberry for bushier growth?
Yes! To encourage bushiness, trim back the tips of branches (especially in spring) to promote lateral branching. Avoid cutting the main trunk—this can stunt the tree. For a denser canopy, focus on thinning out the center while preserving the tree’s graceful, weeping shape.
What should I do if my tree isn’t recovering after pruning?
If your mulberry looks stressed (yellowing leaves, slow regrowth), it may need time or better care. Ensure it’s in well-draining soil and water deeply during dry spells. Avoid fertilizing right after pruning—wait until new growth appears. If problems persist, check for root rot or nutrient deficiencies.
Wrapping up and next steps
Pruning your weeping mulberry doesn’t have to be intimidating—with the right tools, timing, and techniques, you’ll transform it into a lush, vibrant centerpiece! 🌿 Whether you’re shaping its graceful branches or encouraging bushier growth, consistency is key.
Now that you’re armed with expert tips, grab those pruners and give your tree the care it deserves.
Ready to take it further? Plan your next pruning session—mark your calendar for spring or early summer to maintain that perfect, cascading silhouette. Happy pruning! ✂️