
How To
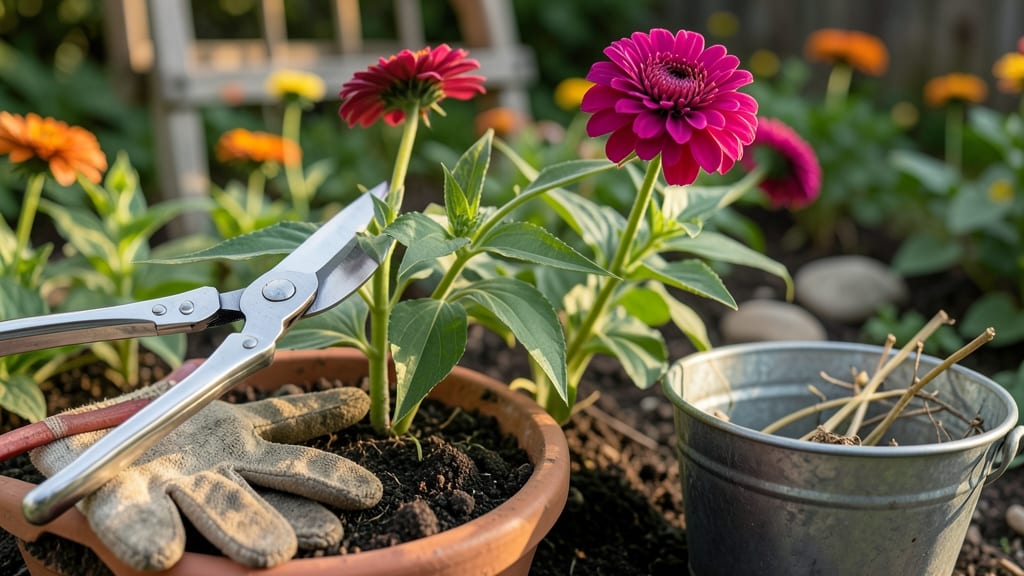
Pruning zinnias isn’t just about cutting back—it’s the secret to nonstop summer blooms that keep your garden vibrant until frost. ✂️ I’ve learned the hard way that skipping this step means fewer flowers and leggy plants by midseason, but the right cuts transform zinnias into prolific bloomers.
The key lies in timing, technique, and knowing exactly where to snip for maximum regrowth.
Start by deadheading spent blooms every 2-3 days to encourage new flowers, then make three strategic cuts per plant: trim leggy stems at the base, pinch back overgrown branches, and cut back faded stems just above a set of leaves.
Use clean, sharp pruners to avoid damaging stems, and always cut at a 45-degree angle to prevent water pooling. This method keeps plants bushy, healthy, and producing blooms for weeks longer than unpruned zinnias.
📚 In This Guide
- What you need
- Instructions
- Tips and common mistakes
- Wrapping up and next steps
What you need
- ● Clean, sharp pruning shears – Bypass pruners (4-6" blades) work best for precision cuts. Dull blades crush stems and invite disease!
- ● Hand pruners or small scissors – For delicate stems (3-4" blades). Perfect for deadheading tiny blooms.
- ● Garden gloves – Lightweight, breathable fabric (e.g., cotton or nitrile-coated) to protect from thorns and dirt.
- ● Disinfectant (70% isopropyl alcohol or bleach solution) – 1 part bleach to 9 parts water to sterilize tools between cuts.
- ○ Garden twine or rubber bands – Optional but helpful for tying leggy stems to stakes post-pruning.
- ● Bucket or wheelbarrow – 10+ gallon capacity for collecting pruned stems (compost or discard).
- ● Stakes or tomato cages – 5-6 feet tall (if your zinnias are flopping post-prune).
- ● Morning sunlight – Prune after dew dries but before midday heat (6–9 AM).
- ● Dry stems – Avoid pruning wet or frosty plants to prevent fungal issues.
- ● Clear weather forecast – Hold off if rain is expected within 24 hours.
- ● Horticultural oil spray – For treating cuts if you spot signs of mildew.
- ● Knee pad or small stool – For comfort when working close to the ground.
- ● Permanent marker – To label stems if experimenting with propagation.
Step-by-Step instructions for pruning zinnias
Master this three-cut technique to extend your zinnias' bloom time by up to 8 weeks.
✂️ Step 1: Deadhead Spent Blooms Immediately
Use clean, sharp pruners to snip the entire flower head just above the first set of healthy leaves below it. This removes the spent bloom but preserves the plant's energy reserves. I always work in the early morning when stems are firm and less likely to tear. Watch for the first signs of wilting petals—those are your cue to act before the seed head forms.
Remove only the flower itself, never the entire stem. Zinnias grow from the base, and cutting too far down weakens the plant's ability to produce new blooms. If you're pruning multiple plants, wipe your pruners with rubbing alcohol between cuts to prevent disease transmission. You'll see new side shoots emerge within 3-5 days at the nodes where you made your cuts.
✂️ Step 2: Thin Overcrowded Stems for Better Airflow
Examine each plant for stems that are growing too close together or crossing. Use your fingers to gently pinch out the weakest stems at the base, leaving only the 3-4 strongest per plant. This prevents fungal diseases like powdery mildew by improving air circulation. I typically do this thinning every 2-3 weeks during peak bloom season when stems get leggy.
Focus on stems that are pale or growing at odd angles—they're competing with stronger growth for sunlight and nutrients. After thinning, water the base of the plant to help it recover from the slight stress. You'll notice the remaining stems thicken and produce more robust blooms within a week, as the plant redirects its energy to fewer, stronger growth points.
✂️ Step 3: Cut Back Leggy Growth to Encourage Bushiness
When stems grow taller than 12 inches without producing flowers, it's time for a rejuvenating cut. Using your pruners, trim the entire stem back to within 4-6 inches of the base. This might seem drastic, but zinnias are remarkably resilient and will produce new growth from the base nodes. I always do this in late afternoon to give the plant time to recover before evening temperatures drop.
After cutting back, fertilize lightly with a balanced 10-10-10 formula to support the new growth. You'll see fresh new shoots emerge within 7-10 days, and these will produce flowers more quickly than the original leggy stems. This technique works particularly well in late summer when zinnias tend to get woody and stop flowering. The key is timing—do this cut after you've harvested the last flowers from those stems.
Tips & tricks for perfect Zinnia pruning
These proven techniques will help you maximize your zinnias' potential and keep them blooming beautifully all season.
Timing is Everything: The early morning timing in Step 1 is crucial because zinnias are most hydrated and firm first thing. This makes them less likely to tear when you cut, and the plant can better absorb the pruning shock. If you must prune later in the day, do it in the late afternoon as mentioned in Step 3 to allow recovery before evening temperatures drop.
Precision Cutting Technique: When deadheading in Step 1, use a clean cut just above the first set of healthy leaves below the bloom. This is where new side shoots will emerge. I've found that using sharp pruners makes all the difference—dull blades crush stems and can introduce disease. For extra precision, hold the stem firmly with one hand while cutting with the other to prevent accidental deeper cuts.
Visual Cues for Perfect Pruning: In Step 2, look for stems that are growing at odd angles or are pale in color—these are your targets for thinning. The ideal stem should be upright and vibrant green. After cutting back leggy growth in Step 3, you'll notice new growth emerging from the base nodes within 7-10 days. This visual confirmation shows you've done it right and the plant is responding well to the pruning.
Seasonal Adjustments: During peak bloom season, you'll need to thin every 2-3 weeks as stems get leggy. In late summer when zinnias tend to get woody, the rejuvenating cut in Step 3 becomes even more important. This technique works particularly well for extending the bloom time by up to 8 weeks, as it encourages new growth that will produce flowers more quickly than the original stems.
Pro Tips for Prune Zinnias
- These proven techniques will help you maximize your zinnias' potential and keep them blooming beautifully all season.
- Timing is Everything: The early morning timing in Step 1 is crucial because zinnias are most hydrated and firm first ...
- Precision Cutting Technique: When deadheading in Step 1, use a clean cut just above the first set of healthy leaves b...
Frequently asked questions
Got questions about pruning zinnias? You’re not alone! Here are answers to the most common concerns—so you can keep those blooms coming all season long.
When is the best time to prune zinnias?
Prune zinnias early in the morning when the plants are dry and temperatures are cool. This reduces stress on the plant and minimizes disease risk. Aim for every 2–3 weeks during peak bloom (late spring to early fall) or after each flush of spent flowers.
Do I need special tools to prune zinnias?
Nope! While sharp pruners or shears work best for clean cuts, clean scissors or even your fingers can pinch off dead blooms. Just ensure your tools are sanitized with rubbing alcohol to prevent bacterial spread.
What if I skip pruning—will zinnias still bloom?
Yes, but expect fewer, smaller flowers and a leggy plant. Pruning encourages bushier growth and more blooms by redirecting energy. Think of it like giving your zinnias a haircut—they’ll thank you with a fuller, happier look!
My zinnias look sad after pruning—what’s wrong?
Don’t worry! A temporary droop is normal due to water loss. Water deeply after pruning and avoid cutting more than 1/3 of the plant at once. If leaves yellow or wilt persistently, check for pests (like aphids) or overwatering.
Can I prune zinnias in fall or winter?
For annual zinnias, prune lightly in fall to remove dead flowers, but stop when frost threatens. Perennial varieties (like Zinnia grandiflora) can be cut back by half in late fall, but mulch to protect roots. Always prune after the first frost to avoid shocking the plant.
Wrapping up and next steps
Pruning zinnias doesn’t have to be intimidating—with the three-cut method, you’ll keep your plants thriving and blooming all summer long! 🌸 Just remember to deadhead spent blooms, trim leggy stems, and snip back overgrown growth at the right spots.
Your garden will reward you with vibrant, continuous flowers that last until frost.
Ready to put your new skills to the test? Grab those shears and head outdoors—your zinnias are waiting for their second wind! For extra tips, bookmark this guide or explore other seasonal pruning hacks to keep your garden looking its best.