
Pruning
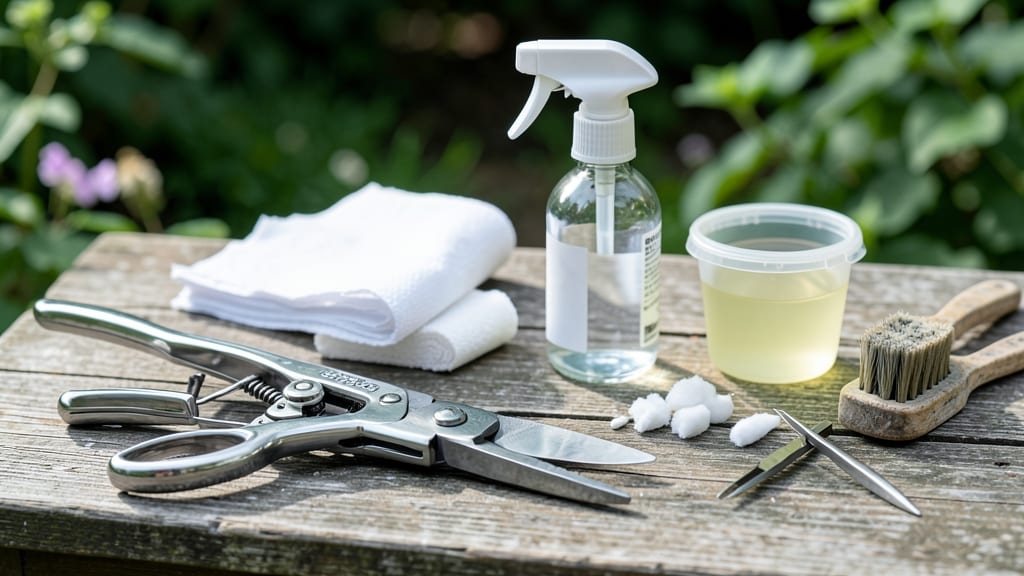
Sanitizing pruning shears isn't just about sharp blades—it's your first line of defense against plant diseases. 🌿 I learned the hard way when my roses kept dying from a mysterious infection; the culprit?
My shears, harboring bacteria from previous cuts. A quick sanitizing routine between plants prevents this silent spread and keeps your garden thriving.
You only need three things: rubbing alcohol (70% or higher), a clean cloth, or a pot of boiling water. The process takes less than a minute but makes all the difference. Alcohol is the fastest option, while boiling works for thorough sterilization.
Store your shears in a dry place between uses to prevent rust and corrosion—rusty blades dull faster and hold bacteria longer.
After sanitizing, your cuts will heal cleaner and faster, reducing the risk of fungal infections like powdery mildew or bacterial blight. The key is consistency: wipe down shears after every few cuts, especially when moving between different plant types or diseased areas.
This simple habit transforms your pruning routine from risky to reliable.
For extra longevity, oil the pivot point of your shears every few months to keep them moving smoothly. A well-maintained pair of shears lasts years and pays for itself in healthier plants. Now, grab those tools and let’s get pruning the right way!
📚 In This Guide
- What you need
- Instructions
- Tips and common mistakes
- Wrapping up and next steps
What you need
- ● Pruning shears – Any type (bypass, anvil, or ratchet), but avoid rusted or heavily pitted blades.
- ● Rubbing alcohol (70% isopropyl or higher) – 1 small bottle (8–16 oz) for disinfecting.
- ● Soft-bristle brush – Small hand brush (like a toothbrush) for scrubbing debris.
- ● Microfiber cloth or paper towels – 2–3 sheets for drying and polishing.
- ○ Rust inhibitor (optional but recommended) – Light oil (e.g., mineral oil or WD-40 Specialist) to prevent corrosion.
- ○ Container for soaking (optional) – Small bowl or bucket if deep-cleaning is needed.
- ● Bleach solution (1:9 ratio with water) – For extra sterilization (use sparingly—rinse well!).
- ● Lubricant (e.g., silicone spray) – Keeps hinges smooth if shears are older.
- ● Sharpener (file or honing stone) – If blades are dull, tackle this after sanitizing.
- ● Gloves (nitrile or latex) – Protects hands from sap, dirt, and alcohol.
Step-by-Step instructions for sanitizing pruning shears
Keep your tools sharp and your plants thriving with this simple, effective routine.
🧼 Step 1: Clean Off Debris and Sap
Start by wiping down the blades and handles with a damp cloth to remove any dried sap, dirt, or plant residue. Sap can harden over time and dull your blades, so don't skip this step. I like to use a slightly rough microfiber cloth—it grabs onto gunk better than a soft towel. Pay special attention to the crevices where dirt loves to hide.
If you're dealing with sticky sap, a drop of mild dish soap mixed with warm water works wonders. Just scrub gently with your fingers or a soft brush—no need to scrub so hard you damage the finish. Rinse everything thoroughly afterward to avoid leaving soap residue that could corrode metal over time.
🔥 Step 2: Heat Sterilize with a Flame
Hold the blades over a gas stove flame or a candle (safely, away from flammable materials) for about 10-15 seconds per side. You'll see any remaining sap bubble and burn off—this is your signal it's working. The heat kills bacteria, fungi, and viruses lurking on the metal, so this isn't just about cleaning, it's about protecting your plants.
I know it seems counterintuitive to heat metal tools, but pruning shears are built to handle it. Just avoid overheating—if the metal starts to glow red, you're pushing it too far. Let the blades cool completely before moving to the next step. This prevents warping and keeps the sharp edge intact.
💧 Step 3: Deep Clean with Rubbing Alcohol
Wipe the blades and handles with 70% isopropyl alcohol using a clean cloth or cotton swab. The alcohol cuts through any remaining grime and provides an extra layer of sterilization. Focus on the blade edges and pivot points where moisture can get trapped. You'll notice the alcohol evaporates quickly, leaving no residue behind.
For stubborn spots, let the alcohol sit for 30 seconds before wiping dry. This extra dwell time ensures even hidden bacteria get killed. Store the alcohol in a spray bottle for easy application next time—just a quick mist and wipe keeps your shears ready for action.
✂️ Step 4: Dry and Store Properly
After sanitizing, dry the blades and handles thoroughly with a clean towel. Moisture left behind can lead to rust, especially if you store them in a damp environment. I like to hang my shears by the blade with a hook or magnet—this keeps them off the ground and allows air to circulate around the metal.
Store them in a dry, shaded spot where they won't get knocked around. A tool roll or dedicated pocket in your gardening apron works great. Avoid tossing them in a toolbox with other dirty tools—cross-contamination defeats the purpose of sanitizing. Now your shears are ready for your next pruning session, free of pathogens and sharp as ever.
Tips & tricks for perfect pruning shear sanitization
These little details make all the difference between shears that stay sharp and ones that rust or spread disease.
Safety First: When heat sterilizing in Step 2, always work near an open window or with a fan running. The fumes from burning sap can be strong—even though it's just a quick 10-15 seconds per side, proper ventilation prevents headaches and keeps your workspace comfortable. I've learned this the hard way after sanitizing indoors with no airflow!
Blade Care: After the 30-second alcohol treatment in Step 3, test your blade sharpness by making a clean cut through a piece of paper. If it tears instead of cuts, your shears need sharpening. The alcohol step shouldn't dull them, but if you notice resistance, you may need to adjust your sharpening routine. A honing stone every few uses keeps blades performing at their best.
Storage Wisdom: For maximum protection, store your shears in a small cloth bag or sleeve after drying. This prevents accidental nicks from other tools and keeps them organized. I keep mine in a dedicated pocket of my gardening apron—it's always ready when I need it, and the fabric protects the blades from scratches.
Pro Tips for Sanitize Pruning Shears
- These little details make all the difference between shears that stay sharp and ones that rust or spread disease.
- Safety First: When heat sterilizing in Step 2, always work near an open window or with a fan running. The fumes from ...
- Blade Care: After the 30-second alcohol treatment in Step 3, test your blade sharpness by making a clean cut through ...
Frequently asked questions
Got questions about keeping your pruning shears in top shape? Here are some of the most common ones—and their answers—to help you sanitize like a pro every time.
How often should I sanitize my pruning shears?
Sanitize your shears before and after each use—especially if you’re pruning multiple plants or dealing with diseased branches. For heavy-duty tasks (like commercial gardening), clean after every 2–3 cuts to prevent cross-contamination. A quick wipe-down with rubbing alcohol or a bleach solution between sessions keeps them ready for action.
Can I sanitize pruning shears too much? Will it damage them?
Nope! Over-sanitizing won’t hurt your shears as long as you use gentle methods. Harsh chemicals (like bleach left too long) can corrode metal over time, so rinse thoroughly after soaking. For stainless steel blades, stick to alcohol or vinegar solutions—they’re tough on germs but kind to your tools. Pro tip: Dry them completely to prevent rust!
What’s the best alternative if I don’t have rubbing alcohol?
No problem! Use a 1:10 bleach-to-water solution (or 3% hydrogen peroxide) for a deep clean. For a natural option, mix white vinegar with water (1:1) and scrub with a brush. Just remember: bleach and vinegar neutralize each other, so never mix them. Rinse well afterward to avoid residue.
Why do my shears smell bad after sanitizing? How do I fix it?
A funky odor usually means mold, sap, or old plant debris is lingering. Soak in warm, soapy water first, then sanitize with alcohol or bleach. For stubborn smells, add a few drops of tea tree oil (a natural disinfectant) to your cleaning solution. Always dry thoroughly—moisture traps bacteria and odors!
What should I do if my shears won’t stay sharp after sanitizing?
Sanitizing doesn’t dull blades, but rust or sap buildup can make them feel less sharp. If this happens, hone the edge with a sharpening stone after cleaning. For stubborn rust, soak in citric acid solution (like lemon juice + water) for 10 minutes before rinsing. Regular maintenance keeps them both clean and cutting like new!
Wrapping up and next steps
Keeping your pruning shears sanitized is the secret weapon for healthy plants and stress-free gardening! 🌱 With just a few simple steps—like using rubbing alcohol, bleach solution, or a sterilizing spray—you’ll prevent disease and extend the life of your tools.
Now that you’re armed with the know-how, go ahead and give your shears the TLC they deserve before your next pruning session.
Ready to take it further? Stock up on sanitizing supplies or explore advanced pruning techniques to become a true green thumb! 🌿