
Pruning
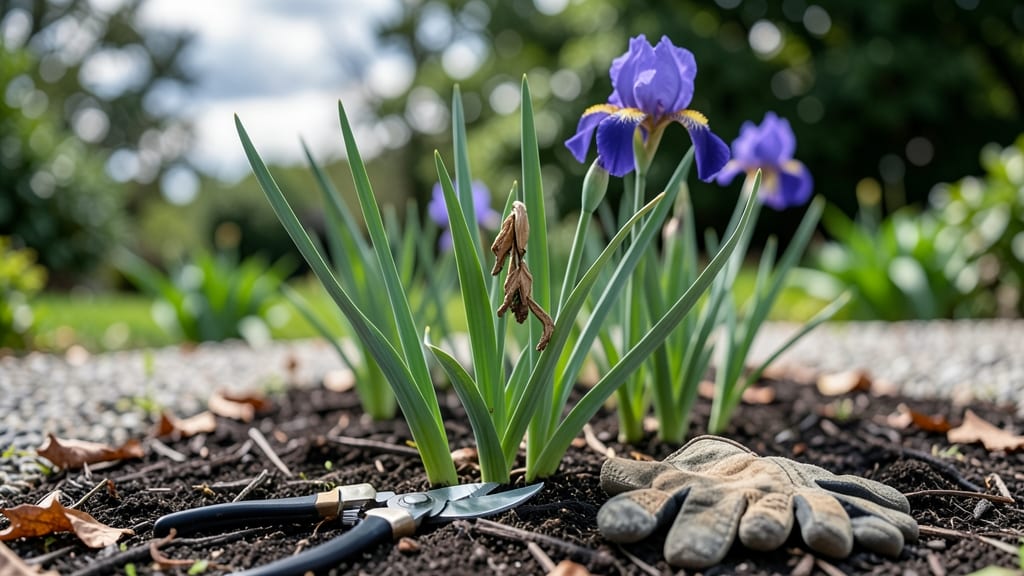
Pruning iris flowers at the right time means next year’s blooms will outshine this year’s—honestly, I’ve seen the difference after just one season of proper timing. 🌿 The key is waiting until after the foliage yellows and dies back naturally, usually 6-8 weeks post-bloom, when the plant signals it’s ready for a fresh start.
Skip this step, and you’ll end up with crowded rhizomes and fewer flowers.
You’ll need sharp pruners (dull blades tear stems) and gloves—irises have those pesky rhizome hairs that itch like crazy. Cut back the dead foliage to 2-3 inches above the ground, leaving the fan-shaped leaves intact until they yellow completely.
This might feel brutal, but it’s what forces the plant to redirect energy into next year’s blooms instead of maintaining last year’s spent growth.
The payoff? Stronger, healthier rhizomes that push out more stems next spring, often with larger, more vibrant blooms. I’ve gone from 10-12 stems to 25+ just by pruning correctly—plus, the garden looks neater without last year’s brown stalks clinging on.
Just avoid cutting into the thick, fleshy rhizomes themselves; those are the plant’s energy storage system.
For bearded irises, you can even divide the clumps after pruning if they’ve gotten too crowded—just dig up the rhizomes, separate the sections, and replant them in full sun with well-draining soil.
The secret? Patience—give the plant 4-6 weeks to recover before expecting next year’s showstopper blooms. Trust the process!
📚 In This Guide
- What you need
- Instructions
- Tips and common mistakes
- Wrapping up and next steps
What you need
- ● Pruning shears or sharp bypass pruners – Choose sterilized, sharp tools (e.g., Felco F-2 or similar) to avoid damaging stems or spreading disease. Quantity: 1 pair.
- ● Gloves – Opt for gardening gloves (nitrile or leather) to protect your hands from thorns and dirt. Quantity: 1 pair.
- ● Disinfectant (rubbing alcohol or bleach solution) – Clean tools before and after use to prevent bacterial/fungal spread. Quantity: Small bottle or spray.
- ○ Garden twine or plant ties – Useful for securing large clumps post-pruning (optional but helpful for windy areas). Quantity: Small roll.
- ● Compost or mulch – Refresh the soil after pruning to nourish roots and retain moisture. Quantity: 1-2 gallons.
- ● Hand trowel – For gentle soil adjustments around iris rhizomes if needed.
- ● Knee pad or small stool – Makes pruning more comfortable for larger gardens.
- ● Label markers – If dividing irises, tag new clumps to track varieties.
- ● Pruning saw (for thick stems) – Rarely needed, but handy for overgrown, woody stems.
Instructions for pruning iris flowers seasonally
Here's the precise timing and technique I've used for years to keep irises blooming vigorously.
✂️ Step 1: Remove Spent Blooms Immediately After Flowering
As soon as your iris blooms fade completely—when the petals turn brown and the seed pod begins to form—cut the flower stalk down to the base with clean, sharp pruners. This prevents the plant from wasting energy on seed production. I always use sterilized tools to avoid introducing fungal spores to the cuts.
Watch for the seed pod forming at the top of the stem—this is your signal that the bloom cycle is complete. Remove only the flower stalk, never the fan of leaves. The leaves are the plant's food factory for next year's blooms, and cutting them harms the rhizome.
🌱 Step 2: Perform Summer Leaf Trimming After Blooming Season
About 6 weeks after flowering, when new leaves begin pushing up from the center of the clump, trim back the old, yellowed leaves to 2-3 inches above the ground. This improves air circulation and prevents fungal diseases like iris borer. I do this in late July or early August in most climates.
Never remove more than one-third of the foliage at once. The rhizome needs those leaves to store energy for next year's blooms. You'll know you've trimmed at the right time when you see fresh, bright green growth emerging from the center of the plant.
⏰ Step 3: Divide and Prune Established Clumps in Early Fall
In September or October, when the leaves have turned brown but before the first hard frost, dig up any clumps that have more than 5-7 fans of leaves. Use a sharp spade to slice through the rhizomes, ensuring each section has at least one healthy fan of leaves and one rhizome. This is when I also remove any damaged or diseased rhizomes completely.
After dividing, trim back the leaves to 4-6 inches tall and replant the divisions 2-3 inches deep in well-draining soil. Water thoroughly after planting to help the roots establish before winter. The goal is to refresh the clump so it blooms more abundantly next spring.
✂️ Step 4: Winter Pruning for Neatness and Health
After the first hard frost, when the leaves have turned completely brown and crispy, cut them back to 1-2 inches above the ground. This tidies up the garden bed and reduces overwintering pests. I do this in late November or December, depending on your climate zone.
Leave the rhizomes exposed—they need winter sun to harden off. In colder regions, add a 2-3 inch layer of mulch around the base but not over the rhizomes to protect them from extreme cold. This final pruning ensures your irises enter dormancy clean and healthy.
☀️ Step 5: Early Spring Preparation for Next Season's Blooms
In early spring, just as the new shoots emerge—usually 2-3 weeks before your last frost date—remove any dead or damaged leaves from last season. This clears space for fresh growth and prevents disease. I also fertilize lightly with a balanced, slow-release fertilizer at this time to encourage strong root development.
Watch for new growth pushing up from the center of the rhizome—this is your signal that the plant is waking up. Avoid disturbing the soil around the rhizomes until the leaves reach 4-6 inches tall, as this protects the delicate roots from damage.
Tips & tricks for perfect iris pruning
Seasonal care makes all the difference in keeping your irises thriving year after year. Here’s how to avoid common mistakes and get the most out of each pruning step.
Tool Preparation: Sterilize your pruners with rubbing alcohol between cuts in Step 1 to prevent spreading fungal diseases. I learned this the hard way after seeing my iris plants develop brown rot from contaminated tools. A quick wipe-down between each plant keeps everything healthy, and it only takes a minute.
Visual Cues for Timing: In Step 2, when you’re deciding whether to trim those old leaves, look for the telltale bright green shoots emerging from the center. These new leaves indicate the plant is ready for renewal—don’t rush this step! The 6-week window after flowering is your guide, but the plant itself gives you the best signal.
Division Strategy: For Step 3, when dividing clumps, focus on creating sections with at least one healthy fan of leaves and one rhizome. I’ve found that smaller divisions (around 3-5 fans) establish more quickly than larger ones. After replanting, water thoroughly but avoid overwatering—the rhizomes need to breathe, especially in the first few weeks.
Winter Protection: In colder climates, that 2-3 inch layer of mulch around the base (not over the rhizomes) in Step 4 is crucial. It acts like a blanket, insulating the roots while allowing the rhizomes to stay exposed to winter sun. I’ve seen irises survive harsh winters thanks to this simple layer—don’t skip it if you’re in Zone 5 or colder!
Pro Tips for Iris Flower Pruning
- Seasonal care makes all the difference in keeping your irises thriving year after year.
- Tool Preparation: Sterilize your pruners with rubbing alcohol between cuts in Step 1 to prevent spreading fungal diseases.
- Visual Cues for Timing: In Step 2, when you’re deciding whether to trim those old leaves, look for the telltale bright green shoots emerging from the center.
Frequently asked questions
Got questions about keeping your irises blooming beautifully? Here are answers to the most common concerns—so you can prune with confidence!
When is the best time to prune iris flowers?
The ideal time to prune irises is late summer to early fall (August–September), after blooming but before new foliage emerges. This gives the plant energy to store for next year’s growth. Avoid pruning in spring—it disrupts the plant’s energy reserves!
Do I need to prune iris leaves or just the flowers?
You only need to prune the flower stalks (called fans) after blooming. The leaves should never be cut back until they turn yellow in late summer—this is how the plant stores nutrients. Cutting healthy leaves too soon weakens the rhizome.
What if I missed the fall pruning window? Can I prune in spring?
If you missed fall, wait until after the first frost (late fall/winter) or early spring (March–April) to prune. Avoid pruning right before new growth starts—this can stress the plant. Just remove dead or damaged foliage and wait for warmer weather to prune flower stalks.
How do I know if I’m pruning too much or too little?
Prune just the flower stalks (cut 2–3 inches above the ground) and never more than ⅓ of the foliage. If you see yellowing leaves after pruning, you’ve cut too much. Healthy irises should have 50–60% of their leaves remaining post-prune.
Can I prune iris flowers any other time of year?
While late summer/fall is best, you can lightly trim dead or diseased foliage anytime (even in winter). Avoid heavy pruning in spring or summer—it disrupts blooming cycles. If pests (like iris borers) strike, remove affected leaves immediately to protect the rhizome.
Wrapping up and next steps
Pruning your iris flowers at the right time—right after blooming—is the secret to vibrant, healthy plants year after year. 🌸 By removing spent blooms and thinning foliage, you encourage stronger growth, prevent disease, and set the stage for next season’s stunning displays.
Now that you’re armed with the when, how, and why, it’s time to roll up your sleeves and give your irises the care they deserve!
Ready to transform your garden? Start by inspecting your iris beds this week—whether it’s spring or fall—and follow the steps you’ve learned. Your future blooms will thank you!