
Pruning
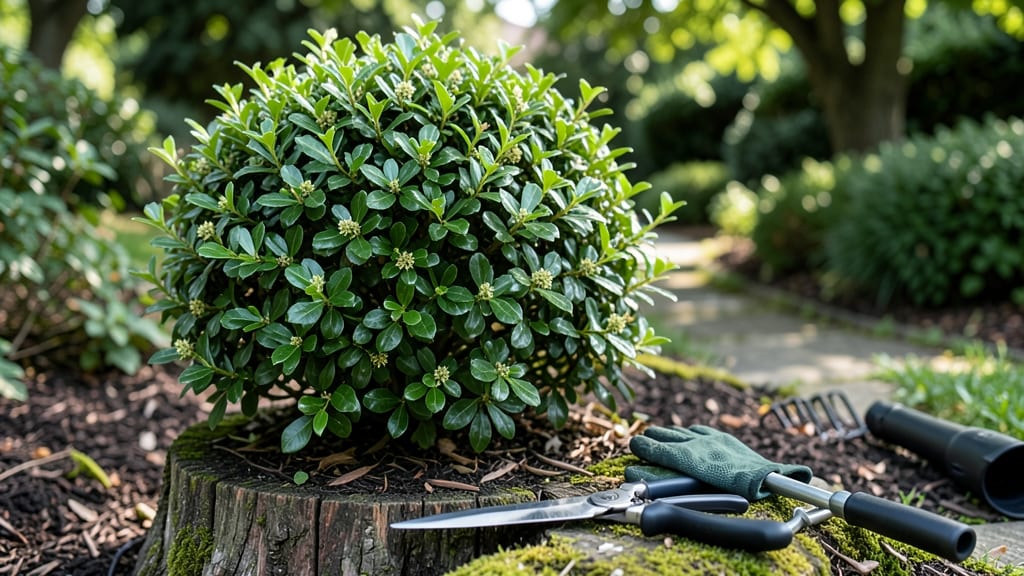
Pruning Japanese holly transforms it from scraggly to shockingly lush—and the best time to start is late winter, when the plant’s dormant but ready to rebound. 🌿 I’ve pruned mine for years, and the difference between a well-shaped shrub and one that looks like it lost a fight with a lawnmower is all in the cuts.
The key isn’t just when or how, but why—whether you’re shaping for symmetry, encouraging dense growth, or rejuvenating an overgrown mess.
You’ll need just three tools: sharp bypass pruners for clean cuts, loppers for thicker branches, and gloves to protect your hands from those tiny, prickly leaves. The real magic happens with your hands, though—feel for the natural growth pattern.
Japanese holly responds well to pruning because it’s a fast-healing evergreen, but timing matters: prune too late in spring, and you’ll stunt new growth; wait too long in fall, and you risk winter damage.
Start by removing dead or crossing branches first—they’re the easy wins. Then, shape the outer edges by cutting just above a leaf bud, always at a 45-degree angle to encourage water runoff. For a bushier look, trim back the tips of inner branches to prompt new shoots.
The result? A fragrant, dense shrub that stays compact yet full, with fewer gaps for pests or diseases to hide in.
Here’s the secret most people miss: prune in stages if your holly is large. Tackle one-third of the plant per year to avoid stress, and always clean your tools with rubbing alcohol between cuts to prevent spreading disease.
By late spring, you’ll see fresh green growth filling in those pruned spots—proof that even a neglected holly can make a dramatic comeback.
📚 In This Guide
- What you need
- Instructions
- Tips and common mistakes
- Wrapping up and next steps
What you need
- ● Pruning shears: Bypass pruners (sharp, 5-7" blades) for clean cuts—1 pair (e.g., Felco or Fiskars).
- ● Loppers: For thicker branches (1-2" diameter)—1 pair with bypass blades.
- ● Hand saw: For stubborn, woody stems—1 small pruning saw (e.g., 8" curved blade).
- ● Gloves: Heavy-duty, cut-resistant (e.g., Mechanix or leather)—1 pair.
- ● Disinfectant: 70% isopropyl alcohol or bleach solution (1:9 ratio) to sterilize tools—small spray bottle.
- ○ Pruning sealant: Optional for large cuts (>1/2")—1 small tube (e.g., Tanglefoot Tree Wound Pruning Seal).
- ● Ladder: Sturdy, extendable (6-10 ft) for tall shrubs—1 (if needed).
- ● Twine or zip ties: To secure branches during shaping—small roll.
- ● Mulch: Organic (e.g., shredded bark) to protect roots post-prune—1-2 bags.
- ● Notebook/pencil: To sketch pruning plans or track growth—1.
Instructions for pruning Japanese holly for year-round beauty
Here's how to shape your Japanese holly into a lush, fragrant hedge that stays vibrant through every season.
✂️ Step 1: Prune for Shape in Late Winter or Early Spring
Timing matters most—wait until just before new growth begins, usually in late February to early March in most climates. Start by removing any dead, diseased, or crossing branches first. These are easy to spot: they'll be brown, brittle, or growing inward toward the center of the plant.
Use sharp, clean pruning shears to make cuts at a 45-degree angle just above a leaf bud or outward-facing branch. This encourages healthy growth and prevents water from pooling on the cut. Step back often to check your progress—you want a naturally balanced shape, not a geometric one. Japanese holly responds well to light shaping, so don't be afraid to trim back up to one-third of the plant's height if needed.
☀️ Step 2: Thin Out for Airflow and Light Penetration
After shaping, focus on thinning the interior. Japanese holly can get dense, which blocks light and airflow—both of which invite pests and diseases. Look for branches growing straight up or inward; these are the first to go. Remove them completely at the base, cutting just outside the branch collar where it meets the main stem.
You'll know you're doing it right when you can see light filtering through the center of the plant. Aim to remove about 10-20% of the total foliage during this step. This might sound aggressive, but holly is tough—it'll bounce back with fresh, fragrant growth. If your plant is young (under 3 years old), skip this step and wait until it's more established.
✂️ Step 3: Light Maintenance Pruning in Summer and Fall
After the initial spring pruning, switch to lighter maintenance cuts. In late summer (August), trim any new growth that looks leggy or overcrowded. Leggy growth is easy to spot—it's long, thin stems with sparse leaves. Cut these back to just above a set of healthy leaves or buds.
In fall (October), do a final light pruning to remove any branches that spoil the shape or produce sparse berries. Avoid heavy cuts now—the plant needs time to harden off before winter. Instead, focus on tidying up and removing any berries that didn't develop properly. This keeps the plant looking neat and encourages stronger growth next spring.
🌿 Step 4: Clean Up and Protect for Winter
After your fall pruning, gather all the clippings and dispose of them properly. Don't compost diseased branches—they can spread pathogens. For healthy trimmings, you can shred and use them as mulch around the base of the plant, but keep them at least 6 inches away from the trunk to prevent rot.
Give your Japanese holly a final check before winter. If you notice any weak or damaged branches, trim them back now. Wrap the base of young plants with burlap or tree guard to protect them from rodents and harsh winds. Mature plants usually handle winter well, but a light layer of mulch around the base helps retain moisture and regulate soil temperature.
⏰ Step 5: Monitor and Adjust Year-Round
Japanese holly is low-maintenance, but keep an eye on it throughout the year. If you notice new growth pushing outward in early summer, trim it back to encourage a denser center. This is especially important for plants used as hedges—consistent trimming keeps them neat and full.
Watch for signs of stress, like yellowing leaves or sparse berries. These can signal over-pruning or poor soil conditions. If you see them, adjust your approach: either lighten up on future cuts or improve the soil with organic matter. A healthy Japanese holly should have deep green leaves, plentiful berries, and a compact, bushy shape—that's your goal.
Tips & tricks for perfect Japanese holly pruning
These simple strategies will help you keep your Japanese holly looking lush and vibrant all year long.
Timing is Everything: The late February to early March window for Step 1 is critical because it aligns with the plant's natural dormancy period. If you prune too early, you risk encouraging new growth that won't survive winter's cold. If you wait too long, you'll cut off potential spring blooms. Check for slight swelling at the branch tips—this is your cue that new growth is about to begin.
The Right Tools Make All the Difference: Never use dull or dirty pruning shears—they can tear branches and spread disease. I always clean my shears with rubbing alcohol between cuts and sharpen them annually. For Step 1, make sure your cuts are clean and precise at that 45-degree angle; this prevents water from sitting on the cut and causing rot. A small pair of bypass pruners works best for most holly branches.
Visual Cues for Perfect Pruning: When thinning in Step 2, imagine you're creating a "window" through the center of your plant. You should be able to see light filtering through when you're done. For Step 3's summer maintenance, look for branches that are longer than they are wide—these are your "leggy" growth targets. In fall, focus on removing branches that are growing at odd angles or producing sparse berries.
Year-Round Care Strategy: After your fall pruning in Step 4, I recommend marking your calendar for next year's late February to early March pruning. Write down any observations about your plant's growth patterns—this helps you adjust your approach each year. For example, if you notice more leggy growth in summer, you'll know to be more aggressive with thinning next spring.
Pro Tips for Japanese Holly Pruning
- These simple strategies will help you keep your Japanese holly looking lush and vibrant all year long.
- Timing is Everything: The late February to early March window for Step 1 is critical because it aligns with the plant...
- The Right Tools Make All the Difference: Never use dull or dirty pruning shears—they can tear branches and spread dis...
Frequently asked questions
Got questions about keeping your Ilex crenata (Japanese holly) lush and healthy? You’re not alone! Here are answers to the most common queries—so you can prune with confidence.
When is the best time to prune Japanese holly for maximum growth?
The ideal window is late winter or early spring (just before new growth starts), but you can also prune lightly after flowering in early summer. Avoid heavy cuts in fall—this plant needs time to harden off before winter. Pro tip: If you missed the spring deadline, a light trim in summer is better than none at all!
How much can I trim back my Japanese holly without harming it?
Japanese holly is highly resilient—you can safely remove up to 1/3 of its height or spread in a single session. For dense hedges, aim for 10-15% annual reduction to encourage bushiness. Warning: Over-pruning (beyond 1/3) may stress the plant, so take it slow!
What if my Japanese holly isn’t recovering after pruning?
If new growth stalls or leaves yellow, check for over-pruning, pests (like spider mites), or root issues. Try these fixes:
- Apply a balanced fertilizer (10-10-10) in spring.
- Water deeply 1-2 times weekly if soil feels dry.
- Inspect for chewed leaves or webbing—treat with neem oil if needed.
Can I shape Japanese holly into a topiary, and how?
Use sharp pruners or hedge shears to create clean lines, and wire frames for support. Start with a basic oval or spiral base, then refine layers over time. Key trick: Prune new growth first to maintain sharp edges—think of it like sculpting with green clay!
Are there any pruning alternatives if I hate the mess?
Yes! For low-maintenance care:
- Let it grow naturally—Japanese holly thrives with minimal pruning (just remove dead wood).
- Use string trimmers for quick, no-fuss shaping.
- Try selective pruning—trim only the longest, leggy branches to encourage density.
Wrapping up and next steps
Pruning your Japanese holly isn’t just about keeping it tidy—it’s your secret weapon for lush, fragrant growth year-round! 🌿 With the right timing, tools, and techniques, you’ll encourage dense foliage, vibrant berries, and even better resilience against pests.
Whether you’re a seasoned gardener or just starting, these tricks make the process simple and rewarding.
Ready to transform your holly into a thriving centerpiece? Grab your pruners and start small—even a few strategic cuts can make a big difference. Happy pruning!