
Pruning
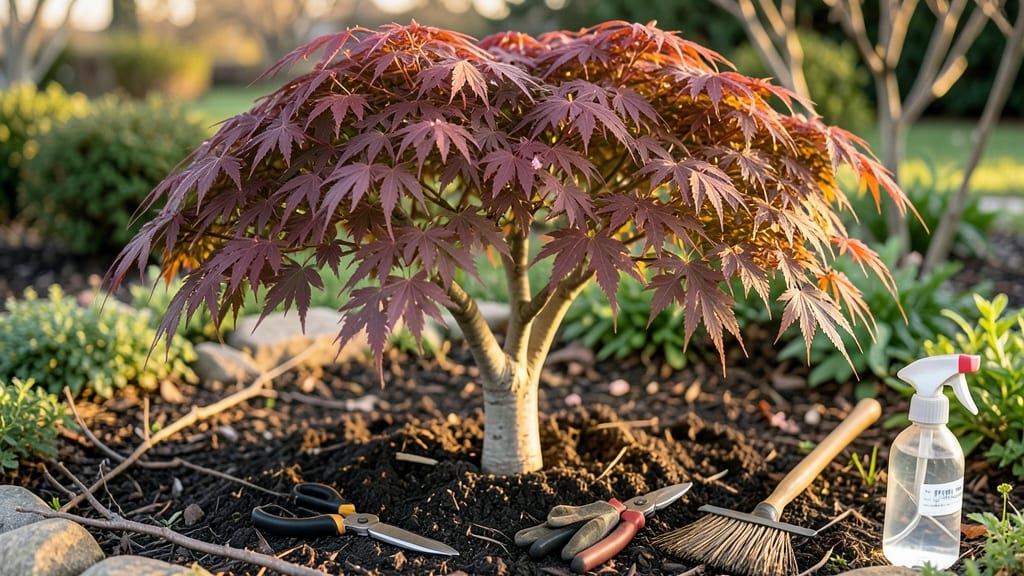
Japanese trees like cherry blossoms and maples deserve careful pruning to keep their graceful shapes and vibrant health. ✨ I’ve learned the hard way that aggressive cuts can ruin years of growth—so I’ve perfected a gentle approach that works for both beginners and seasoned gardeners.
The key is timing: prune dormant trees in late winter or early spring before new growth starts, and shape flowering trees right after they bloom. You’ll need sharp pruners, a ladder, and a clear vision of the tree’s natural form—no guesswork allowed.
With the right cuts, you’ll see fuller branches, fewer weak limbs, and a stronger structure that lasts for decades. The secret? Focus on opening the canopy to sunlight and air while preserving the tree’s elegant silhouette. This method works for all Japanese trees, from delicate sakuras to sturdy maples.
Let’s get those branches looking their best!
📚 In This Guide
- What you need
- Instructions
- Tips and common mistakes
- Wrapping up and next steps
What you need
- ● Pruning shears (bypass or anvil): Sharp, high-quality shears (e.g., Felco F-2 or Corona) for clean cuts on small branches (½"–1" diameter). Quantity: 1 pair.
- ● Loppers: For thicker branches (1"–2" diameter). Opt for bypass loppers (e.g., Felco 201) to avoid crushing wood. Quantity: 1 pair.
- ● Pruning saw: A curved-tooth saw (e.g., Felco 400) for branches >2" in diameter. Quantity: 1.
- ● Hand pruners (concave cutter): For delicate cuts on bonsai or ornamental trees. Quantity: 1 pair.
- ● Extension pole saw: For high branches (e.g., telescoping pole with a curved blade). Quantity: 1.
- ● Rubbing alcohol (70%+) or bleach solution: To sterilize tools between cuts and prevent disease spread. Quantity: Small bottle.
- ○ Tree wound dressing (optional): Pruning sealant (e.g., Tanglefoot Tree Wound Pruning Seal) for large cuts on non-bonsai trees. Quantity: Small tube.
- ● Gloves: Heavy-duty, cut-resistant gloves (e.g., Mechanix Wear) for protection. Quantity: 1 pair.
- ● Ladder or step stool: Sturdy, non-slip ladder for reaching higher branches. Quantity: 1.
- ● Tarp or drop cloth: To collect debris and protect the ground. Quantity: 1–2 (depending on tree size).
- ● Knowledge of tree species: Research your tree’s growth habits, pruning seasons (e.g., late winter/early spring for most Japanese trees), and sensitivity to cutting (e.g., maples bleed sap).
- ● Weather check: Prune on a dry, overcast day to reduce stress on the tree and prevent fungal infections.
- ● Safety gear: Safety glasses and long sleeves to protect against sap, debris, or thorns.
- ● Disposal plan: Have a trash bag or compost bin ready for pruned branches (avoid leaving debris near the tree base).
- ● String or twine: For marking branches to remove (e.g., for topiary shapes).
- ● Spray bottle with water: To dampen cuts on drought-sensitive trees.
- ● Camera or sketchpad: To document your progress or plan complex designs.
- ● Japanese pruning knife (e.g., kanna): For intricate bonsai work (requires practice!).
Instructions for Japanese tree pruning: restore balance and beauty
Here’s how I approach seasonal pruning to keep Japanese trees thriving—whether it’s late winter shaping or summer cleanup.
⏰ Step 1: Choose the Right Season for Your Pruning Goals
Japanese trees respond best to pruning at specific times. For structural shaping, prune in late winter or early spring (just before buds swell) when the tree is dormant. This lets you see the branch structure clearly and prevents disease spread. Summer pruning is best for light cleanup—remove only dead or crossing branches to avoid stressing the tree.
If you’re pruning for flowering or fruiting, wait until after the season (spring for spring blooms, fall for summer/winter blooms). Never prune when the tree is under stress—like during drought or extreme heat. I always mark my calendar with seasonal reminders to avoid this common mistake.
✂️ Step 2: Gather Tools and Prepare for Clean Cuts
Use sharp, clean pruning tools—a bypass pruner for small branches and loppers for thicker stems. Disinfect your tools with rubbing alcohol between cuts to prevent spreading disease. I keep a small spray bottle of alcohol handy to wipe blades mid-session if I notice sap or debris buildup.
Wear gloves and have a bucket or tarp ready to collect debris. Japanese trees often have delicate bark, so avoid tearing it with rough tools. If you’re working with larger branches, use three cuts to avoid bark stripping: the first under the branch, the second just outside the branch collar, and the third to remove the branch stub.
🌿 Step 3: Remove Dead, Diseased, or Crossing Branches First
Start by identifying dead or diseased branches—they’ll be dry, brittle, or discolored. Cut these out completely, making your cuts at the branch collar (the swollen area where the branch meets the trunk). Next, remove any branches that cross or rub against each other. These create wounds and weaken the tree over time.
Watch for suckers (shoots growing from the base or trunk) and remove them immediately. Suckers drain energy from the main structure. I like to step back every few cuts to visualize the tree’s natural shape—this helps me avoid over-pruning, which can stress the tree.
🌱 Step 4: Shape the Tree for Balance and Airflow
Now focus on refining the tree’s form. Japanese trees often benefit from an open-center shape to allow light and air to circulate. Thin out overcrowded branches starting from the inside, working outward. Aim to remove no more than 25% of the tree’s foliage in one session—this keeps the tree healthy and resilient.
Use hand pruners for precision cuts on smaller branches, and loppers for thicker stems. Step back frequently to check symmetry. If a branch is too long, cut it back to a bud or lateral branch that faces the direction you want growth to continue. I often sketch a rough outline of the tree’s ideal shape before I start—it’s a game-changer for consistency.
☀️ Step 5: Finish with Light Pruning and Aftercare
After shaping, do a final pass to remove any remaining dead wood or water sprouts (fast-growing, weak shoots). Seal larger cuts (over ½ inch in diameter) with pruning sealant to prevent disease entry. For smaller cuts, let them heal naturally—the sealant isn’t always necessary and can trap moisture.
Water the tree deeply after pruning to help it recover. Avoid heavy fertilization right after pruning—let the tree focus on healing for 4-6 weeks before feeding. I also mulch around the base with 2-3 inches of organic mulch to retain moisture and protect roots.
Tips & tricks for perfect Japanese tree pruning
These practical insights will help you transform your pruning session from stressful chore to satisfying art—without harming your tree.
Seasonal Timing is Everything: The late winter/early spring window for structural shaping isn't just about avoiding buds—it's about catching the tree when it's naturally dormant but ready to respond. I've learned this the hard way after seeing spring-blooming trees lose potential flowers when pruned too early. For summer cleanup, limit yourself to just removing deadwood and crossing branches to avoid shocking the tree during its active growth phase.
Tool Sharpness Matters More Than You Think: Dull pruners don't just make messy cuts—they tear bark and create larger wounds that invite disease. I keep a small file in my toolkit to quickly sharpen blades between sessions. For larger branches, the three-cut method (under, outside collar, final removal) prevents bark stripping that can take years to heal. This is especially critical with Japanese trees whose delicate bark is prone to damage.
Visualize Before You Cut: Step back every 5-10 minutes during shaping to check your progress against the tree's natural form. I've found that sketching a rough outline on paper first prevents over-pruning—Japanese trees can handle up to 25% foliage removal in one session, but many people exceed this limit when focused on details. The open-center approach isn't just aesthetic; it dramatically improves airflow and sunlight penetration.
Aftercare Prevents Reversal: That deep watering and 4-6 week fertilization wait aren't arbitrary—they give the tree time to seal wounds naturally. I've seen pruned Japanese trees decline when owners rushed to fertilize immediately. The organic mulch layer isn't just for looks; it maintains consistent soil moisture while protecting roots from temperature fluctuations during recovery.
Pro Tips for Japanese Tree Pruning
- These practical insights will help you transform your pruning session from stressful chore to satisfying art—without harming your tree.
- Seasonal Timing is Everything: The late winter/early spring window for structural shaping isn't just about avoiding buds—it's about catching the tree when it's naturally dormant but ready to respond.
- Tool Sharpness Matters More Than You Think: Dull pruners don't just make messy cuts—they tear bark and create larger wounds that invite disease.
Frequently asked questions
about Japanese tree pruning—because even the most beautiful bonsai or traditional landscape needs a little TLC! Here are answers to the most common questions to keep your trees thriving.When is the best time to prune Japanese trees?
The ideal time depends on the species! For most Japanese trees like maples or pines, late winter to early spring (just before new growth) is best. Evergreens can be pruned in early spring or late fall. Avoid pruning during extreme heat or cold—think of it like giving your tree a spa day at the right season!
Can I prune Japanese trees myself, or should I hire a professional?
Small pruning tasks (like shaping or removing dead branches) are DIY-friendly with the right tools! However, for large trees, complex designs (like bonsai), or structural work, a professional arborist ensures safety and precision. If you’re unsure, start with a consultation—they’ll guide you on what you can handle yourself.
What if I prune too much? Will my tree die?
Over-pruning is a common worry, but most healthy trees bounce back! As a rule, never remove more than 25-30% of the foliage in one session. If you’ve already overdone it, focus on watering deeply, fertilizing lightly, and avoiding stress (like heavy winds). Your tree might look sad for a bit, but it’ll recover with patience!
Are there any Japanese trees that shouldn’t be pruned?
Some trees, like Japanese yews (Hinoki) or sacred bamboo, are sensitive to heavy pruning. Others, such as Japanese maples with delicate bark, should only be pruned with sharp tools to avoid tearing. Always research your specific tree—when in doubt, prune minimally and observe how it responds.
How do I know if my tree needs pruning?
Watch for these signs:
- Dead or crossing branches (they weaken the tree).
- Overgrowth blocking sunlight (affects health and aesthetics).
- Unusual leaf color or sparse foliage (could signal stress or disease).
- Safety hazards (like branches near power lines or roofs).
Wrapping up and next steps
Mastering Japanese tree pruning isn’t just about aesthetics—it’s a year-round commitment to your trees’ health and beauty. 🌿 By understanding seasonal techniques, tools, and cultural practices, you’re well on your way to creating stunning, thriving landscapes that reflect the harmony of wabi-sabi.
Whether you’re a beginner or a seasoned gardener, every trim brings you closer to that serene, balanced garden you envision.
Ready to take the next step? Start small—pick one tree this season and apply what you’ve learned. Over time, your confidence and skills will grow, just like the branches you shape! Happy pruning! 🌳✨