
Pruning
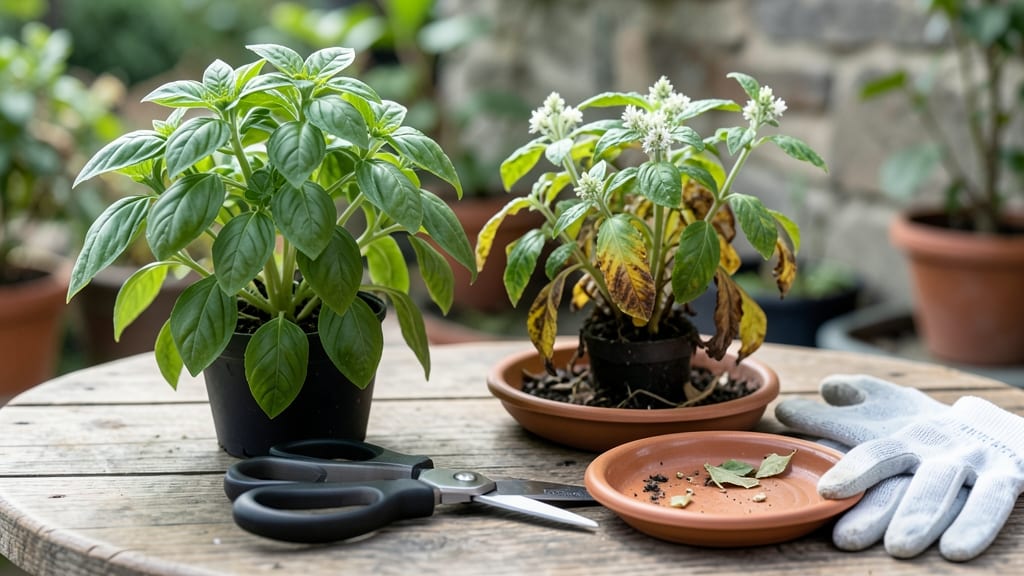
Pruning basil for winter isn't just about cutting back—it's about giving your plants a fighting chance against frost. 🌿 I learned the hard way when my basil froze solid last December, but now I know exactly when to trim and how to protect it.
The key window opens in late October, just as temperatures dip but before hard frost hits.
Start by harvesting all the leaves you can—fresh pesto never tasted so good. Then, trim back the stems by about one-third, focusing on leggy growth and yellowing leaves. This redirects energy to the roots, helping the plant store nutrients for spring.
If your basil is in containers, move them to a sunny windowsill or under grow lights before the first frost.
For those who want to overwinter basil, keep the soil barely moist and temperatures above 45°F. You'll see new growth in early spring, and with proper care, your plants will be ready for another growing season by May. The smell of fresh basil in February is worth the effort!
If you're in a colder climate, consider bringing potted basil indoors entirely. Just watch for pests like spider mites, which love dry indoor air. With these tricks, you'll have basil that survives winter and thrives in spring—no store-bought pots needed.
📚 In This Guide
- What you need
- Instructions
- Tips and common mistakes
- Wrapping up and next steps
What you need
- ● Sharp pruning shears or scissors – Clean, sterilized, and sharp (avoid dull tools that crush stems). A bypass pruner is ideal for clean cuts.
- ● Rubbing alcohol (70% isopropyl) or hydrogen peroxide – For sterilizing tools before and after use (1-2 tbsp per cut or wipe).
- ○ Glove – Optional but recommended to protect hands from thorns or sap irritation.
- ● Container or bucket – Large enough to hold pruned cuttings (5+ gallons for 10-15 plants).
- ○ Rooting hormone (optional but helpful) – Powder or gel to boost propagation success (e.g., Clonex or Rootone).
- ● Well-draining potting mix – Lightweight and airy (e.g., cactus/succulent mix or a blend of peat moss + perlite).
- ● Small pots or trays – 3-4 inch diameter for individual cuttings (or a propagation tray with cells).
- ● Spray bottle with water – For light misting to keep cuttings hydrated.
- ● Grow lights or sunny windowsill – 6+ hours of indirect light daily for cuttings to root (LED full-spectrum bulbs work great).
- ● Humidity dome or plastic wrap – Creates a mini greenhouse to retain moisture while roots form.
- ● Fertilizer (diluted) – Balanced liquid fertilizer (5-5-5 or 10-10-10) to nourish cuttings after roots sprout (use at half-strength).
- ○ Heat mat (optional for indoor growers) – Keeps soil warm (70-75°F) to speed up rooting.
- ● Labeling tags – To track varieties (e.g., Genovese, Thai, or Purple basil).
Step-by-step guide to pruning basil for winter survival
Here's how I save my basil year after year—no fancy tools, just sharp scissors and a little patience.
✂️ Step 1: Assess the Plant and Identify What to Cut
Start by giving your basil a thorough inspection. Look for woody stems—these are thick, brown, and no longer produce tender leaves. These are your first targets. Healthy stems should be green and flexible, not brittle. I like to run my fingers along the stems to feel for the transition point between green and brown.
Next, check for damaged or diseased foliage. Yellow leaves, brown spots, or anything that looks sad needs to go. Basil is sensitive to fungal issues like downy mildew, so removing affected leaves immediately prevents the whole plant from crashing. Use clean, sharp scissors to make precise cuts—never tear leaves by hand.
✂️ Step 2: Prune Back to Healthy Growth Points
For each woody stem, cut back to the base of the plant or to a point where you see new green growth emerging. This encourages the plant to focus its energy on regenerating tender shoots rather than maintaining dead wood. I usually make my cuts at a 45-degree angle just above a leaf node—this helps water run off and prevents rot.
If your basil is still mostly green but leggy, prune back by about one-third to encourage bushier growth. Focus on cutting just above a set of leaves where new branches will sprout. Avoid cutting into the center of the plant—this creates a "donut hole" that traps moisture and invites disease.
🌿 Step 3: Harvest and Use the Pruned Foliage
Don't toss those pruned leaves! Basil loses its delicate flavor as it woody, so use what you've cut immediately. Chop the tender leaves for pesto, add them to soups, or dry them for winter use. I like to spread the leaves on a screen in a warm, dry place for a few days until crisp, then store them in an airtight jar.
While harvesting, keep an eye out for flower buds. If you see any forming, pinch them off immediately. Basil flowers signal the plant to shift energy from leaves to seeds, and once it bolts, the leaves turn bitter. This is especially important if you're trying to overwinter your plant—no flowers means more leafy growth.
🪴 Step 4: Prepare for Indoor Overwintering
Once you've pruned, move your basil to a bright indoor spot near a south-facing window. Basil needs at least 6 hours of sunlight daily to survive winter. If your space is dim, supplement with a grow light kept 6-12 inches away from the plant. I use a simple LED bulb on a timer for 12-14 hours a day.
Reduce watering significantly—basil in winter needs far less moisture. Water only when the top inch of soil feels dry, and avoid getting water on the leaves to prevent fungal issues. I like to use a spray bottle for light misting around the base rather than pouring water from above.
⏰ Step 5: Monitor and Maintain Through Winter
Check your basil weekly for new growth. If you see tender shoots emerging, it's a good sign your plant is recovering. Prune lightly again in 6-8 weeks to encourage another round of bushy growth. If the plant looks sad or stops producing new leaves, it might be time to start fresh in spring.
Watch for pests like spider mites, which love dry indoor air. Wipe leaves with a damp cloth if you spot webbing or tiny dots. I also rotate the pot a quarter turn weekly so the plant grows evenly toward the light. With proper care, your basil can live for years, giving you fresh leaves long after most garden herbs have faded.
Tips & tricks for perfect winter basil pruning
These simple strategies will help you extend your basil's life and keep it thriving through the cold months.
Timing is Everything: The key to successful winter pruning is doing it before the first frost hits your area. I typically start my late-season pruning in late September or early October, when nights begin to cool but before temperatures drop below 50°F. This gives your basil time to recover and establish new growth before winter sets in. If you miss this window, don't worry—you can still try, but recovery may be slower.
Clean Tools are Non-Negotiable: Before you start cutting, sterilize your scissors with rubbing alcohol or boiling water. I learned this the hard way after my basil developed fungal spots from dirty tools. Clean tools prevent spreading disease and keep your plant healthy. You can also sharpen your scissors regularly to make clean cuts that heal faster and reduce stress on the plant.
Light Matters More Than You Think: That 6 hours of sunlight is non-negotiable for winter survival. If your indoor space only gets morning sun, rotate your basil pot daily to give all sides equal exposure. I've had success with south-facing windows, but even east or west-facing windows can work if supplemented with grow lights for the remaining hours. The goal is to mimic natural daylight conditions as closely as possible.
Pro Tips for Prune Basil For Winter
- These simple strategies will help you extend your basil's life and keep it thriving through the cold months.
- Timing is Everything: The key to successful winter pruning is doing it before the first frost hits your area. I typic...
- Clean Tools are Non-Negotiable: Before you start cutting, sterilize your scissors with rubbing alcohol or boiling wat...
Frequently asked questions
Got questions about pruning basil for winter? You’re not alone! Here are answers to the most common concerns—so you can keep your plants thriving (or at least save what you can) before the cold sets in.
When is the exact best time to prune basil for winter?
Prune basil before the first hard frost—typically 4–6 weeks ahead of your area’s average first freeze (check your USDA zone). Aim for late summer to early fall (August–October in most regions). If frost hits unexpectedly, act fast: trim back hard to salvage stems for indoor regrowth or harvest.
Can I prune basil too late in the season?
Yes, but with limits. If frost is imminent, prune just enough to harvest leaves or save stems for indoor pots. Over-pruning late can stress the plant, making it vulnerable to cold. Focus on harvesting (not pruning) if frost looms—strip leaves for pesto or drying instead.
How do I save pruned basil stems for indoor regrowth?
Trim healthy stems (4–6 inches) with 2–3 leaves, strip lower leaves, and place them in water. Keep in bright, indirect light (like a sunny windowsill) and change water every 2 days. Roots should sprout in 1–2 weeks—then transplant to soil! Pro tip: Use a clear jar to track root growth.
What if my basil looks sad after pruning—should I panic?
Not necessarily! Basil may look leggy or sparse post-pruning, but it’s normal. Focus on light (6+ hours/day) and water (keep soil moist but not soggy). If leaves yellow or droop, it might need more nutrients—dilute fish emulsion or compost tea to revive it. Patience is key!
Can I prune basil after it’s been frostbitten?
Unfortunately, frost-damaged basil is usually a lost cause. Prune off only the blackened or mushy parts to prevent rot, but the plant won’t recover. Save what you can: harvest any undamaged leaves for cooking or drying. Next year, start earlier with cold-hardy varieties like Genovese or Sweet Basil.
Wrapping up and next steps
Pruning basil for winter isn’t just about survival—it’s your chance to nurture a thriving herb garden come spring! 🌱 By following these late-season tricks, you’ll protect your plants from frost while keeping them healthy and ready for regrowth.
Now that you’re armed with the right techniques, grab those shears and give your basil the care it deserves—your future pesto (and dinner table) will thank you!
Ready to take it further? Mark your calendar for early spring pruning to encourage fresh growth, and consider harvesting and drying some leaves now for winter cooking. Happy gardening!