
Pruning
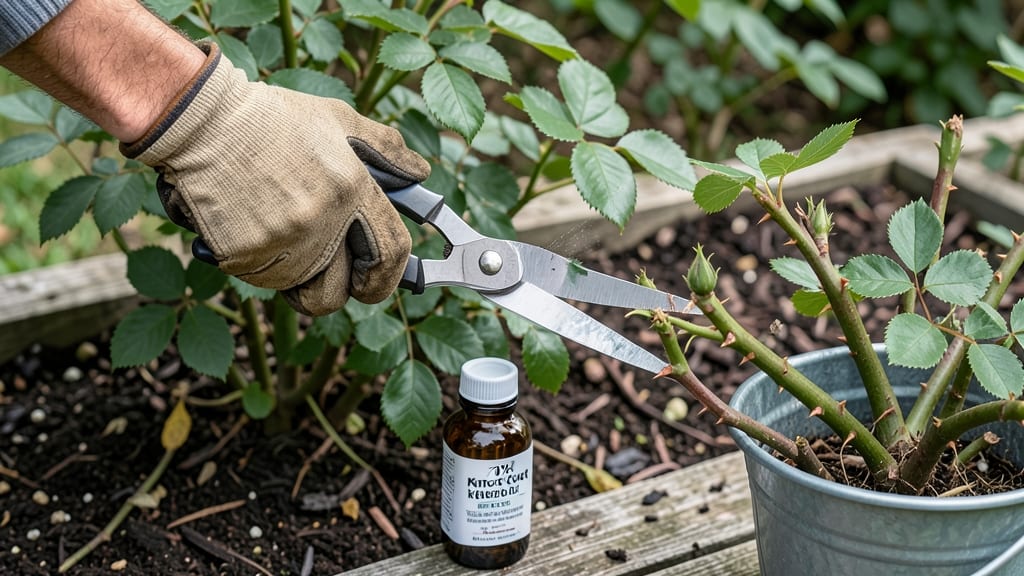
February’s sharp air is the perfect time to prune rose bushes—when the ground stays frozen but buds peek through. ✂️ I’ve learned that cutting now forces roses to focus energy on vibrant spring blooms instead of leggy growth, and the results are worth the effort.
The key? Timing, the right tools, and knowing which canes to keep (or toss). You’ll need clean pruners, rubbing alcohol for disinfecting, and a sharp saw for thicker stems. Work on a dry day when temps hover above freezing—this prevents stress on fresh cuts.
For most roses, aim to remove one-third of last year’s growth, cutting at a 45-degree angle just above an outward-facing bud. What you’ll end up with is a bush shaped like an open vase, with strong stems ready to burst into blooms.
The fragrance alone makes it worth the work—imagine hundreds of buds waiting to unfurl by May. Just avoid pruning too late in warm zones, or you risk encouraging tender new growth that frost can’t handle.
Here’s the trick: hybrid teas and floribundas need aggressive cuts to stay compact, while climbers and shrub roses benefit from lighter shaping. Always prune above a bud that faces outward—this creates airflow and prevents disease.
And never prune into wet wood (it’s easier to spot now that branches are bare). Confession: I’ve killed roses by pruning too early or too late, but this method has nailed it for me over five seasons. The secret? Patience.
A well-pruned rose rewards you with longer bloom seasons and fewer pests. Now grab those shears—spring’s waiting.
📚 In This Guide
- What you need
- Instructions
- Tips and common mistakes
- Wrapping up and next steps
What you need
- ● Pruning shears: Bypass pruners (sharp, clean, and disinfected with rubbing alcohol or bleach solution). Avoid anvil pruners—they crush stems!
- ● Loppers: For thicker branches (½"–1½" diameter). Look for long handles (24–36") for leverage.
- ● Hand saw: Pruning saw with a curved blade for stubborn, thick stems (1½"+ diameter).
- ● Gloves: Heavy-duty, cut-resistant gloves (rose thorns are no joke!). Leather or reinforced fabric works best.
- ● Disinfectant: 70% isopropyl alcohol or 1-part bleach to 9-parts water to sterilize tools between cuts (prevents disease spread).
- ● Rake or broom: To clear fallen leaves/debris from the base of the bush.
- ● Sharpener: A file or honing tool to keep blades razor-sharp mid-pruning.
- ● Marking twine or spray paint: To tag branches for removal (if you’re unsure which to cut).
- ● Compost bin or bag: For collecting pruned stems (they’ll decompose into nutrient-rich mulch!).
- ● Knee pads or stool: For comfort—February pruning is a marathon, not a sprint!
- ● Weather check: A light jacket or rain gear (February weather is unpredictable!).
Step-by-Step instructions for pruning rose bushes in February
Here’s how I transform bare winter bushes into spring’s most fragrant stars—clean cuts and all.
✂️ Step 1: Gather Tools and Assess the Bush
First, grab sharp bypass pruners (dull blades crush stems) and a disinfectant solution (1 part bleach to 9 parts water) to wipe them between cuts. I always wear gloves—thorns don’t care about your mood. Stand back and scan the bush for dead, crossing, or weak stems. These are your first targets.
Look for blackened or shriveled canes (dead wood) and stems rubbing together (they’ll create wounds). Snap off any dead blooms from last fall—those sapped energy that could fuel new growth. Real talk: if a stem’s center is hollow or crumbly, it’s history. Cut it out completely at the base.
✂️ Step 2: Make the Big Cuts—Shape for Airflow
Now for the main event: cut back last year’s growth by one-third. For hybrid teas and floribundas, aim to remove stems down to an outward-facing bud (about ¼ inch above it). Angle your cuts slightly downward to shed water away from the bud. I like to imagine the bud as a tiny umbrella—water should roll off, not pool.
For climbing roses, prune to 3-5 strong canes, cutting each back to 12-18 inches tall. You’re sculpting, not hacking—step back often to check balance. If the bush looks lopsided, trim more from the thicker side. Weak, spindly stems? Snip them at the base. This isn’t about quantity; it’s about setting up strong, fragrant blooms.
🌱 Step 3: Thin Out for Light and Air
Now focus on interior stems—the ones growing toward the center. These crowd out airflow and invite disease. Cut these back aggressively, even if they’re healthy. You’re creating an open vase shape where air circulates freely. I target 3-5 main stems per bush, spaced evenly around the plant.
Watch for suckers (shoots growing from the base or graft union). These are energy vampires—remove them completely. If you see any mushroom-shaped growths at the base, that’s crown gall. Prune above it and disinfect your tools immediately. Healthy roses bloom best when they’re not fighting for space.
⏰ Step 4: Clean Up and Protect New Growth
Rake up all clippings and dispose of them in the trash (never compost—diseases hide in rose debris). Now’s the time to apply a 2-inch layer of mulch around the base, keeping it 6 inches away from the stem. I use shredded bark because it insulates roots while breaking down slowly. Water deeply to settle the mulch—this keeps soil moist for root growth without drowning the plant.
Finally, spray the bush with a fungicide (like neem oil or copper-based solution) to protect fresh cuts. I do this on a calm evening so the spray settles evenly. Avoid pruning if rain’s forecasted within 24 hours—wet cuts take longer to heal and invite rot. Your goal is clean wounds that seal quickly for a strong spring start.
🌿 Step 5: Monitor and Adjust for Spring
Check your roses in 4-6 weeks—that’s when you’ll see if your cuts paid off. New growth should emerge pale green and tender from the buds you left behind. If you notice yellowing leaves or stunted shoots, it’s a sign of over-pruning. Next time, leave those buds!
Here’s the thing—roses are forgiving. If you missed a bud or two, don’t stress. Just watch for swollen buds (they’ll bloom in late spring) and thick canes (these are your powerhouses). Adjust as you go. By late March, your bush should look like a well-groomed sculpture, not a tangled mess. That’s your reward for February’s work.
Tips & tricks for pruning rose bushes in late winter
These simple tricks will help you prune like a pro—no green thumb required.
Tool Prep is Everything: Before you make a single cut, sharpen your bypass pruners with a file or honing tool. Dull blades crush stems instead of cutting cleanly, which invites disease. I test my blades by cutting a piece of paper—if it tears instead of slicing smoothly, it’s time to sharpen. Also, disinfect your tools between cuts using a 1:9 bleach-to-water solution to prevent spreading disease from one part of the bush to another.
The One-Third Rule: When you cut back last year’s growth by one-third in Step 2, remember this isn’t about being precise—it’s about balance. For hybrid teas, look for outward-facing buds when making your cuts. I like to count stems while I work: if I see more than 3-5 main stems after pruning, I trim the extras. This creates that perfect open vase shape that lets air and sunlight circulate freely.
Sucker Patrol: In Step 3, those sneaky suckers growing from the base or graft union are energy thieves. I make it a habit to circle the base of the bush and snip anything growing below the graft union (that raised bump near the soil). These shoots won’t produce quality blooms—they’ll just drain energy from your main stems. Pro tip: if you see any mushroom-shaped growths at the base, that’s crown gall. Cut above it immediately and disinfect your tools.
Weather Watch: Never prune if rain is forecasted within 24 hours. Wet cuts take longer to heal and become prime targets for fungal infections. I check the weather app before grabbing my tools—this single precaution makes all the difference between healthy new growth and a bush struggling with rot. If you’ve already pruned and rain is coming, apply a fungicide spray immediately to protect those fresh cuts.
Pro Tips for Prune Rose Bush February
- These simple tricks will help you prune like a pro—no green thumb required.
- Tool Prep is Everything: Before you make a single cut, sharpen your bypass pruners with a file or honing tool. Dull b...
- The One-Third Rule: When you cut back last year’s growth by one-third in Step 2, remember this isn’t about being prec...
Frequently asked questions
Got questions about February rose pruning? You’re not alone! Here are answers to the most common concerns—so you can confidently shape your bushes for a showstopping spring blooming season.
Why prune roses in February instead of waiting until spring?
February is ideal because it’s late dormancy—the perfect time to remove dead or weak wood before new growth starts. Pruning now encourages stronger stems and earlier, more abundant blooms. Just avoid pruning if your roses are still in hard frost zones (wait until temps stabilize above 40°F).
What if my roses are still covered in snow or frost?
Don’t prune if the ground is frozen or snow-covered—wait until at least 2–3 weeks after the last frost in your area. Cold stress can shock the plant, and wet conditions may slow healing. Check your local frost dates or use a USDA Plant Hardiness Zone Map for guidance.
How do I know if I’ve pruned too much or too little?
Here’s the rule of thumb: Cut back 1/3 of the plant’s height (or to an outward-facing bud) for most hybrid teas and floribundas. Over-pruning (more than 1/3) can stress the bush, while under-pruning (leaving too much) may lead to crowded, leggy growth. Look for a balanced shape with open centers.
Can I prune roses in February if they’re still blooming?
If your roses are winter-blooming varieties (like Knock Out® roses), prune lightly to shape them—just avoid heavy cuts. For spring-blooming roses, prune aggressively in February to remove all old blooms and dead wood. The goal? Redirect energy to new growth for a bigger spring show.
What if my rose bush bleeds sap after pruning?
Sap bleeding (a sticky, red liquid) is normal and harmless—it’s the plant’s way of sealing wounds. To minimize it, prune on a dry, cool day (not hot or humid) and use sharp, clean tools. Avoid pruning in extreme heat, which can stress the plant further. The sap will dry up in a few days!
Are there alternatives if I miss February pruning?
Yes! You can prune roses throughout late winter into early spring (up to March or April, depending on your climate). Just avoid pruning after buds swell (around late April–May), as this can damage new growth. For major shaping, February is best—but light maintenance cuts are fine later.
Wrapping up and next steps
Pruning your rose bushes in February isn’t just about tidying up—it’s your secret weapon for a burst of vibrant blooms this spring!
By removing dead wood, shaping for airflow, and encouraging new growth, you’re setting the stage for a fragrant, thriving garden. 🌸 With the right tools, timing, and technique, you’ll be well on your way to a showstopping rose display.
Ready to roll up your sleeves? Grab those pruners and make February your month—your roses will thank you with lush, healthy growth and a spectacular spring show. Next up: Check out our guide on post-pruning care to keep those stems strong and blooms abundant!