
Pruning
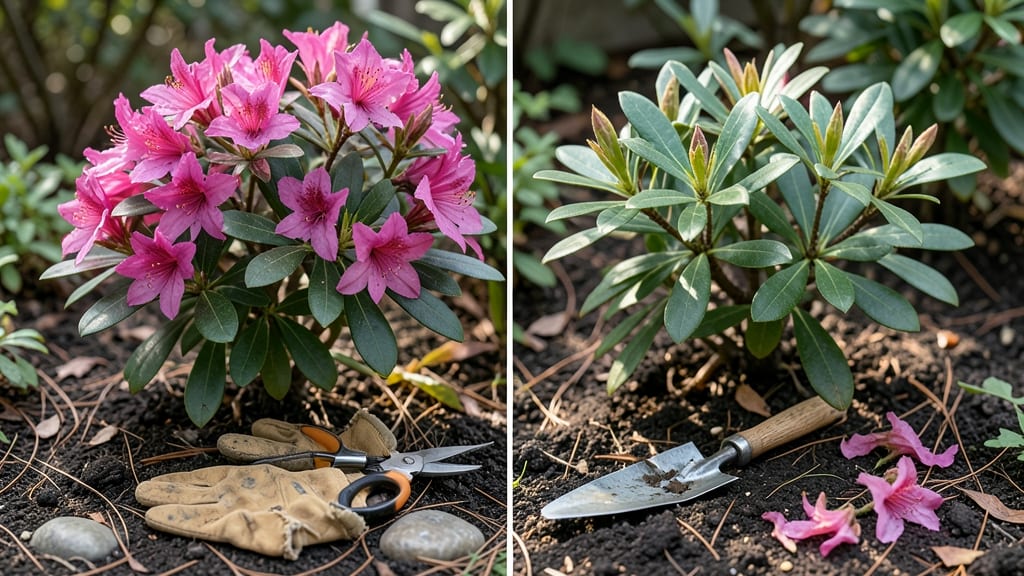
Your pruning azaleas before and after blooming could double their springtime show—if you time it right. ✂️ I’ve pruned these shrubs for years, and the difference between a wild, leggy mess and a showstopping display comes down to timing, technique, and a little patience.
Most people wait too late or hack too aggressively—and end up with sparse flowers or stressed plants.
The best time to prune is right after blooming (late May to early June for most zones), when the flowers have faded but before summer heat stresses the plant.
You’ll need sharp bypass pruners, gloves, and a clear vision of your shrub’s natural shape—think of it like giving your azalea a haircut that encourages fullness, not thinning. The goal isn’t to make it perfect; it’s to remove dead wood, shape for airflow, and redirect energy to next year’s blooms.
What you’ll end up with is a denser, healthier shrub bursting with flowers in two seasons. The branches fill in where they were once sparse, and the plant focuses its energy on vibrant blooms instead of floppy, overgrown stems.
It’s the kind of transformation that makes neighbors pause and ask, “How’d you do that?”—and the secret is in the cuts.
This method works for all azalea types, from evergreen to deciduous, and adapts to containers or landscape plantings. The key is consistency: prune the same way every year, and your azaleas will reward you with showier blooms and fewer pests over time. Let’s get those shears ready!
📚 In This Guide
- What you need
- Instructions
- Tips and common mistakes
- Wrapping up and next steps
What you need
- ● Bypass pruners – Sharp, clean, and 5- to 6-inch blades (1 pair). Avoid anvil pruners—they crush stems.
- ● Hand pruners – For smaller branches (¼-inch thick or less) (1 pair). Look for ergonomic grips for comfort.
- ● Loppers – For thicker branches (½-inch to 1½-inch) (1 pair). Choose bypass-style for precision.
- ● Pruning saw – For stubborn, thick branches (1½-inch+) (1). A curved blade works best.
- ● Garden gloves – Cut-resistant, durable material (1 pair). Protects hands from thorns and scrapes.
- ● Disinfectant (rubbing alcohol or 10% bleach solution) – To sterilize tools between cuts (small bottle or spray). Prevents disease spread.
- ● Pruning shears with a built-in ruler – For measuring cuts accurately (1). Saves time and guesswork.
- ● Tarp or drop cloth – To collect debris (1). Keeps your workspace clean.
- ● Spray bottle with water – To dampen cuts (small). Reduces sap splatter and makes cuts cleaner.
- ● Marking twine or flags – To tag branches for removal (small pack). Useful for large shrubs.
- ● Check the weather forecast – Prune on a dry, overcast day or early morning to avoid stressing the plant.
- ● Know your azalea’s age and type – Mature shrubs (3+ years) need heavy pruning; younger ones just need shaping.
- ○ Gather safety gear – Sunglasses and long sleeves (optional but recommended). Protects from sap and debris.
Instructions for pruning azaleas before and after blooming
Here's the method I use to keep my azaleas flowering like clockwork—year after year.
✂️ Step 1: Prune After Blooming (Late Spring)
Wait until 2-3 weeks after flowers fade—this gives the plant time to set next year's buds. I always prune right after Memorial Day when the blooms have dropped completely. Use clean, sharp pruners to avoid tearing the bark, which invites disease.
Focus on removing dead or crossing branches first. These are the ones rubbing against others or growing inward. Cut all the way back to the main stem or outward branch. You'll know you're doing it right when the plant starts looking more open and airy.
Next, trim back any overly long stems to just above a set of leaves or a side branch. Never cut into old wood—azaleas bloom on new growth, and you want to preserve those healthy stems. Aim to shape the plant into a rounded form rather than a flat top.
☀️ Step 2: Light Pruning for Air Circulation (Early Summer)
About 6-8 weeks after the first pruning, do a quick check for any new growth that's too dense. Azaleas need good airflow to prevent fungal issues. I look for clusters of branches growing too close together and thin them out by removing the smallest stems.
This isn't about heavy shaping—just creating space. You'll see where the plant naturally wants to grow thicker, and that's where you make your cuts. Thin out about one-third of the smallest branches in each cluster. The goal is to let sunlight reach the inner stems.
I always prune on a dry morning to reduce stress on the plant. If you notice any yellowing leaves after pruning, it's just the plant adjusting—don't worry unless it continues for more than a week.
⏰ Step 3: Prepare for Next Year's Blooms (Fall)
In late fall, after the first hard frost, give your azaleas a final check. Remove any dead, diseased, or weak branches that became obvious over the winter. This is also the time to shape any new growth that might have gotten out of hand.
Focus on maintaining the plant's natural shape while keeping it open in the center. I like to step back and look at the plant from all sides to ensure it's balanced. If one side looks too bare, trim back the opposite side slightly to even things out.
Don't be afraid to make bold cuts—azaleas are tougher than they look. Just avoid cutting into old wood, as it won't produce new blooms. After pruning, give the plant a light feeding with an acid-loving fertilizer to encourage strong root growth for next spring.
🌱 Step 4: Spring Maintenance (Early Season)
In early spring, before new growth appears, do a final inspection. Remove any dead wood or crossing branches that might have appeared over the winter. This keeps the plant healthy and ensures energy isn't wasted on weak stems.
You'll notice new shoots starting to emerge—these are the buds for next year's flowers. Avoid pruning these new growths unless they're absolutely necessary. Instead, focus on keeping the plant tidy and removing any debris from around the base.
Water deeply after pruning to help the plant recover. Azaleas prefer consistently moist soil, especially after a heavy pruning session. Mulch around the base with 2-3 inches of organic mulch to retain moisture and protect roots from temperature swings.
Tips & tricks for perfect azalea pruning
Here's what nobody tells you about keeping your azaleas thriving—and blooming—year after year.
Timing is Everything: That 2-3 week wait after blooms fade in Step 1 is critical. I learned this the hard way after pruning too early and losing next year's flowers. Wait until the petals have completely dropped and turned brown—this is your cue that the plant has finished flowering for the season. The Memorial Day timing works for most zones, but adjust based on your local frost dates.
Tool Matters: I can't stress this enough—use clean, sharp pruners every time. Dull blades tear the bark, creating wounds that invite disease. I sterilize my pruners with rubbing alcohol between cuts on the same plant, especially when dealing with diseased branches in Step 3. For thick branches, I use loppers with a bypass blade for cleaner cuts that heal faster.
Shape with Purpose: When shaping in Step 1 and Step 3, think of your azalea like a rounded vase. The goal is to create an open center that lets sunlight and air circulate. I step back every few cuts to check my progress—this helps me see the plant's natural shape rather than just focusing on individual branches. The rounded form isn't just aesthetic; it encourages stronger growth from the center outward.
Seasonal Care: The 6-8 week window between Step 1 and Step 2 gives your azalea time to recover. During this period, I focus on watering deeply but less frequently—about once a week unless it's particularly hot or dry. The key is to keep the soil consistently moist but never soggy. In Step 4, that 2-3 inches of organic mulch acts like a blanket, protecting roots from temperature swings while keeping moisture locked in.
Pro Tips for Pruning Azaleas Before And After
- Here's what nobody tells you about keeping your azaleas thriving—and blooming—year after year.
- Timing is Everything: That 2-3 week wait after blooms fade in Step 1 is critical.
- Tool Matters: I can't stress this enough—use clean, sharp pruners every time.
Frequently asked questions
Got questions about pruning azaleas? You’re not alone! Here are some of the most common concerns—plus straightforward answers to keep your shrubs thriving.
When is the best time to prune azaleas?
Prune after blooming (late spring to early summer) to avoid cutting off next year’s buds. For shaping, light pruning can happen in late summer or early fall—but avoid heavy cuts after August. Pro tip: Never prune in winter, as it stresses the plant.
Can I prune azaleas too much?
Over-pruning (cutting more than ⅓ of the plant) weakens growth, reduces blooms, and invites pests. Stick to selective cuts—remove only dead, crossing, or overly leggy branches. Less is more!
What if my azalea didn’t bloom after pruning?
Missing blooms often mean pruning too late (after August) or cutting back flower buds. Check for new growth at branch tips—these are next year’s buds. If none appear, avoid pruning next year and focus on fertilization.
Do I need special tools for azalea pruning?
Not necessarily! Use clean, sharp bypass pruners (for small branches) and loppers (for thicker stems). Sterilize tools with rubbing alcohol to prevent disease. Dull tools = jagged cuts = stress on the plant.
What’s the difference between pruning for blooms vs. shape?
| Goal | When | How |
|---|---|---|
| Blooms | After flowering | Remove spent blooms + ⅓ of the oldest stems (encourages new growth). |
| Shape | Late summer/fall | Trim leggy branches, thin dense areas, and maintain natural form. |
Still unsure? Snap a photo of your azalea and ask for a second opinion—every plant has unique needs!
Wrapping up and next steps
Mastering the art of pruning azaleas transforms your garden from ordinary to extraordinary! 🌸 By following the right timing, techniques, and tools—whether you’re shaping for the before or after bloom—you’ll unlock healthier plants and stunning displays year after year. Remember, patience and precision pay off with vibrant blooms and lush foliage.
Now that you’re armed with expert tips, grab those shears and get pruning! 🌿 Start with one section at a time, observe the changes, and soon your azaleas will be the envy of the neighborhood. Happy gardening!