
Pruning
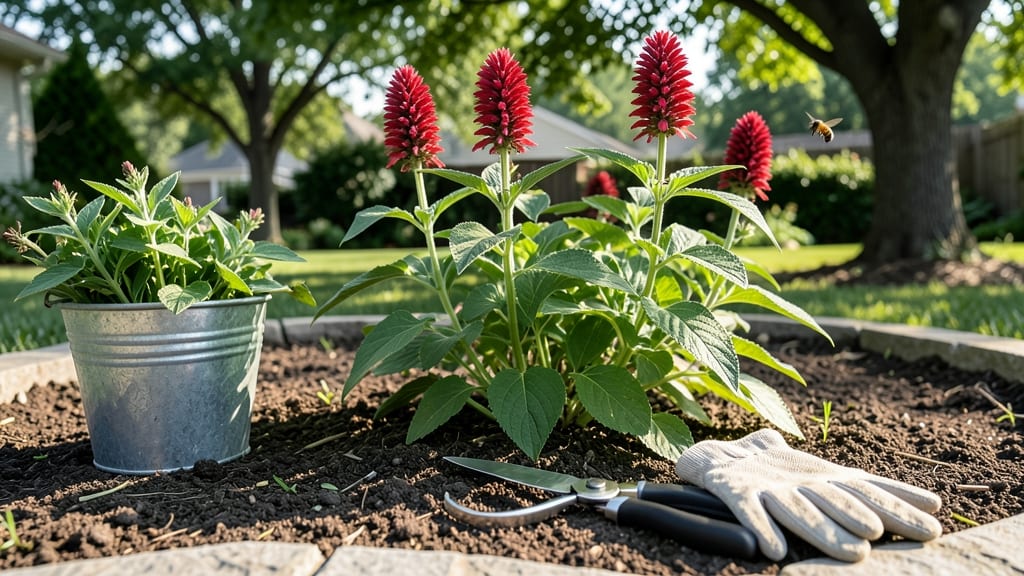
Pruning bee balm in late winter isn’t just about tidying up—it’s your secret weapon for vibrant summer blooms that hummingbirds can’t resist. 🌿 I’ve learned the hard way that skipping this step means leggy stems and half the flowers by July.
The right cuts now determine whether your bee balm looks like a wild meadow or a sad, overgrown clump. You’ll need sharp pruners (dull blades crush stems) and a clear day to assess what stays and what goes.
Cut back one-third of the plant to the first set of healthy leaves—never leave stubs. This isn’t just pruning; it’s teaching your bee balm to grow bushier and stronger for the season ahead.
By late spring, you’ll see new growth within weeks, with blooms arriving thicker and earlier than ever. The key is patience: resist the urge to prune again until after flowering. Your garden will thank you with weeks of nonstop color and fewer pests.
Works for both sunny borders and shady spots—just adjust timing slightly for cooler climates. Here’s how to do it right the first time.
📚 In This Guide
- What you need
- Instructions
- Tips and common mistakes
- Wrapping up and next steps
What you need
- ● Pruning shears or bypass pruners – Sharp, clean, and sterilized (1 pair, with a bypass blade for clean cuts).
- ● Garden gloves – Heavy-duty, cut-resistant (1 pair) to protect your hands from thorns and sap.
- ● Disinfectant (70% isopropyl alcohol or bleach solution) – 1:9 bleach-to-water ratio to sterilize tools between cuts and prevent disease spread.
- ○ Garden twine or plant ties – Optional but helpful for securing large stems if needed.
- ● Garden bag or bucket – For collecting pruned stems (1 medium-sized bag/bucket).
- ○ Rake or hoe – Optional for clearing dead foliage around the base of the plant.
- ● Timing – Prune in late winter or early spring (just as new growth begins, typically February–March in most U.S. zones). Avoid pruning in fall or during active blooming.
- ● Weather conditions – Choose a dry, calm day to minimize stress on the plant and reduce disease risk.
- ● Plant health check – Inspect bee balm for dead, diseased, or pest-infested stems before pruning. Remove these first.
- ● Safety note – Bee balm can attract bees and hummingbirds! Prune early in the morning or late afternoon when pollinators are less active.
- ● Sharpen your tools – Dull blades crush stems, inviting disease. A quick stone sharpening goes a long way!
- ● Label your prunings – If composting, note that bee balm stems can self-seed aggressively—consider bagging them separately.
- ● Fertilizer boost – After pruning, add a balanced, slow-release fertilizer (e.g., 10-10-10) to encourage lush regrowth.
Step-by-Step guide to pruning bee balm for a lush summer display
Here's how I revive my bee balm every late winter—it's the secret to those bold, continuous blooms all summer long.
✂️ Step 1: Time Your Prune for Perfect Regrowth
Wait until your last frost date has passed and new growth appears—usually mid-to-late February in Zone 5, but check your local frost dates. You'll know it's time when you see pale green shoots emerging from the base of the plant. This late-winter prune removes last year's dead foliage and stimulates fresh, vigorous growth.
I grab my clean, sharp pruners and make my first cut about 2-3 inches above the ground, just above a set of healthy buds. This ensures the plant has enough energy stored to produce strong new stems. If your bee balm looks completely dead, don't panic—it's still alive underground. Just wait a few more weeks for those first shoots to appear.
✂️ Step 2: Cut Back to Encourage Bushier Growth
After the initial hard prune, step back and assess the plant. You want to remove about one-third of the current year's growth, cutting just above a leaf node or bud. This encourages the plant to branch out rather than grow tall and leggy. Look for new shoots—these are your signal to keep pruning.
I make my cuts at a 45-degree angle about ¼ inch above the bud. This prevents water from pooling on the cut and causing rot. If your bee balm has multiple stems, thin them out to 3-5 of the strongest, removing weaker stems at the base. This improves airflow and reduces disease risk.
☀️ Step 3: Maintain Through Spring for Continuous Blooms
Once you've done the initial prune, keep an eye out for new flower buds forming. When you see them, pinch back the tips of the stems to encourage bushier growth and more blooms. This is especially important if your bee balm starts to look leggy or sparse.
Water deeply once a week during dry spells, keeping the soil evenly moist but not soggy. Bee balm thrives in full sun to partial shade, so if your plant is in a shadier spot, you might see fewer blooms. Mulch around the base with 2-3 inches of organic mulch to retain moisture and suppress weeds. This also keeps the roots cool during hot summer days.
⏰ Step 4: Deadhead and Prune Throughout the Season
To keep your bee balm blooming all summer, deadhead spent flowers regularly. Simply pinch or cut off the faded blooms just above a set of leaves. This redirects the plant's energy toward producing more flowers instead of seed heads. I do this every 2-3 weeks throughout the growing season.
If your bee balm starts to look overgrown or leggy by mid-summer, give it a light trim. Cut back the longest stems by half their length, again just above a leaf node. This rejuvenates the plant and often triggers a second flush of blooms. Just avoid heavy pruning after mid-July—this can prevent the plant from hardening off for winter.
🌱 Step 5: Prepare for Winter Dormancy
As temperatures drop in late fall, bee balm will start to die back naturally. Once the foliage turns brown and crispy, cut back the stems to 1-2 inches above the ground. This makes it easier to clean up the garden and reduces the risk of disease overwintering in dead foliage.
Leave the cut stems in place—they provide some insulation for the crown over winter. In colder climates (Zone 4 and below), add a 2-3 inch layer of mulch around the base to protect the roots from freezing. In warmer climates, no additional protection is needed. Your bee balm will pop back up with fresh growth in early spring, ready for another season of vibrant blooms.
Tips & tricks for perfect bee balm pruning
These simple tricks will help you revive your bee balm and keep it blooming beautifully all summer long.
Timing is Everything: Don't rush the late-winter prune—wait until you see those first pale green shoots emerging from the base. This usually happens around mid-to-late February in Zone 5, but your local frost dates are your best guide. I've learned the hard way that pruning too early can shock the plant when cold snaps still occur.
The Cutting Angle Matters: When you make those initial cuts in Step 2, always use a 45-degree angle about ¼ inch above the bud. This simple technique prevents water from pooling on the cut, which can lead to rot. I also recommend using clean, sharp pruners—dull blades can crush stems and invite disease. Think of it like giving your plant a clean, professional haircut!
Prune for Airflow: In Step 2, when thinning out multiple stems, focus on keeping just 3-5 of the strongest ones. This isn't about quantity—it's about creating space between stems. Good airflow reduces humidity around the leaves, which dramatically cuts down on fungal diseases like powdery mildew. I've seen bee balm plants go from struggling to thriving just by improving airflow!
Seasonal Maintenance: Remember that mid-summer trim? Avoid heavy pruning after mid-July—this gives your bee balm time to harden off properly before winter. Instead, focus on regular deadheading every 2-3 weeks throughout the growing season. This simple habit redirects the plant's energy toward producing more flowers rather than seed heads, keeping your display vibrant all summer.
Pro Tips for Pruning Bee Balm
- These simple tricks will help you revive your bee balm and keep it blooming beautifully all summer long.
- Timing is Everything: Don't rush the late-winter prune—wait until you see those first pale green shoots emerging from...
- The Cutting Angle Matters: When you make those initial cuts in Step 2, always use a 45-degree angle about ¼ inch abov...
Frequently asked questions
Got questions about pruning bee balm? You’re not alone! Here are some of the most common concerns—and their answers—to help you master late-winter pruning like a pro.
When is the exact best time to prune bee balm?
Late winter is ideal—right after the ground thaws but before new growth starts (typically February to early March in most climates). This timing balances disease prevention and early-season energy for your plant. Pro tip: If you’re in a warmer zone, wait until early spring to avoid encouraging early shoots that could frost damage.
How much should I cut back? Should I prune to the ground?
Yes! Cut back all the stems to the ground (about 1–2 inches above soil level). This removes dead foliage, prevents disease, and encourages bushier, more vibrant regrowth. Think of it like a fresh start for your bee balm—just like giving it a haircut to flaunt its summer bloom potential! Warning: Avoid leaving stubs; clean cuts heal faster.
Will pruning hurt the bees? I’ve heard they use bee balm early in the season.
Not if you time it right! Bee balm flowers after late-winter pruning (usually May–July in most regions). Early spring bloomers are rare, so you’re safe. For extra bee-friendly prep, leave a few unpruned stems in one corner of the plant as a buffer—just in case! Bonus: Pruning now means more flowers later for pollinators to enjoy.
What if my bee balm looks sad after pruning? Should I panic?
Don’t worry—it’s normal for bee balm to look bare post-prune! New growth will sprout from the base in 2–4 weeks. If it stays dormant beyond that, check for root rot (soggy soil) or pests (like Japanese beetles). Fix: Ensure well-draining soil and fertilize lightly with compost in spring. Patience pays off with lush, vibrant blooms!
Can I prune bee balm in containers differently?
Container-grown bee balm follows the same rules, but watch for overcrowding. Trim stems to 6–8 inches tall (instead of the ground) if space is tight, and repot every 2–3 years to refresh roots. Containers dry out faster, so water deeply after pruning to reduce stress. Pro move: Add mulch to retain moisture and protect roots from temperature swings.
What if I missed the late-winter window? Can I prune later?
Yes, but with caveats. Prune in early spring (March–April) if you missed late winter, but avoid cutting back after early summer—this removes next year’s flower buds! Late pruning also risks attracting pests. If your plant looks leggy, a light trim (not drastic) can still help, but expect fewer blooms that season.
Wrapping up and next steps
Pruning bee balm in late winter isn’t just a chore—it’s your secret weapon for a showstopping summer display!
By cutting back dead stems, thinning congested clumps, and sharpening your tools, you’re giving your plants room to thrive and bloom with vigor. 🌿✨ Think of it as a fresh start for your garden, where every snip brings you closer to lush, vibrant blooms.
Ready to roll up your sleeves? Grab your shears and head outside—your bee balm’s future beauty starts with your next pruning session! For even more tips, bookmark this guide or explore our garden pruning calendar to stay ahead of the game.