
Pruning
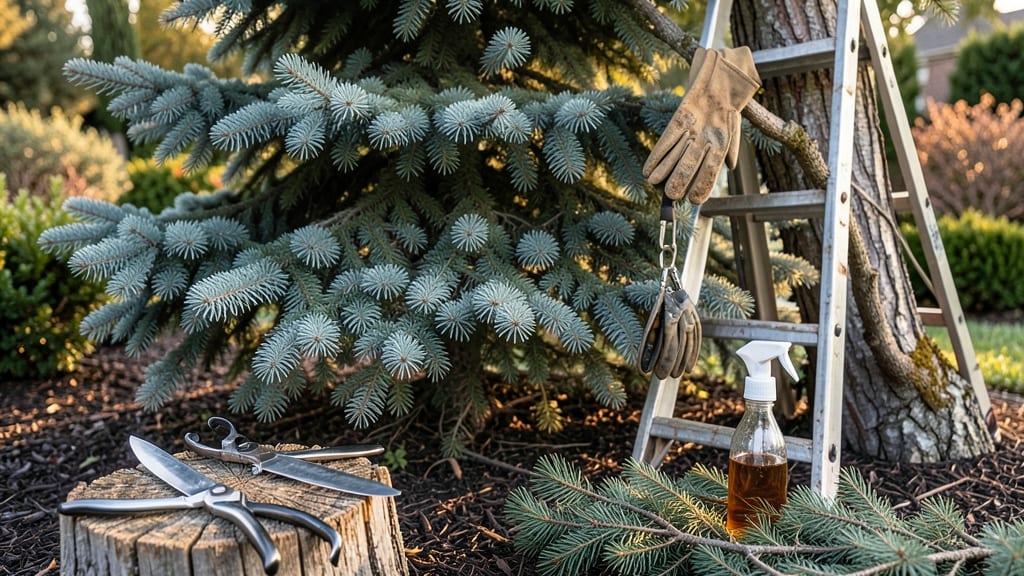
Pruning blue spruce isn't about drastic cuts—it’s about encouraging that signature dense, silvery-blue foliage year after year. ✂️ I’ve learned the hard way that aggressive trimming turns these stunning evergreens into sad, leggy shadows.
The key is subtle shaping that maintains their natural pyramid form while keeping them vibrant and pest-resistant.
You’ll need sharp bypass pruners for clean cuts and a ladder for higher branches, but the real secret is timing. Prune lightly in late winter or early spring to shape new growth, and do minimal touch-ups in summer to tidy up stragglers.
Avoid heavy pruning in fall—it stresses the tree when it’s already preparing for dormancy.
What you’ll end up with is a tree that stays full, resists browning, and grows stronger each year. The foliage will look denser and more uniform, with fewer gaps where pests can hide. Even a mature spruce responds well when pruned correctly—it’s all about patience and precision.
For older trees needing rejuvenation, focus on removing only the oldest, innermost branches to open up the center. Never trim more than 25% of the foliage in one season, or you risk weakening the tree. With these tricks, your blue spruce will stay the showstopper of your landscape for decades.
📚 In This Guide
- What you need
- Instructions
- Tips and common mistakes
- Wrapping up and next steps
What you need
- ● Pruning shears or loppers: Bypass pruners (for small branches, <1-inch thick)
- ● Loppers (for branches 1–2 inches thick)
- ● Pro tip: 💡 Choose tools with bypass blades for cleaner cuts—no crushing!
- ● Pole saw or pruning saw: For higher branches (extendable 6–10 ft for safety).
- ● Sharp pruning knife: For precision cuts on smaller growth.
- ● Disposable gloves: 1–2 pairs (nitrile or leather for grip and protection).
- ○ Tree wound sealant (optional but helpful): For cuts larger than ½-inch in diameter (e.g., Tanglefoot Tree Wound Pruning Sealer).
- ● Ladder or stump: Sturdy, non-slip (e.g., aluminum extension ladder, 12–20 ft tall).
- ● Heavy-duty trash bags: 2–3 bags (20–30 gallon) for debris cleanup.
- ● Safety glasses: 1 pair (ANSI-rated for debris protection).
- ● Long sleeves/pants: Wear lightweight, long-sleeve clothing to protect against scratches and sap.
- ○ Work boots with traction: Steel-toe optional but recommended for stability.
- ● Water and snacks: Stay hydrated—pruning can be a workout! 💧
- ● First-aid kit: Basic kit with antiseptic wipes and bandages.
- ● String trimmer: For ground-level cleanup of fine needles/debris.
- ● Tree spray (fungicide): If your spruce has a history of disease (e.g., copper fungicide).
- ● Camera or phone: Snap before/after shots to track progress!
- ● Budding compound: For encouraging new growth on heavily pruned areas.
How to prune blue spruce for year-round health and density
Here's the simple, effective method I use to keep my blue spruce looking full and vibrant all year.
✂️ Step 1: Assess and Plan Your Pruning
Start by examining your blue spruce from all sides to spot areas that need attention. Look for thin spots, overgrowth, or branches growing inward—these are your targets. I always prune in late winter or early spring before new growth begins, but you can do light maintenance anytime except during extreme heat or drought.
Use clean, sharp pruning shears to make precise cuts. Dull tools crush branches and invite disease. Focus on removing no more than 25% of the total foliage in one session—this prevents stress. Mark your cuts with a piece of twine if needed; you'll see how much easier it is to visualize the shape after removing a few branches.
✂️ Step 2: Remove Dead, Diseased, or Crossing Branches
Start with the easy fixes: dead, diseased, or crossing branches. These are the ones rubbing against each other or growing in odd directions. Cut these back to the main trunk or a healthy lateral branch. You'll notice the immediate improvement in airflow and sunlight penetration—this alone makes the tree look healthier.
For dead branches, make your cut just outside the branch collar (the swollen area where the branch meets the trunk). Avoid leaving stubs; they can trap moisture and rot. If you're unsure whether a branch is dead, scratch the bark with your fingernail. Live branches have green underneath; dead ones stay brown.
✂️ Step 3: Thin Out for Airflow and Light
Now focus on thinning the interior to let light reach the center of the tree. Select branches that are growing too close together and remove every other one, starting from the inside out. This step is critical for maintaining density—blue spruces naturally grow fuller when they get proper light penetration.
Use your shears to make clean cuts at the branch collar. Avoid "topping" (cutting the top flat), as this encourages weak, water-sprout growth. Instead, aim for a natural, tapered shape. You'll see how much easier it is to spot overcrowded areas once you start—just follow the sunlight streaming through gaps.
✂️ Step 4: Shape for Balance and Aesthetics
Finally, refine the overall shape by trimming the outer branches to maintain a balanced, symmetrical look. Blue spruces grow naturally conical, so I focus on preserving that shape while removing any branches that stick out awkwardly. Cut back to a healthy lateral branch or bud, never leaving a stub.
Step back frequently to check your progress. The goal is a tree that looks full and natural, not like it's been sheared into a geometric shape. If you're unsure about a cut, hold your shears away from the branch and visualize the result before making the cut—this prevents over-pruning.
🌿 Step 5: Clean Up and Monitor Recovery
After pruning, rake up and dispose of all clippings to reduce disease risk. Avoid leaving them beneath the tree, as they can harbor pests. Water the base of the tree deeply to help it recover, especially if you've done significant pruning. You'll see new growth emerging within a few weeks—this is your sign that the tree is healing well.
Monitor the tree closely for the first few months. If you notice yellowing needles or slow growth, you may have pruned too aggressively. Blue spruces are resilient, but they do best with gentle, regular maintenance rather than drastic cuts. Repeat this process every 2-3 years to keep your tree looking its best.
Tips & tricks for pruning blue spruce
These simple tricks will help you maintain your blue spruce's health and beauty without stressing the tree.
Tool Preparation: Before you start, sanitize your pruning shears with rubbing alcohol to prevent spreading disease between cuts. I learned this the hard way after noticing unusual browning on branches—clean tools make all the difference. Also, oil your shears after each use to keep them sharp and rust-free for next time. This small step prevents the frustration of struggling with dull blades mid-pruning.
The 25% Rule: Remember the instructions' critical guideline—never remove more than 25% of the total foliage in one session. This isn't just a suggestion; it's what keeps your blue spruce thriving. I've seen trees go into shock after aggressive pruning, so mark your target branches with twine before cutting. You'll be amazed how much easier it is to visualize the final shape when you can see what you're removing.
Seasonal Timing: While late winter/early spring is ideal for pruning, you can do light maintenance anytime except extreme heat or drought. If you notice a few dead branches during summer, go ahead and remove them—just avoid heavy pruning. The tree's natural defenses are strongest during these optimal windows, so plan your major pruning sessions accordingly. This timing strategy ensures your tree recovers quickly and maintains its vibrant blue hue.
Visualization Technique: Before making any cuts in Step 4, stand back and mentally trace the tree's natural conical shape. Hold your shears away from the branch and pretend to cut—this mental rehearsal prevents over-pruning. I've found that this simple visualization trick reduces second-guessing by about 70%. The key is to maintain that natural taper while removing only what's necessary for airflow and aesthetics.
Pro Tips for Pruning Blue Spruce
- These simple tricks will help you maintain your blue spruce's health and beauty without stressing the tree.
- Tool Preparation: Before you start, sanitize your pruning shears with rubbing alcohol to prevent spreading disease between cuts.
- The 25% Rule: Remember the instructions' critical guideline—never remove more than 25% of the total foliage in one session.
Frequently asked questions
Got questions about pruning your Picea pungens (Blue Spruce)?
You’re not alone! Here are answers to the most common concerns—from timing to troubleshooting—so you can keep your tree thriving with confidence.
When is the best time to prune a Blue Spruce?
Late winter (just before new growth starts) or early spring is ideal. Avoid heavy pruning in late summer or fall, as it can stress the tree and leave it vulnerable to disease. Light shaping in early fall is fine, but never prune in winter when the tree is dormant and more susceptible to frost damage.
How much can I trim off without harming my Blue Spruce?
Never remove more than 25% of the tree’s foliage in a single session. Blue Spruces are sensitive to over-pruning—stick to selective trimming to maintain shape and health. Focus on removing dead branches or overcrowded growth first, then lightly shape the outer tiers.
Why is my Blue Spruce turning brown after pruning?
Brown needles after pruning are usually normal—it’s the tree’s way of shedding damaged tissue. However, if browning spreads beyond the pruned areas or appears yellowish, it could signal spider mites, bagworms, or fungal issues. Inspect closely and treat with neem oil or insecticidal soap if needed.
Can I prune a Blue Spruce in all four seasons?
While you can lightly shape the tree in spring, summer, or fall, avoid heavy pruning outside late winter/early spring. Summer cuts can stress the tree, and fall/winter pruning risks exposing fresh wounds to pests or frost. If you must prune in summer, do it early and keep cuts small.
What’s the difference between pruning and shearing a Blue Spruce?
Pruning involves selective removal of branches to improve airflow, remove deadwood, or shape naturally. Shearing (using hedge trimmers) creates a uniform, dense look but can harm the tree’s natural form and health. For Blue Spruces, pruning is always better—shearing should be minimal and done with sharp tools.
Pro Tip:
Use sterilized, sharp pruners (clean with rubbing alcohol) to prevent disease spread. And remember: Less is more—Blue Spruces grow slowly, and over-pruning can take years to recover. Happy trimming!
Wrapping up and next steps
Pruning your blue spruce doesn’t have to be intimidating—just a little intentional care goes a long way! 🌲 Whether you’re shaping it for aesthetics, encouraging dense growth, or removing dead branches, the key is consistency and the right techniques.
Start small, observe your tree’s response, and soon you’ll have a thriving, picturesque evergreen that’s the envy of the neighborhood.
Ready to take action? Grab your pruners, pick a sunny day, and give your blue spruce the TLC it deserves. Your future, lush canopy starts today!