
Pruning
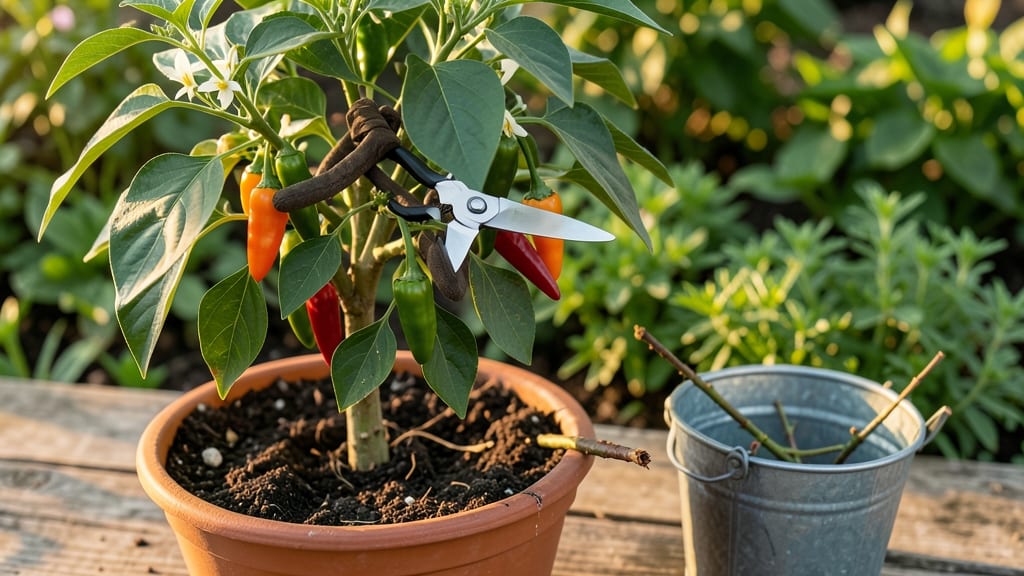
Pruning chilli plants isn't just about shaping—it's about unlocking more heat and bigger harvests than you ever thought possible. 🌶️ I spent years growing peppers without pruning, and my plants were always leggy with just a handful of small peppers.
Then I learned the exact cuts that transform a single-stemmed plant into a bushy, fruit-loaded machine. The difference is night and day: my jalapeños now produce 3x more peppers, and they pack serious heat too.
The best time to prune is when your plant has at least 6-8 inches of growth and is in active growing season (after the last frost). You'll be looking for the first set of leaves on each stem—this is where new branches will form.
Cut just above that leaf node (about 1/4 inch above) with clean, sharp pruners, and you'll encourage the plant to send out new side shoots. Each of those side shoots becomes a new branch that will bear more peppers.
What you end up with is a compact, productive plant that uses its energy growing peppers instead of reaching for the sky. The air circulation improves too, which means fewer diseases and healthier plants overall.
My plants now look like little pepper bushes instead of skinny poles, and the harvest is consistent from early summer until frost. Start with just 2-3 cuts per plant in the early season, then prune lightly throughout the growing season to maintain shape.
The key is patience—don't go overboard, and always cut at the right angle to prevent disease. Your peppers will thank you with a harvest that keeps coming all season long.
📚 In This Guide
- What you need
- Instructions
- Tips and common mistakes
- Wrapping up and next steps
What you need
- ● Pruning shears or sharp scissors: Clean, sterilized, and sharp (bypass pruners work best for clean cuts). Quantity: 1 pair.
- ● Garden gloves: Thick, cut-resistant (chillies can sting!). Quantity: 1 pair.
- ● Rubbing alcohol (70% or higher): For sterilizing tools between cuts. Quantity: Small bottle.
- ○ Disinfectant spray (optional but recommended): Hydrogen peroxide (3%) or copper fungicide to prevent disease. Quantity: 8 oz spray bottle.
- ● Small container or bucket: For collecting pruned material. Quantity: 1.
- ● Pencil or marker: To label plants if pruning multiple varieties. Quantity: 1.
- ● Healthy chilli plants: No signs of disease (e.g., powdery mildew, spots) or severe pest damage.
- ● Good weather: Mild, dry conditions (avoid pruning after rain or in extreme heat).
- ○ Growth chart or pruning guide (optional): Printed or digital reference for your specific chilli variety.
- ○ Rooting hormone (optional): For propagating cuttings (e.g., Clonex or willow water). Quantity: Small bottle.
- ○ Plant ties or twine (optional): For supporting heavy branches after pruning. Quantity: Small roll.
Step-by-Step guide to pruning chili plants for maximum heat and yield
Here's how I transform leggy, overgrown chilis into bushy, high-yielding powerhouses—with exact cuts that boost both size and heat.
✂️ Step 1: Identify and Remove Suckers for Stronger Growth
Suckers are those little shoots that form in the V-shaped junction where a branch meets the main stem. These energy vampires drain your plant instead of letting it focus on fruit production. Use clean, sharp pruning shears to snip them off at their base—don’t leave stubs, or they’ll regrow. I do this every 7-10 days during the growing season, always checking for new suckers after watering when they’re easiest to spot.
Watch for first true leaves on these suckers—they’re your signal to act. If left unchecked, they’ll steal nutrients from your peppers, leaving you with fewer, smaller fruits. Think of it like weeding your plant: you’re removing competition so the main stems can thrive.
🌿 Step 2: Prune Lower Leaves to Improve Airflow and Sunlight
Start by removing any leaves that touch the soil or are within 6 inches of the ground. These create a damp, shaded environment that invites fungal diseases like powdery mildew. Use your fingers or shears to gently pinch them off—no need for dramatic cuts. I focus on the bottom third of the plant first, then work my way up as the plant grows taller.
You’ll notice the plant’s center opens up, letting more sunlight reach the core where most peppers form. This isn’t just about aesthetics—better airflow means fewer pests and faster drying of morning dew, which keeps your chilis healthier. If you see yellowing leaves at the base, that’s your cue to prune them immediately.
☀️ Step 3: Trim Leggy Growth to Encourage Bushier Structure
Leggy growth happens when your chili plant stretches toward light, creating long, weak stems with sparse leaves. To fix this, cut back the top 2-3 inches of the tallest stems just above a leaf node (where leaves grow). This might seem counterintuitive—you’re removing the top!—but it forces the plant to branch out and grow thicker, more productive stems.
Do this in the morning on a cloudy day so the plant has time to recover before the heat of afternoon sun. You’ll see new side shoots emerge within 7-10 days—these are your future fruit-bearing branches. If your plant is already flowering, hold off on heavy pruning until after harvest to avoid stressing it.
⏰ Step 4: Prune Overcrowded Branches for Bigger Peppers
Once your plant has multiple branches, focus on spacing them out. Remove any branches that are growing directly into the center of the plant, where they’ll block sunlight and airflow. Aim to leave 3-4 main branches per plant, spaced evenly around the stem. Cut just above a leaf node where two leaves meet—this ensures the plant can heal quickly.
Here’s the thing—overcrowded branches compete for nutrients, resulting in smaller peppers. By thinning them out, you’re telling the plant to focus its energy on fewer, larger fruits. If you see branches rubbing against each other, that’s your signal to prune them immediately to prevent damage.
🌱 Step 5: Finish with a Light Harvest Pruning Before Dormancy
As your chili plant nears the end of its growing season, give it a final light pruning to prepare for dormancy. Remove any remaining suckers, yellow leaves, or branches that haven’t produced fruit. Cut back the plant by about one-third, focusing on the top and outer edges. This helps the plant redirect energy to root growth, making it stronger for next season.
Do this 4-6 weeks before your first frost, when the days start getting shorter. You’ll see new growth slow down, but the plant will enter dormancy healthier and more resilient. If you’re growing in a warm climate year-round, a light pruning every 3 months keeps the plant productive without overstressing it.
Tips & tricks for perfect chili plant pruning
These little adjustments make all the difference between a scraggly chili plant and a powerhouse that delivers bigger, hotter peppers.
The Right Tools Matter: Always use clean, sharp pruning shears—not dull scissors. I sterilize mine with rubbing alcohol between plants to prevent spreading disease. For small suckers, your fingernails work fine, but anything larger needs proper shears. The cleaner the cut, the faster the plant recovers and the less stress it experiences.
Timing is Everything: In Step 1, you'll see I recommend checking for new suckers every 7-10 days after watering. Morning is best because that's when suckers are most visible and the plant is hydrated. If you're dealing with a particularly aggressive plant, consider weekly checks during peak growing season. Just avoid pruning when the plant is already stressed from heat or drought.
Visual Cues for Healthy Cuts: When pruning in Step 4, look for where two leaves meet at the stem—that's your perfect cutting point. The cut should be clean and just above this node. If you cut too close, you risk damaging the leaf node where new growth emerges. Think of it like making a precise surgical cut—clean and targeted for maximum healing.
Seasonal Adjustments: The 4-6 weeks before frost timing in Step 5 is ideal for most climates, but if you're in a warm region, you can prune every 3 months to maintain productivity. Just avoid heavy pruning when flowers are setting—this is when your plant is directing all its energy into producing fruit, and cutting back too much can reduce your harvest.
Pro Tips for Pruning Chilli Plants
- These little adjustments make all the difference between a scraggly chili plant and a powerhouse that delivers bigger, hotter peppers.
- The Right Tools Matter: Always use clean, sharp pruning shears—not dull scissors.
- Timing is Everything: In Step 1, you'll see I recommend checking for new suckers every 7-10 days after watering.
Frequently asked questions
Got questions about pruning your chilli plants? You’re not alone! Here are some of the most common concerns—plus clear, actionable answers to keep your peppers thriving.
When is the best time to prune chilli plants?
Prune your chilli plants after they’ve established 4-6 true leaves (usually 4-6 weeks after transplanting). Avoid pruning during flowering or fruiting unless removing damaged growth—this can stress the plant. Early pruning encourages bushier growth, while late-season pruning focuses on removing spent flowers to redirect energy to existing peppers.
Do I need special tools to prune chilli plants?
Not necessarily! Clean, sharp pruning shears or even sterilized scissors work well for larger cuts. For small trims, your fingers are fine—just wash them with soap and water afterward. Avoid dull tools, as they crush stems and invite disease. A spray bottle with water can also help prevent infection when making cuts.
Will pruning reduce my chilli yield?
Actually, done right, pruning increases yield! By removing excess leaves or branches, you improve airflow (reducing fungal risks) and help the plant focus energy on larger, hotter peppers. However, over-pruning—especially during flowering—can stress the plant. Stick to 1/3 of the plant’s foliage max per session for best results.
What if my chilli plant looks sad after pruning?
Don’t panic! A little wilting is normal as the plant adjusts. Water consistently (but avoid soggy soil) and keep it in bright, indirect light for 1-2 weeks. If leaves turn yellow or drop excessively, you may have pruned too aggressively. Next time, trim smaller sections and monitor for signs of recovery.
Can I prune chilli plants indoors or only outdoors?
Indoor chilli plants benefit from pruning just as much as outdoor ones. Just ensure your space has good airflow (a small fan helps) and adequate light (12+ hours of sunlight or grow lights). Avoid overcrowding potted plants—prune to maintain a balanced shape and prevent root-bound stress.
Wrapping up and next steps
Pruning your chilli plants isn’t just about tidying up—it’s your secret weapon for explosive heat, bigger yields, and healthier growth! 🌶️ By mastering the right cuts at the right time, you’ll encourage bushier plants, stronger stems, and a harvest that packs a punch.
Whether you’re a first-timer or a seasoned grower, every snip brings you closer to a bountiful, fiery reward.
Now that you’re armed with the know-how, grab those shears and get pruning! Start with your first cut this week, and watch your chilli plants transform before your eyes. Happy growing—and may your harvest be hotter than ever! 🔥