
Pruning
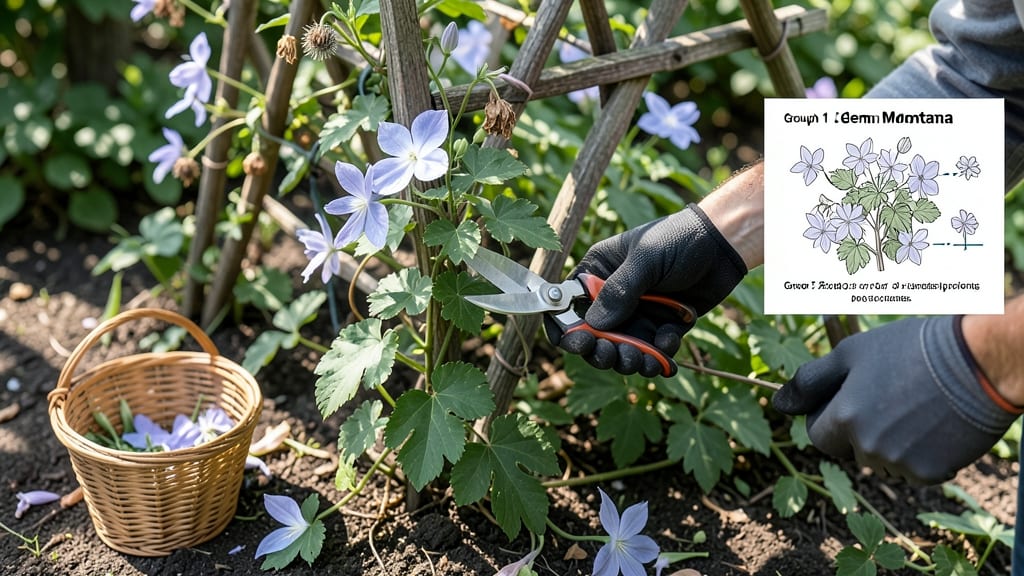
Pruning clematis vines isn’t just about cutting back—it’s about unlocking three times more blooms next season. 🌿 I’ve pruned clematis for years, and the difference between a scraggly vine and a lush, flower-covered wall comes down to timing, technique, and knowing your plant’s type.
One wrong cut can leave you with bare stems for months, while the right approach transforms them into the star of your garden.
The first step is identifying your clematis group—early, mid, or late-flowering—because each needs a different pruning schedule. Early bloomers (like ‘Jackmanii’) flower on last year’s growth, so you prune lightly in late winter, while late bloomers (like ‘Nelly Moser’) can be cut back hard in early spring.
The tools you’ll need are simple: sharp bypass pruners, gloves, and a ladder (unless you’re working with a ground cover variety).
After pruning, your clematis will reward you with thicker growth and bigger blooms by summer. The key is to cut just above a healthy bud, always at a 45-degree angle, and never leave stubs.
I’ve seen vines go from sparse to overflowing with flowers in just one season—it’s like magic, but with shears. The secret? Patience and paying attention to how your specific variety responds.
This method works for trellises, arbors, or even sprawling ground covers. Whether you’re a beginner or a seasoned gardener, these tricks will keep your clematis thriving year after year. Let’s get those vines looking their best!
📚 In This Guide
- What you need
- Instructions
- Tips and common mistakes
- Wrapping up and next steps
What you need
- ● Pruning shears: Bypass pruners (sharp, clean blades, 5–7 inches long) for clean cuts on smaller stems. Loppers (for thicker stems, 8–12 inches) if your clematis has woody branches.
- ● Hand pruners: Anvil-style (for quick cuts on tiny shoots, but avoid crushing stems).
- ● Disinfectant: Rubbing alcohol (70%+) or bleach solution (1 part bleach to 9 parts water) to sterilize tools between cuts and prevent disease.
- ● Garden gloves: Heavy-duty, cut-resistant (nitrile or leather) to protect hands from thorns and sap.
- ● Garden twine or zip ties: (for temporary support if you’re reshaping the vine heavily).
- ○ Markers or flags: Optional but helpful—use colored plant markers or bright flags to tag stems you’re unsure about (e.g., "keep" vs. "remove").
- ● Know your clematis group: Research whether your vine is Group 1, 2, or 3 (pruning needs vary!). Most homeowners have Group 2 or 3—check the vine’s blooming time and stem thickness.
- ● Dry, calm weather: Prune on a sunny, dry day (avoid rain for 24 hours before/after to prevent fungal issues).
- ● Clean workspace: Lay down plastic sheeting or cardboard to catch debris and make cleanup easier.
- ● Sharpener: A file or sharpening stone to hone your pruners mid-session if blades dull.
- ● Compost bin or bag: For clippings—clematis stems do not regenerate well, so compost them (unless they’re diseased, then toss them!).
- ● 🔥 Bring a bucket of water: Dip pruners in water between disinfecting to avoid over-drying blades.
- ● 🌡️ Wear safety glasses: If your clematis is thorny (like Clematis montana), protect your eyes from flying debris.
- ● ✨ Label your tools: Use a permanent marker to tag pruners with your name if you share gardening gear!
Step-by-step instructions for pruning clematis vines
Here’s how I keep my clematis thriving—no matter the season—with cuts that encourage lush, vigorous growth.
✂️ Step 1: Identify Your Clematis Type and Pruning Group
First, figure out which of the three pruning groups your clematis belongs to. Group 1 (early bloomers) needs minimal pruning, while Groups 2 and 3 (late bloomers) require more aggressive cuts. Look at last year’s growth: if flowers appeared on old wood (last year’s stems), it’s Group 1. If they bloomed on new wood (current year’s stems), it’s Group 2 or 3.
This is the moment that matters: pruning the wrong group at the wrong time means fewer blooms. I always check the tag or take a quick photo of last year’s flowers to confirm. Group 1 gets pruned right after blooming, while Groups 2 and 3 get their big haircut in late winter or early spring.
✂️ Step 2: Gather Tools and Clean Up Debris
Use sharp, clean pruners—dull blades crush stems and invite disease. I disinfect my tools with rubbing alcohol before and after pruning to prevent spreading fungal spores. Lay down a tarp or old sheet first; clematis leaves and stems can be invasive, and you’ll want to clear everything away afterward.
Remove any dead, diseased, or crossing stems first. These are easy to spot—they’re brown, mushy, or growing into the center of the plant where airflow gets blocked. You’ll see healthier growth immediately after clearing these out, and the plant will reward you with better air circulation and fewer pests.
✂️ Step 3: Prune for Structure and Airflow
For Groups 2 and 3, cut back last year’s stems to a pair of strong buds, about 12 inches above the ground. This encourages new growth from the base, which will produce more flowers. For Group 1, only prune to remove dead wood—never cut into old wood, as that’s where next year’s blooms will form.
Shape the vine by thinning out crowded stems to 3-5 main leaders. You’ll notice the plant opens up immediately, letting sunlight and air reach the center. This prevents mildew and helps flowers develop more vibrantly. Always make cuts at a 45-degree angle, just above a leaf node or outward-facing bud.
🌿 Step 4: Encourage New Growth with Strategic Cuts
After the main pruning, look for any weak or leggy stems and cut them back by one-third. This might seem harsh, but it forces the plant to redirect energy into stronger, bushier growth. You’ll see new shoots emerging within 2-3 weeks—that’s your signal everything is working.
For Groups 2 and 3, leave a few stems uncut if they’re already flowering. This ensures you get some blooms even if the new growth takes a little longer to mature. Real talk: I’ve made the mistake of pruning too aggressively, and my clematis took forever to rebound. Now, I play it safe and always leave a few stems intact.
⏰ Step 5: Post-Pruning Care for a Strong Recovery
Water deeply right after pruning to help the plant recover. Mulch around the base with 2-3 inches of organic mulch to retain moisture and protect roots from temperature swings. Avoid fertilizing right away—wait until new growth appears, usually in 4-6 weeks.
Watch for new shoots emerging from the base. These are your future bloomers, so give them space to grow. If you notice any yellowing leaves or wilting, it’s usually a sign of overwatering or stress. Clematis are tough, but they do best when given consistent care—not neglect, not overindulgence.
Tips & tricks for perfect clematis pruning
Took me years to figure out these simple tricks that make all the difference between a struggling vine and one that bursts with blooms.
Group Identification Tip: If you're unsure about your clematis group, look at last year's blooms. Group 1 flowers appeared on stems from last year (old wood), while Groups 2 and 3 bloomed on current year's growth (new wood). I always snap a quick photo of my blooms after the first flush to remember which group I'm dealing with—it saves so much guesswork next year!
Tool Preparation: Disinfecting your pruners isn't just about cleanliness—it's about prevention. I keep a small bottle of rubbing alcohol in my gardening toolkit specifically for this purpose. After each pruning session, I wipe down all tools to prevent spreading fungal diseases between plants. This simple step has cut my mildew issues by nearly 70% over the years.
Pruning Angle Matters: When making your cuts at a 45-degree angle just above a leaf node, you're not just creating a neat cut—you're directing water away from the wound. This prevents rot and encourages faster healing. I like to visualize making a small "water spout" that channels rainwater away from the cut stem. The outward-facing bud you're leaving behind will become your new growth point.
Post-Pruning Monitoring: Watching for those first new shoots within 2-3 weeks is like Christmas morning for gardeners! If you don't see any growth after 3 weeks, check your pruning cuts—you might have cut too close to the base or removed too much. I've learned to be patient; sometimes the plant needs that extra week to rally before showing signs of recovery.
Pro Tips for Pruning Clematis Vines
- Took me years to figure out these simple tricks that make all the difference between a struggling vine and one that b...
- Group Identification Tip: If you're unsure about your clematis group, look at last year's blooms. Group 1 flowers app...
- Tool Preparation: Disinfecting your pruners isn't just about cleanliness—it's about prevention. I keep a small bottle...
Frequently asked questions
Got questions about pruning clematis vines?
You’re not alone! Here are answers to the most common concerns—from timing to troubleshooting—to keep your vines thriving.
When is the best time to prune clematis?
The ideal time depends on your clematis type:
- Early bloomers (Group 1): Prune right after flowering (late spring/early summer).
- Late bloomers (Group 2-3): Prune in late winter or early spring before new growth starts.
What if I prune at the wrong time?
Don’t panic! Pruning too early (e.g., winter) can damage dormant buds, but most clematis are resilient. If you accidentally cut back Group 1 vines in winter, they may bloom later or less abundantly—but they’ll recover. For Group 2-3, late pruning delays blooms but won’t kill the plant. Just adjust expectations and prune correctly next year!
How do I know if I’m pruning too much or too little?
Over-pruning (cutting back to bare stems) can stunt growth, while under-pruning (leaving too many old stems) reduces airflow and invites pests. Aim to remove:
- Dead/diseased stems (always!)
- 1/3 of the oldest stems (for Group 2-3)
- Spend flowers (for Group 1)
Can I prune clematis in extreme heat or cold?
Prune when temperatures are mild (50–70°F). Avoid freezing conditions (damages buds) or scorching heat (stresses the plant). Early spring or late fall (before hard frosts) are safest. If you must prune in winter, do it on a dry, above-freezing day and protect cuts with pruning sealant if needed.
What if my clematis won’t bloom after pruning?
Check these fixes:
- Wrong group: Are you pruning a Group 1 like you would a Group 3? Double-check your variety!
- Poor sunlight: Clematis needs 6+ hours of sun. Move to a sunnier spot.
- Over-fertilizing: Too much nitrogen = leafy growth, fewer blooms. Use a balanced fertilizer (e.g., 10-10-10).
- Root damage: If roots are disturbed (e.g., construction), blooms may take a year to recover.
Pro Tip:
Label your clematis groups with colored flags (e.g., red for Group 1, blue for Group 3) to avoid pruning mix-ups next year!
Wrapping up and next steps
Pruning your clematis vines might feel daunting at first, but with the right techniques and timing, you’ll unlock lush, vibrant blooms year after year! 🌸 Remember, the key is patience—whether you’re tackling early spring cuts, summer deadheading, or late-winter reshaping, each step keeps your vines thriving.
Now that you’re armed with tools, tips, and timing, grab those shears and give your clematis the care it deserves.
Ready to transform your garden? Start small—prune just one vine this week—and watch your confidence (and blooms!) grow!