
Pruning
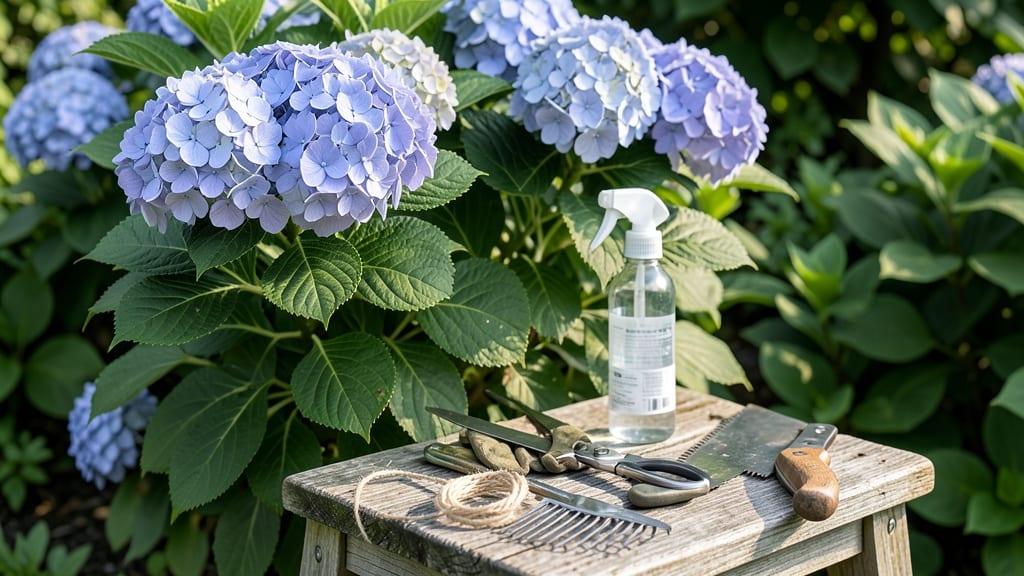
Pruning Endless Summer hydrangeas in spring is the secret to vibrant blooms that last all summer long—if you time it right. ✂️ I’ve learned the hard way that cutting too early or too late can leave you with bare stems and no flowers, but mastering this one technique will transform your shrub from leggy to lush.
The key is waiting until late winter or early spring, after the last frost but before new growth appears. Look for those tight buds forming at the ends of last year’s stems—those are your future blooms.
Grab your pruners and cut back one-third of the oldest stems to the first set of buds, leaving the rest untouched for next year’s flowers. After pruning, give your hydrangea a drink of water and a light feeding with balanced fertilizer.
Within weeks, you’ll see fresh green shoots pushing out, and by summer, those iconic blooms will appear—earlier and more abundant than ever before. This method works for all Endless Summer varieties, whether you’re pruning a young plant or reviving an overgrown shrub. The payoff?
A bush that blooms twice as hard with minimal effort.
📚 In This Guide
- What you need
- Instructions
- Tips and common mistakes
- Wrapping up and next steps
What you need
- ○ Pruning shears: Bypass pruners (sharp, clean, and 4-6 inch blades for precision cuts). Optional: Loppers (for thicker stems, 8-10 inch handles).
- ● Hand pruners: Bypass or anvil style (for smaller stems, 3-4 inch blades).
- ● Gloves: Garden gloves (cut-resistant, medium to heavy-duty for protection).
- ● Disinfectant: Rubbing alcohol (70%+) or bleach solution (1:9 ratio with water) to sterilize tools.
- ○ Pruning sealant (optional): Tree wound pruning paste (for large cuts, 1-2 oz tube).
- ○ Garden twine or tape (optional): For marking stems if needed (1/4 inch width).
- ● Timing: Prune after the last frost but before new growth (late spring, typically April-May in most zones).
- ● Weather: Choose a dry, overcast day to avoid stressing the plant.
- ● Safety gear: Sunglasses and long sleeves/pants (hydrangeas can be thorny!).
- ● Cleanup supplies: Garden bag or bucket for trimmings (5-gallon capacity recommended).
Step-by-Step instructions for pruning Endless Summer hydrangeas in spring
Here's how I refresh these hydrangeas every year—keeping them lush, blooming, and healthy.
✂️ Step 1: Time Your Pruning Perfectly
Wait until late spring, after the last frost but before new growth appears. For me, that's usually mid-April in my zone 6 garden. Pruning too early risks damaging buds that haven't opened yet, while waiting too long limits next year's flowers. Look for swollen buds on the stems—those are your signal to prune.
I always prune on a dry, overcast day. Wet wood is harder to cut cleanly, and the plants recover better without stress. Grab your pruners and gloves—hydrangeas can be thorny, and the sap stains easily. I like to work in the morning when the stems are still firm from the night's cool air.
✂️ Step 2: Identify and Remove Dead or Weak Growth
Start by scanning the entire plant for dead, diseased, or crossing branches. Dead wood is easy to spot—it's brown, brittle, and falls away when you gently tug. Cut these stems back to the main trunk or to a healthy bud. I make my cuts at a 45-degree angle, about 1/4 inch above a leaf node where new growth can emerge.
Next, remove any branches that are rubbing against each other. Friction creates wounds where pests and diseases can enter. Thin out crowded stems to improve airflow—this prevents fungal issues and helps the plant focus its energy on producing larger, healthier blooms. I aim to leave about 3-5 strong stems per plant, depending on its size.
✂️ Step 3: Shape the Plant for Optimal Blooming
Endless Summer hydrangeas bloom on both old and new wood, so you don't need to do a drastic "renewal" prune like with some other varieties. Instead, focus on light shaping. I start by cutting back last year's blooms to just above the first set of healthy leaves. This encourages fresh growth while preserving next year's flower buds.
Step back and assess the plant's shape. You want an open, airy structure with room for light to penetrate. Avoid cutting into the center of the plant—this creates a dense, shaded interior that discourages blooming. If a branch is too long, shorten it by 1/3 to 1/2 to maintain balance. I like to leave some of last year's growth intact to anchor the plant and provide structure.
💧 Step 4: Clean Up and Encourage New Growth
After pruning, rake up all the clippings and dispose of them in the trash—not the compost pile. Hydrangea debris can harbor pests and diseases that might reinfect your plant. I also disinfect my pruners with rubbing alcohol between cuts to prevent spreading anything.
Water the plant deeply right after pruning to help it recover. The roots need moisture to support the new growth you're encouraging. I give it about 1-2 gallons of water, depending on the plant's size, and mulch around the base with 2-3 inches of organic mulch to retain moisture and regulate soil temperature. Avoid piling mulch against the stems—keep it 2-3 inches away to prevent rot.
☀️ Step 5: Monitor and Maintain Through the Season
Keep an eye on your hydrangeas over the next few weeks. New growth should appear within 2-3 weeks, and you'll see bright green leaves emerging from the buds. If you notice any yellowing or wilting, it could signal over-pruning or stress—adjust your care accordingly.
Throughout the growing season, I fertilize lightly every 4-6 weeks with a balanced, slow-release fertilizer. Hydrangeas aren't heavy feeders, but a little extra nutrition helps them produce those vibrant blooms. I also watch for pests like aphids or spider mites—if I spot any, I treat them early with neem oil or insecticidal soap to avoid a full-blown infestation.
Tips & tricks for pruning Endless Summer hydrangeas
These little details make all the difference when it comes to keeping your hydrangeas thriving year after year.
Timing is Everything: The window for pruning Endless Summer hydrangeas is narrow, and getting it right is crucial. I can't stress enough how important it is to prune after the last frost but before you see new growth—usually around mid-April in zone 6. If you prune too early, you risk cutting off next year's flower buds that are already forming. If you wait too long, you'll be removing potential blooms for this season. Look for those swollen buds as your cue—they're like little green nubs along the stems that haven't opened yet.
Cutting Technique Matters: When you're making those 45-degree cuts about 1/4 inch above a leaf node (as mentioned in Step 2), here's what I've learned: Always cut just above a bud that's facing outward. This encourages growth in the direction you want—toward the outside of the plant. I also recommend using sharp, clean pruners. Dull blades crush the stems, which can invite disease. After each cut, I wipe my pruners with rubbing alcohol to keep them sanitized—this simple step prevents spreading any potential pathogens between cuts.
Shape with Purpose: In Step 3, when you're shaping your plant, think about creating an open, airy structure. I like to imagine a vase shape—wider at the top and narrower at the base. This allows light and air to penetrate all the way to the center, which is crucial for preventing fungal issues. When you're cutting back last year's blooms, aim to remove about 1/3 to 1/2 of the length. This might seem drastic, but it's what encourages those lush, vibrant blooms. Remember, you're not trying to create a bushy hedge—you're shaping a flowering plant that needs room to breathe.
Post-Pruning Care: The work doesn't end when you put down your pruners. After you've finished shaping, give your hydrangeas a deep drink of water—about 1-2 gallons depending on the plant's size. This helps them recover from the stress of pruning. I also recommend applying a 2-3 inch layer of organic mulch around the base, but keep it 2-3 inches away from the stems to prevent rot. This mulch layer helps regulate soil temperature and retain moisture, which is especially important during those hot summer months when hydrangeas are putting on their best show.
Pro Tips for Pruning Endless Summer Hydrangeas In Spring
- These little details make all the difference when it comes to keeping your hydrangeas thriving year after year.
- Timing is Everything: The window for pruning Endless Summer hydrangeas is narrow, and getting it right is crucial. I ...
- Cutting Technique Matters: When you're making those 45-degree cuts about 1/4 inch above a leaf node (as mentioned in ...
Frequently asked questions
about pruning Endless Summer hydrangeas in spring—because even pros need a little clarity!When is the exact best time to prune?
The sweet spot is late winter to early spring (February–March) before new growth starts. If you miss it, you can prune lightly in spring after blooms fade—but avoid heavy cuts then! Pro tip: Prune when temps are above freezing to prevent shock.
What if I cut too much off by mistake?
Don’t panic! Endless Summer hydrangeas are resilient. If you’ve pruned back to old wood (brown stems), new growth will still emerge. Just avoid cutting into green stems—those are this year’s blooms! Fix it: Water deeply and fertilize lightly to encourage recovery.
Can I prune in fall instead?
Nope! Fall pruning risks winter dieback. Endless Summer hydrangeas bloom on old wood, so pruning in fall removes next year’s buds. Wait until spring to revive your plant—patience pays off! Alternative: Lightly shape in fall if needed, but avoid heavy cuts.
Do I need special tools?
Not fancy ones! Sharp bypass pruners (for stems <½” thick) and loppers (for thicker stems) work best. Sterilize tools with rubbing alcohol to prevent disease. Skip: Dull shears—they crush stems, inviting pests. Bonus: Wear gloves to avoid hydrangea sap irritation!
What if my hydrangeas aren’t blooming after pruning?
Check these first:
- Sunlight: Need 4–6 hours of sun daily.
- Water: Keep soil consistently moist (not soggy).
- Fertilizer: Use acidic fertilizer (pH 5.5–6.2) in early spring.
Wrapping up and next steps
Pruning your Endless Summer hydrangeas in spring is all about timing, technique, and a little patience—it’s your secret to vibrant blooms year after year! By following these steps, you’ll encourage healthier growth, bigger flowers, and a lush, fuller plant.
Don’t let hesitation hold you back—grab those shears and give your hydrangeas the care they deserve.
Ready to see the difference? Mark your calendar for late winter or early spring, gather your tools, and get pruning! Your garden—and future blooms—will thank you. 🌸✂️