
Pruning
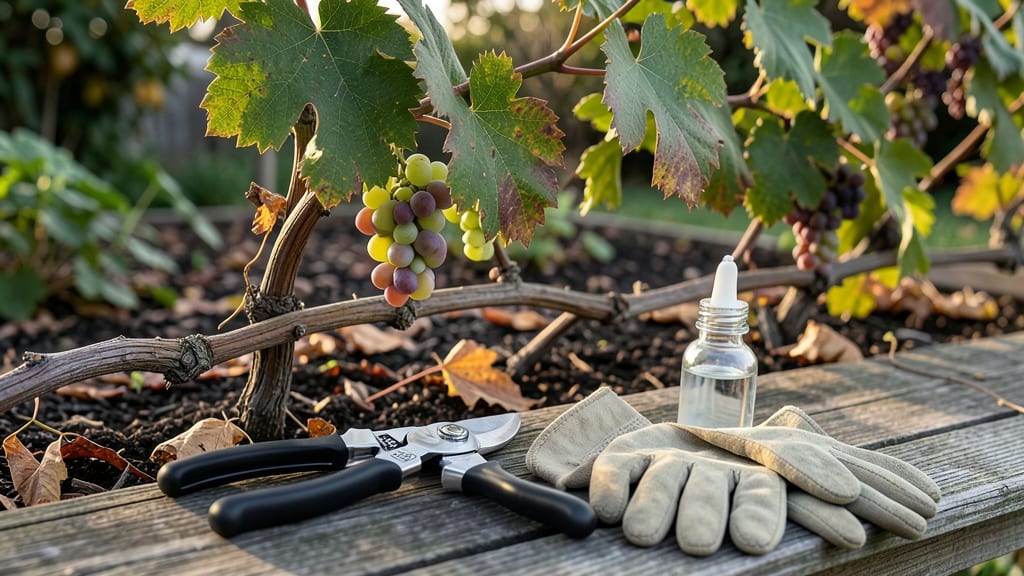
Fall grape pruning is the secret to stronger vines and bigger harvests next summer—don’t skip this step after the leaves drop. ✂️ I’ve watched my grapevines go from tangled messes to productive powerhouses by timing cuts right, and the difference in fruit quality is night-and-day.
The key is working when the plant is dormant but before hard frost sets in, usually between November and early December in most climates.
You’ll need just a few tools: sharp pruning shears, hand pruners, and rubbing alcohol (to sterilize cuts). The goal is simple: remove dead or weak canes, thin out crowded growth, and shape the vine to encourage airflow.
Start by cutting back last year’s fruit-bearing canes to 2-3 buds—this forces energy into new growth where you want it. For young vines, keep them low to the ground to protect against winter winds.
What you’ll end up with is a vine that’s easier to manage, produces healthier fruit, and recovers faster from winter. The cuts you make now determine how well the plant stores energy for spring, so take your time—rushing leads to uneven growth or broken canes.
In warmer zones (like Zones 8-10), you might delay pruning until January or February to avoid frost damage.
Pro tip: Label your vines if you’re new to this—it’s easy to mix up canes year after year. And if your grapes struggle with mildew, prune aggressively to improve airflow. The effort now means juicier berries and fewer pests come harvest time. Ready to transform your vines?
📚 In This Guide
- What you need
- Instructions
- Tips and common mistakes
- Wrapping up and next steps
What you need
- ● Pruning shears: Bypass pruners (for clean cuts) or anvil pruners (for thicker branches). Choose sharp, rust-resistant tools (e.g., Felco or Corona brands). Quantity: 1 pair per person.
- ● Loppers: For branches ½–1.5 inches thick. Opt for ratchet-style loppers for extra leverage. Quantity: 1 pair.
- ● Pruning saw: For thick, woody vines (>1.5 inches). A curved-tooth saw prevents tear-out. Quantity: 1.
- ● Disinfectant: 70% isopropyl alcohol or bleach solution (1 part bleach to 9 parts water) to sterilize tools between cuts and prevent disease.
- ● Gloves: Heavy-duty, cut-resistant gloves (e.g., Mechanix or gardening gloves with reinforced palms). Quantity: 1 pair.
- ● Twine or vine tape: 3–4mm thick for wrapping pruning cuts on large branches to promote healing.
- ● Bucket or bag: For collecting pruned debris. A 5-gallon bucket or heavy-duty trash bag works well.
- ● Ladder or step stool: If vines are 6+ feet tall. Ensure it’s stable and non-slip.
- ○ Sharpie or marker: For labeling vines (optional but helpful for tracking varieties).
- ● Pruning paint: Copper-based sealant to protect large cuts from pests/disease (e.g., Ortho Fruit Tree Spray).
- ● Knee pads: For comfort if you’ll be kneeling frequently.
- ● Hand lens or magnifier: To inspect buds and small details up close.
- ● Pruning guide or chart: A reference for cane vs. spur pruning techniques.
- ● Weather check: Plan for dry, calm conditions (avoid pruning if rain is forecasted within 24 hours).
Step-by-step guide to pruning fall grapes
Here's my foolproof method for late-season grapevine pruning that sets your vines up for explosive spring growth.
✂️ Step 1: Remove Dead, Diseased, or Damaged Wood First
Start by identifying any canes that are completely blackened, shriveled, or showing signs of fungal infection like powdery mildew. These are your first targets—cut them back to the base of the vine using clean, sharp pruners. I always disinfect my tools between cuts with a 1:10 bleach-water solution to prevent spreading disease. You'll know you're doing this right when you're left with only healthy, green canes that feel firm when squeezed.
Look for canes with cracks or splits where pests could hide over winter. These weak points compromise the vine's ability to heal properly. Remove any suckers growing from the trunk or rootstock—these drain energy from the main structure. I like to make these cuts at a 45-degree angle, about ¼ inch above a bud that faces the direction I want the new growth to go. This ensures the vine knows exactly where to send its energy next spring.
✂️ Step 2: Thin Out Overcrowded Canes
Grapes thrive when they have proper air circulation, so your next step is to remove any canes that are growing too close together. Aim to leave 4-6 main canes per vine, spaced evenly around the trunk. These will become your primary fruiting arms. I count buds along each cane—strong vines typically have 10-15 buds per cane—and remove any canes with fewer than 8 buds as they won't produce enough fruit.
Pay special attention to canes that cross over each other. These create wounds where diseases can enter and make future pruning more difficult. When you make your cuts, leave a small ½-inch stub—this prevents water from pooling at the cut site and helps the vine heal more cleanly. You'll notice the vine's structure opens up as you work, revealing more sunlight access to the remaining canes.
✂️ Step 3: Shape the Vine for Next Year's Growth
Now it's time to establish your vine's framework. For head-trained vines (those growing as a bush), select 2-4 main arms that emerge from the trunk at wide angles. Cut back these arms to leave 4-6 buds each—this encourages strong, balanced growth next season. For cordon-trained vines (those growing along a horizontal wire), prune the main trunk to leave 2-3 buds, then select 2-4 fruiting spurs along the cordon, each with 2-3 buds.
Here's where it gets strategic: make your final cuts just above a bud that faces outward on the vine. This ensures new growth will spread evenly rather than crowding inward. I always step back after pruning to visualize the vine's shape—you should see an open, pyramid-like structure that allows sunlight to penetrate all the way to the center. This prevents future shading issues that lead to poor fruit quality.
✂️ Step 4: Clean Up and Protect the Vine
After making all your cuts, gather up all the pruned material and remove it from the vineyard. Burning or composting these clippings prevents disease from overwintering. I like to spread a 2-3 inch layer of organic mulch (like straw or wood chips) around the base of the vine to protect the soil and retain moisture. This also helps regulate soil temperature during winter's cold snaps.
For extra protection in cold climates, wrap the trunk with burlap or horticultural fleece to prevent sunscald and frost cracks. Leave the top of the vine open to allow for some air circulation. You'll know you've done everything right when the vine looks balanced, the cuts are clean, and the surrounding area is free of debris. This preparation gives your grapes the best possible start for next year's harvest.
Tips & tricks for perfect late-season grape pruning
Late-season grape pruning might seem intimidating, but these key strategies will help you create a vineyard framework that thrives next year.
Tool Preparation: Clean and sharpen your pruners before you begin—dull blades tear rather than cut cleanly, causing unnecessary stress on the vine. I use a dedicated pair of pruners just for grapevines and store them in a 70% isopropyl alcohol solution between seasons to prevent rust and bacterial buildup. A small file in your toolkit helps maintain sharp edges between uses. This attention to detail makes all the difference in clean cuts that heal properly.
Bud Counting Technique: When selecting canes in Step 2, count buds from the base of the vine outward—this ensures you're capturing the vine's natural growth pattern. I find it helpful to use a small notepad to tally buds per cane, aiming for that 10-15 buds per cane sweet spot. Remember that each bud has the potential to become a new shoot with clusters of grapes, so accuracy here directly impacts your next harvest's yield. For older vines, you might need to adjust this range slightly based on vine vigor.
Visualizing Growth Direction: Before making your final cuts in Step 3, take a moment to visualize how the vine will grow. The outward-facing bud you leave behind should point in the direction you want new canes to grow—this creates an open, pyramid-like structure that maximizes sunlight exposure. I often sketch a rough diagram on scrap paper to plan my cuts before making them, which helps prevent costly mistakes. This strategic approach prevents future shading issues that can reduce fruit quality.
Seasonal Timing Insight: While fall pruning is ideal for late-season preparation, you can also prune in late winter or early spring if you missed the fall window. The key is to time your pruning just before the vine begins active growth—this allows the cuts to heal before new shoots emerge. In colder climates, I often wait until late winter when temperatures are consistently above freezing to ensure the vine isn't stressed by cold weather.
Pro Tips for Pruning Grapes In Fall
- Late-season grape pruning might seem intimidating, but these key strategies will help you create a vineyard framework...
- Tool Preparation: Clean and sharpen your pruners before you begin—dull blades tear rather than cut cleanly, causing u...
- Bud Counting Technique: When selecting canes in Step 2, count buds from the base of the vine outward—this ensures you...
Frequently asked questions
Got questions about pruning grapes in the fall? You’re not alone! Here are some of the most common concerns—plus clear, actionable answers to help you prune like a pro.
Why should I prune grapes in the fall instead of winter?
Fall pruning (after leaf drop but before hard frost) reduces disease risk by removing infected leaves and debris. It also lets you assess vine health before winter dormancy, making it easier to spot issues like dead wood or pests. Plus, early cuts give vines a head start on healing before spring’s growth surge!
What’s the best time to prune grapes in fall?
Aim to prune 4–6 weeks after leaf drop (typically late October to December, depending on your climate). Wait until temps dip below 50°F (10°C) to minimize stress on the vine. Avoid pruning too early—you’ll leave wounds vulnerable to rot, or too late—when cold snaps can damage fresh cuts.
Can I use regular pruning shears, or do I need special tools?
You’ll need clean, sharp pruners (bypass or anvil types work), but avoid hedge trimmers—they crush stems. For thick canes (over ½ inch), use loppers or a pruning saw. Disinfect tools between cuts with rubbing alcohol or bleach to prevent spreading diseases like black rot.
What if I accidentally prune too much? Can I fix it?
Don’t panic! If you’ve over-pruned, focus on retaining 2–4 healthy buds per cane (the minimum for next year’s growth). Water deeply and apply a balanced fertilizer (like 10-10-10) in early spring to encourage recovery. Monitor vines closely—if they look stressed, reduce sunlight temporarily with shade cloth.
Will fall pruning affect my grape harvest next year?
Not if done correctly! Proper fall pruning boosts fruit quality by redirecting energy to fewer, healthier canes. You might see a slight delay in harvest timing (1–2 weeks) as vines adjust, but yields and flavor improve long-term. Think of it as a reset button for stronger, more productive vines!
Wrapping up and next steps
Fall is the perfect time to give your grapevines the care they need for a bountiful harvest next season! Pruning in late fall—after the leaves drop but before hard frost—helps shape your vines, improves airflow, and sets the stage for stronger growth.
Whether you’re a seasoned gardener or just starting, every careful cut brings you closer to healthier, more productive vines. 🌱✂️
Now that you’re armed with the right tools, timing, and techniques, take that first step: schedule your pruning session before winter sets in. Grab your gloves, sharpen those shears, and get ready to watch your grapevines thrive like never before! Ready to dive deeper? 🚀