
Pruning
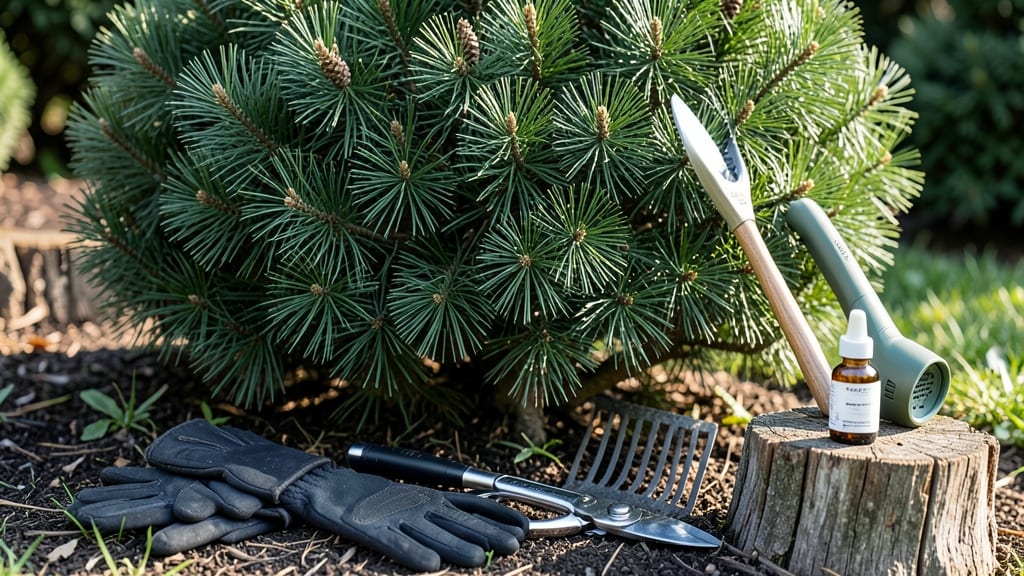
Pruning mugo pines transforms your yard from ordinary to stunning with just a few sharp cuts. 🌲 I used to avoid pruning these tough little evergreens, fearing I'd ruin their natural shape—but now they're the showstopper of my landscape, looking fuller and more vibrant every year.
The best time to prune is late winter or early spring, when new growth is about to begin. You'll need clean, sharp pruners (bypass pruners work best) and a clear vision of the shape you want—whether that's a formal hedge, a rounded mound, or a natural, relaxed look.
Most pruning happens in one session, but light shaping after storms keeps them tidy year-round.
After pruning, your mugo pines will bounce back with dense, fresh growth within weeks. The key is cutting just outside the branch collar (that little bump where the branch meets the stem) to prevent damage.
Avoid over-pruning—never remove more than one-third of the plant in a single session, or you risk stressing it.
This method works for both small mugo pines in containers and large hedges along property lines. The same principles apply whether you're shaping a single plant or maintaining a formal border. Once you master the technique, your evergreens will stay lush and beautiful with minimal effort.
📚 In This Guide
- What you need
- Instructions
- Tips and common mistakes
- Wrapping up and next steps
What you need
- ● Bypass pruning shears – Choose sharp, high-quality shears (e.g., Felco or Fiskars) for clean cuts on small branches (up to ½-inch thick). Budget pick: $15–$25.
- ● Loppers – For thicker branches (½-inch to 1.5-inch diameter). Look for: Ratcheting or bypass action to avoid crushing wood. Price: $20–$40.
- ○ Hand pruners (optional) – For precision trimming on delicate growth. Bonus: Ergonomic handles reduce hand fatigue.
- ● Garden gloves – Thick, cut-resistant (e.g., Mechanix or Filson) to protect against sap and splinters.
- ● Disinfectant (70% isopropyl alcohol or bleach solution) – Wipe tools before and after use to prevent disease spread.
- ● Heavy-duty trash bags or bucket – Collect clippings for easy disposal. Pro tip: Line the bucket with a bag for hassle-free cleanup!
- ● Safety glasses – Protect your eyes from flying debris, especially when pruning near the ground.
- ● Sturdy ladder (if needed) – For tall mugo pines (6+ feet). Check for: Non-slip feet and a weight limit exceeding your body weight.
- ○ Hose with nozzle (optional) – Rinse tools and clean sap off branches post-pruning for a tidy finish.
- ○ Pruning sealant (optional) – Apply to large cuts to prevent disease, but skip for mugo pines—their small branches heal quickly!
- ● ✅ Late winter/early spring (Feb–March) – Ideal for shaping; new growth is about to sprout!
- ● ❄️ Avoid pruning in frost or extreme heat – Stress weakens the plant.
- ● 🌱 Post-pruning care – Water deeply if your area is dry, especially after heavy trimming.
Step-by-Step instructions for pruning mugo pines
Transform your mugo pines into sculpted masterpieces with these precision cuts—just a few minutes of work keeps them lush and shaped for years.
✂️ Step 1: Time Your Pruning for Optimal Growth
Prune mugo pines in early spring (March-April) or late fall (October-November) when the plant is dormant but ready to rebound. This timing prevents stress during extreme heat or cold. Avoid cutting in summer—you’ll encourage tender new growth that won’t harden off before winter.
I always check the weather before pruning. If frost is forecast within a week, wait until after the last freeze. The needles should look firm and vibrant, not wilted or brittle. This ensures the plant can heal quickly and produce fresh growth in the right season.
✂️ Step 2: Gather the Right Tools for Clean Cuts
Use sharp, clean pruning shears (bypass pruners work best) and sterilize them with rubbing alcohol before you start. Dull blades tear tissue, inviting disease. I also keep a small hand saw on hand for thicker branches—mugo pines can develop woody stems over time.
Wear gloves to protect your hands from the sharp needles. A small brush or cloth helps clear fallen needles from your workspace. This keeps your tools and work area tidy, making it easier to spot where you’ve already cut.
🌿 Step 3: Shape the Pine with Strategic Cuts
Start by removing dead, diseased, or crossing branches at the base. Cut just outside the branch collar (the swollen area where the branch meets the trunk) to prevent unsightly stubs. For shaping, trim no more than 1/3 of the plant’s height in one session—this prevents shock.
I like to step back every few cuts to check the balance. Mugo pines grow in a natural mound, so I aim to maintain that rounded silhouette. Avoid cutting into old wood—new growth emerges from the tips, so focus on the outer branches. You’ll see fresh, vibrant needles within weeks of proper pruning.
💧 Step 4: Clean Up and Monitor Recovery
After pruning, rake up all fallen needles and debris to reduce pests and disease. Water the pine deeply if the weather has been dry, but avoid overwatering—mugo pines prefer well-draining soil. A light layer of mulch (2-3 inches) helps retain moisture and keeps roots cool.
Watch for new growth in 4-6 weeks. If the pine looks stressed (needles turning brown or dropping), it may need more time to recover. Prune lightly the following year if needed—better to make small adjustments than overdo it in one session.
⏰ Step 5: Maintain Year-Round with Light Touch-Ups
Give your mugo pine a quick check every 6-8 weeks during the growing season. Trim stray branches that spoil the shape or remove any that rub against others. A little maintenance keeps the plant looking intentional without heavy-handed pruning.
I also rotate my pruning approach seasonally. In spring, I focus on shaping; in fall, I clean up any errant growth. This keeps the pine healthy and ensures it stays a standout feature in your landscape year-round.
Tips & tricks for perfectly shaped mugo pines
Real talk: The difference between a mugo pine that looks intentional and one that looks hacked together comes down to these small details. Here's what nobody tells you about shaping evergreens right.
Timing Secret: The early spring or late fall windows in Step 1 are non-negotiable for healthy growth. I learned this the hard way after pruning in summer—my pine produced tender new growth that froze in the first winter. Check for frost dates in your area and mark your calendar. The plant's needles should feel firm like fresh pine needles, not brittle like straw. This simple test tells you everything about recovery potential.
Tool Technique: Step 2 emphasizes sharp tools, but here's what I do differently: I always make my first cut slightly above where I intend to finish. This prevents tearing the bark when I make the final cut. For thicker branches, use the hand saw to make a clean cut first, then finish with shears. The goal is to leave a smooth surface that won't collect moisture and rot. I keep a small container of rubbing alcohol handy to wipe blades between cuts—this prevents cross-contamination between branches.
Shape Strategy: When shaping in Step 3, I use the "thirds rule" religiously: never remove more than 1/3 of the plant's height at once. For visual balance, I mentally divide the pine into thirds and work on one section at a time. Start with the top third—this creates the illusion of height. Use your shears at a slight angle to create natural-looking layers. The key is to step back every few minutes and check your progress from all angles. What looks perfect from the front might be lopsided from the side.
Recovery Wisdom: After pruning, I always do a final check for any remaining debris that could harbor pests. The 4-6 week recovery window in Step 4 is when most problems appear. If you see brown needles after 6 weeks, it's not too late—just reduce watering and wait another 2 weeks. The mulch layer should be fluffy, not compacted. I use pine bark mulch because it mimics the natural forest floor environment these pines thrive in. This small detail makes a huge difference in root health.
Pro Tips for Pruning Mugo Pines
- Real talk: The difference between a mugo pine that looks intentional and one that looks hacked together comes down to...
- Timing Secret: The early spring or late fall windows in Step 1 are non-negotiable for healthy growth. I learned this ...
- Tool Technique: Step 2 emphasizes sharp tools, but here's what I do differently: I always make my first cut slightly ...
Frequently asked questions
Got questions about pruning your mugo pines? You’re not alone! Whether you’re a first-timer or a seasoned gardener, these FAQs will help you navigate the process with confidence. Let’s dive in!
When is the best time to prune mugo pines?
The ideal window is late winter to early spring (February–March), just before new growth begins. This timing minimizes stress on the plant and promotes healthy regrowth. Avoid pruning in summer or fall, as it can expose the tree to pests or winter burn.
How much can I trim off a mugo pine without harming it?
Never remove more than 25–30% of the foliage in a single session. Mugo pines are resilient but can struggle if over-pruned. For shaping, focus on light, gradual cuts—think of it like sculpting! If you’ve already trimmed too much, don’t panic; the tree will recover with patience.
What if my mugo pine looks stressed after pruning?
Stress signs like yellowing needles or stunted growth often mean over-pruning or poor timing. To help it recover:
- Water deeply but avoid soggy soil.
- Apply a balanced fertilizer (10-10-10) in spring.
- Shade the tree from harsh afternoon sun for a few weeks.
Can I prune mugo pines into different shapes (e.g., topiary)?
Mugo pines are fantastic for topiary due to their dense growth. Use sharp shears or a hedge trimmer for clean cuts, and prune frequently (every 4–6 weeks) to maintain shape. Start with a basic oval or round form for beginners, then get creative!
Are there alternatives to pruning if my mugo pine is already overgrown?
If pruning feels too drastic, consider selective thinning—removing only the innermost branches to improve airflow and light penetration. For severely overgrown trees, a gradual reset (light pruning over 2–3 years) works better than a harsh cutback. If all else fails, propagation from cuttings is an option!
Wrapping up and next steps
Pruning your mugo pines isn’t just about tidying up—it’s an art that unlocks their full potential, keeping them lush, healthy, and stunning year-round. 🌲 With the right tools, timing, and techniques, you’ll transform your evergreens into showstopping focal points.
Now that you’re equipped with the know-how, there’s no better time to roll up your sleeves and give your pines the care they deserve.
Ready to see the difference? Pick a calm, sunny day and start pruning—your future landscape will thank you! For extra inspiration, browse before-and-after pruning galleries to visualize your own mugo pine masterpiece.