
Pruning
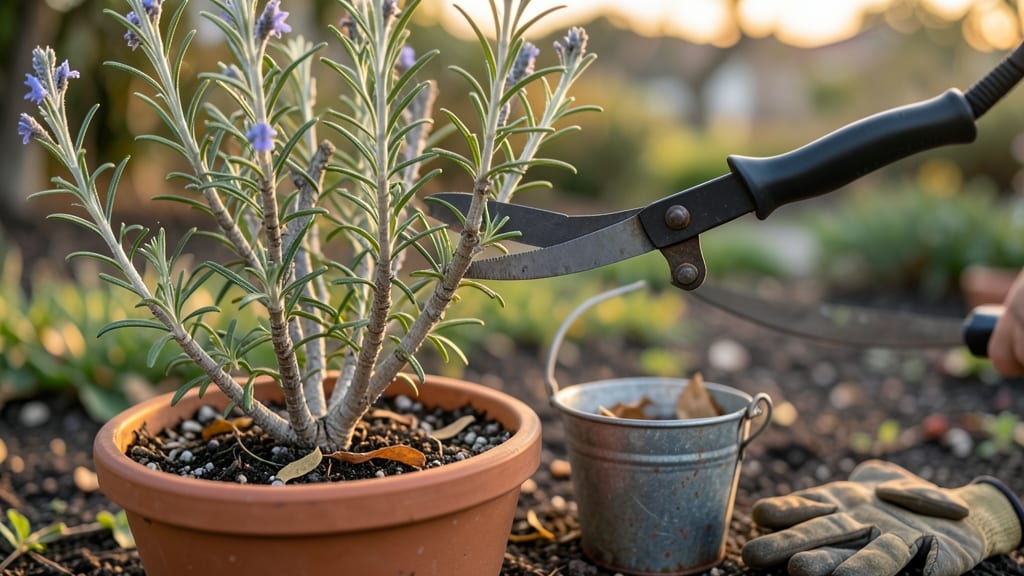
Pruning woody salvias in late winter isn't just about shaping—it’s about setting up your plants for shockingly lush blooms all season. 🌿 I’ve watched my Salvia nemorosa go from scraggly to showstopping in just six weeks after a proper cutback, and the secret lies in timing, technique, and a little strategic patience.
Most gardeners wait until spring, but dormant-season pruning gives your salvias a head start on new growth while avoiding the stress of summer heat.
The right tools and a sharp eye make all the difference. You’ll need clean, sharp pruners (dull blades crush stems and invite disease), gloves to protect from spiky foliage, and a bucket for clippings—because those woody stems make surprisingly good kindling.
Focus on removing dead, crossing, or weak stems first, then cut back the remaining stems by one-third to half their height. This isn’t about making them small; it’s about encouraging strong, bushy growth from the base.
What you’ll end up with is a plant that blooms like crazy—thicker stems, better airflow, and fewer pests. My Salvia officinalis now produces two full cycles of flowers instead of one, and the fragrance? Unmatched. The key is to avoid over-pruning; salvias are tough but not invincible.
If you cut too aggressively, you’ll delay blooming or stress the plant. Think of it like giving your salvias a fresh start, not a haircut.
This method works for any woody salvia, from the tall Salvia nemorosa to the compact Salvia greggii. Whether you’re in a hot, dry climate or a cooler zone, late-winter pruning ensures your plants hit the ground running.
Grab your tools, and let’s get those stems looking sharp—your summer garden will thank you.
📚 In This Guide
- What you need
- Instructions
- Tips and common mistakes
- Wrapping up and next steps
What you need
- ● Bypass pruners – Sharp, clean bypass pruners (not anvil-style) for precise cuts. Size: 6–8 inches, ergonomic grip for comfort.
- ● Loppers – For thicker stems (½ inch or larger). Size: 18–24 inches, with a long handle for leverage.
- ● Pruning saw – For stubborn, woody branches. Type: Curved-tooth saw for clean cuts.
- ● Garden gloves – Heavy-duty, cut-resistant gloves to protect hands from thorns or rough stems.
- ○ Disinfectant (optional but recommended) – 70% isopropyl alcohol or a pruning sealant to sterilize tools between cuts and prevent disease.
- ● Hose or bucket – For rinsing tools and cleaning sap off blades mid-pruning.
- ● Marking twine or flags – To tag branches for removal (helpful in large shrubs).
- ● Compost bin or bag – For collecting pruned debris (avoid leaving large piles near the plant).
- ● Safety glasses – If working with dense foliage or near your face.
- ● Check the weather: Prune on a dry, calm day to avoid spreading disease or damaging the plant.
- ● Know your plant: Identify dead, diseased, or crossing branches before you start.
- ● Timing: Late winter (just before new growth begins) is ideal for woody salvias.
Step-by-Step instructions for pruning woody salvias
Here’s how I revive woody salvias each late winter—cutting back just enough to spark fresh, vigorous growth.
✂️ Step 1: Assess the Plant’s Structure and Health
Start by examining your woody salvia for dead, diseased, or crossing branches. I look for brown, brittle stems (dead wood) or any limbs rubbing against others (a future wound site). Use your fingers to gently tug on stems—if they snap easily, they’re dead and should be removed. Healthy stems have a slight give but resist breaking.
Identify the main stems—these are the thickest, upright branches that form the plant’s skeleton. In salvias, these often bear last year’s flower stalks. Mark them with a soft-tip marker if needed; you’ll preserve these as they’re the plant’s energy reservoirs for next season’s blooms.
✂️ Step 2: Cut Back Dead and Weak Growth First
Using clean, sharp pruners (sterilized with rubbing alcohol), make your first cuts. Remove any dead wood down to the base or to a healthy bud. For crossing branches, cut one entirely—never leave a stub. I always cut at a 45-degree angle, about ¼ inch above a leaf node or outward-facing bud, to encourage water runoff and prevent rot.
Next, trim thin, leggy stems that haven’t produced flowers in years. These saplings steal energy from the main plant. Cut them back to half their height, but never below the lowest set of healthy buds. You’ll know you’ve gone too far if the stem looks bare and woody all the way down.
✂️ Step 3: Shape the Remaining Structure
Now focus on the main stems. For most woody salvias, I reduce their height by one-third—this mimics their natural growth cycle and prevents overcrowding. Cut just above a bud that faces outward (never inward) to maintain an open, airy shape. This encourages airflow, reducing fungal risks like powdery mildew.
Step back frequently to check your work. The goal is a rounded, slightly bushier silhouette—not a dense, hedge-like appearance. If your salvia is particularly tall, consider staggering cuts over two years to avoid shocking the plant. Real talk: I’ve over-pruned before, and the plant took two seasons to recover.
🌿 Step 4: Clean Up and Apply Post-Pruning Care
Remove all trimmings from the work area immediately—salvia cuttings can root, but they’re prone to disease if left piled under the plant. Sterilize your pruners again with alcohol to prevent spreading pathogens between cuts. I like to finish by watering deeply at the base, which helps the plant recover faster.
After pruning, hold off on fertilizing for 4-6 weeks. The plant needs time to knit wounds and redirect energy to new growth. Instead, mulch around the base with 2-3 inches of organic mulch (like shredded bark) to retain moisture and regulate soil temperature. This is the moment that matters: proper post-pruning care sets the stage for lush, blooming stems by summer.
Tips & tricks for pruning woody salvias
Late-winter pruning transforms woody salvias from leggy relics into vigorous bloomers—here’s how to avoid the most common pitfalls and get it right the first time.
Bud Identification: The key to successful pruning lies in those tiny buds hidden along the stems. In Step 3, when shaping your plant, look for buds that face outward—they’ll grow into new branches that create that open, airy structure we want. I’ve made the mistake of cutting above inward-facing buds, which leads to dense, crowded growth that blocks sunlight and air circulation. Think of it like training a dog: you want new growth pointing outward, not inward where it’ll tangle.
Pruner Precision: Those 45-degree angle cuts in Step 2 aren’t just for show—they’re a fungal disease prevention strategy. The slanted cut directs water away from the wound, preventing rot. I keep a small bottle of rubbing alcohol handy to sterilize my pruners between cuts, especially when working with multiple plants. Cross-contamination can spread pathogens faster than you can say "powdery mildew." Pro tip: Use sharp pruners—they make cleaner cuts that heal faster than jagged tears.
One-Third Rule: Reducing main stems by one-third in Step 3 might seem arbitrary, but it’s rooted in plant biology. This amount mimics the plant’s natural growth cycle and prevents overcrowding while preserving enough foliage for photosynthesis. For particularly tall salvias, I’ve found staggering cuts over two years works best—this gradual approach prevents shock. The goal is to reveal the plant’s natural shape, not turn it into a topiary. Step back often to check your work; you’re aiming for a rounded silhouette, not a hedge.
Post-Pruning Recovery: That 4-6 week fertilizing hiatus in Step 4 is crucial—your salvia needs time to heal. Think of it like giving a human a major surgery: you wouldn’t feed them right away. During this period, focus on deep watering and mulching. I’ve seen plants recover beautifully when given this recovery window, but they’ll struggle if you rush back to feeding. The mulch layer helps regulate soil temperature and retain moisture, which is especially important in our unpredictable spring weather.
Pro Tips for Pruning Woody Salvias
- Late-winter pruning transforms woody salvias from leggy relics into vigorous bloomers—here’s how to avoid the most co...
- Bud Identification: The key to successful pruning lies in those tiny buds hidden along the stems. In Step 3, when sha...
- Pruner Precision: Those 45-degree angle cuts in Step 2 aren’t just for show—they’re a fungal disease prevention strat...
Frequently asked questions
Got questions about pruning woody salvias? You’re not alone! Here are some of the most common concerns—plus clear, actionable answers to keep your plants thriving.
When is the best time to prune woody salvias if I miss late winter?
Late winter (just before new growth starts) is ideal, but you can prune woody salvias anytime during dormancy (fall or early spring). Avoid pruning after buds form in spring—this could reduce blooms. If you’re late, focus on shaping rather than heavy cuts to avoid stress.
How much can I trim back woody salvias without harming them?
Woody salvias are tough! You can safely remove up to ⅓ of the plant’s height in one go. For overgrown plants, cut back to healthy, woody stems (avoid cutting into bare wood). Dead or damaged stems can be trimmed all the way to the base. Pro tip: Use clean, sharp shears to prevent tearing.
What if my woody salvia doesn’t bloom after pruning?
No blooms could mean a few things:
- Pruned too late—bloom buds form in late winter/early spring.
- Over-fertilized—too much nitrogen = leafy growth, not flowers.
- Not enough sun—woody salvias need 6+ hours of sunlight daily.
Can I prune woody salvias in cold climates, or should I wait for warmer weather?
Prune woody salvias before the first hard frost (late fall) or after the ground thaws in early spring. Cold-weather pruning is fine as long as the plant is dormant. Avoid pruning during freezing temperatures—wait until temps rise above 40°F (4°C) for cleaner cuts and faster healing.
Is there an alternative to pruning if my woody salvia looks messy but isn’t overgrown?
If your plant is healthy but unruly, try selective trimming instead of heavy pruning:
- Remove only spent flowers (deadheading) to encourage new blooms.
- Thin out crossing or crowded stems for better airflow.
- Use hand-pruning to shape instead of shears for delicate adjustments.
Wrapping up and next steps
Pruning woody salvias in late winter isn’t just about tidying up—it’s your secret to vibrant blooms and healthier plants! By following the right techniques, you’ll encourage lush growth and protect your salvias from pests and disease.
Now that you’re armed with the how-to, grab those pruners and give your garden a little love—your salvias will thank you with a stunning spring display. 🌸
Ready to take the next step? Mark your calendar for late winter (just before new growth starts) and make pruning a yearly ritual. For extra care, consider mulching or fertilizing after the cut to boost recovery. Happy pruning!