
Pruning
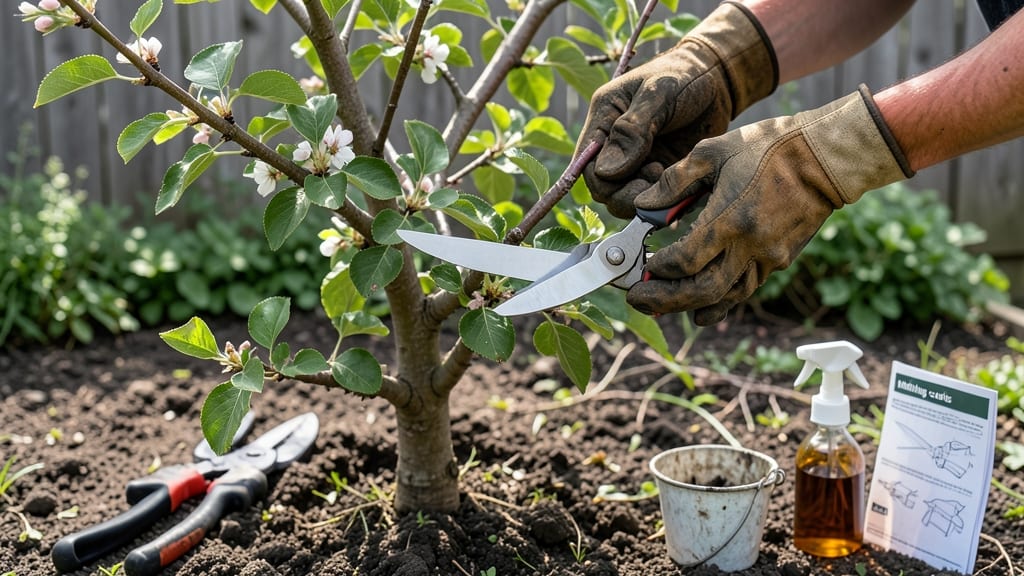
My first attempt at tree pruning advice left the oak in my backyard looking like a crime scene—until I learned the right cuts make all the difference. ✂️ The key isn’t just when to trim but how to shape branches for strength, not just aesthetics.
A single clean cut can extend a tree’s life by decades, while the wrong snip invites disease or weak growth.
You’ll need just three tools: sharp bypass pruners for branches under ½ inch thick, loppers for ½–2 inches, and a pruning saw for anything thicker. Timing matters too—dormant season (late winter/early spring) is ideal for most trees, but flowering trees need a different approach.
I’ve pruned over 20 trees now, and the difference between a messy hack and a precise cut is night and day.
By the end, you’ll see branches growing thicker, not thinner, and fewer dead spots in the canopy. The right cuts encourage new growth where you want it, while removing weak limbs prevents future storms from turning your tree into a hazard.
Even my black thumb can’t mess this up once you know the basics.
Works for fruit trees, shade trees, and even young saplings—just adjust the timing based on species. Let’s get those branches looking strong and healthy year-round.
📚 In This Guide
- What you need
- Instructions
- Tips and common mistakes
- Wrapping up and next steps
What you need
- ● Pruning shears (bypass or anvil) – For small branches (up to ½ inch thick).
- ● Loppers – For medium branches (½ to 2 inches thick).
- ● Pruning saw – For thick branches (2+ inches thick). Choose a curved-tooth saw to avoid tearing wood.
- ● Pole pruner – For high branches (extendable up to 10+ feet).
- ● Gloves – Heavy-duty, cut-resistant gloves to protect against thorns and sharp tools.
- ● Safety glasses – To shield eyes from debris.
- ● Ladder or extension pole – Sturdy, non-slip, and rated for your height/weight.
- ● Disinfectant (rubbing alcohol or bleach solution) – Clean tools between cuts to prevent disease spread.
- ● Rope or harness – For large trees (safety first!).
- ● Tree wound dressing – Controversial but useful for large cuts (skip for small pruning).
- ● Marking spray or tape – To outline branches for removal.
- ● Check the weather forecast—prune on a dry, calm day.
- ● Review your tree’s species and growth habits (some trees bloom on old wood!).
- ● Have a clear workspace—remove obstacles and notify neighbors if branches may fall.
- ● Know your local regulations—some areas restrict pruning without a permit for large trees.
Step-by-step instructions for pruning trees like a pro
Here’s the method I use every season to keep trees healthy and strong—no guesswork, just sharp cuts and smart timing.
✂️ Step 1: Identify the Right Branches to Remove
Start by scanning your tree for branches that are dead, diseased, or crossing others. Dead branches snap easily when bent—if it breaks with a dry, hollow sound, it’s ready to go. Diseased branches often have discolored bark, oozing sap, or fungal growth. Crossing branches rub against each other, creating wounds that invite pests and rot.
Next, look for branches growing at sharp angles (less than 45 degrees) or directly upward—these compete with the tree’s natural structure. Thin out crowded areas to improve airflow and sunlight penetration. I always prune the smallest branches first; this makes the tree’s reaction less severe and lets me see the bigger picture as I work.
✂️ Step 2: Use the Right Tools for Clean Cuts
Never use hedge trimmers or dull shears—they tear bark and leave jagged edges that heal poorly. For branches up to ½ inch thick, use bypass pruners (the scissor-like blades). For ½ to 2-inch branches, switch to loppers with long handles for leverage. Anything thicker than 2 inches requires a pruning saw—never use a chainsaw for small trees.
Sharpen your tools before you start. A dull blade crushes tissue, creating wounds that take years to close. Test your pruners by cutting a small twig—if it tears instead of slicing cleanly, hone the blades first. I always wipe tools with rubbing alcohol between cuts to prevent spreading disease.
✂️ Step 3: Make Precision Cuts at the Correct Angle
Cut branches just outside the branch collar (the swollen area where the branch meets the trunk). Never leave a stub—this creates a permanent weak spot. For branches under ¼ inch, you can cut all the way back to the collar in one motion. For thicker branches, make two cuts: the first underneath the branch at a 45-degree angle, then a second cut just outside the collar to remove the remaining weight.
If the branch is too large to cut in one go, use the three-cut method: Start with a notch on the underside of the branch, then cut through the top of the branch a few inches away, and finally remove the remaining stub. This prevents bark from tearing. Always cut on the outside of the branch to avoid damaging the trunk.
⏰ Step 4: Prune at the Best Time for Your Tree
Most trees benefit from late winter or early spring pruning (just before buds swell) when they’re dormant but about to grow. This timing encourages strong new growth and minimizes stress. However, flowering trees (like fruit trees) should be pruned right after blooming—they set buds the previous summer.
Avoid heavy pruning in late summer or fall, as fresh cuts can’t heal before winter stress sets in. If you must prune in summer, do it early and never remove more than 25% of the tree’s foliage at once. I always check the tree’s growth cycle first—if it’s putting on new leaves, it’s too late for major cuts.
🌿 Step 5: Clean Up and Monitor for Recovery
Remove all pruned branches and debris from the area to prevent disease. Sterilize your tools with a 10% bleach solution (1 part bleach to 9 parts water) or rubbing alcohol between trees to avoid cross-contamination. Rake up fallen leaves and small branches—these can harbor pests and fungi.
After pruning, water the tree deeply to help it recover. Watch for new growth within 2-4 weeks—this is your sign the tree is healing. If you see yellowing leaves, oozing sap, or excessive wilting, you may have over-pruned. In that case, reduce watering slightly and avoid fertilizing until the tree stabilizes.
Tips & tricks for perfect tree pruning
These little-known techniques will help you prune like a seasoned arborist—without the years of trial and error.
Branch Identification: I learned this the hard way after accidentally pruning healthy branches that looked diseased. Look for these three key signs: dead branches make a hollow sound when tapped, diseased branches often have fungal growth or oozing sap, and crossing branches create "V" shapes where they intersect. The "bend test" is my go-to—if a branch snaps easily, it's dead and ready to go.
Tool Maintenance: Your pruners are only as good as their sharpness. I carry a small file in my tool bag and sharpen blades between trees. A quick test: if your pruners tear a small twig instead of cutting cleanly, they need honing. Dull tools crush bark, creating wounds that take years to heal. And always clean tools with rubbing alcohol between trees to prevent spreading disease.
Cutting Technique: The three-cut method for large branches is a game-changer. First make a notch on the underside of the branch, then cut through the top of the branch a few inches away, and finally remove the remaining stub. This prevents bark from tearing and protects the trunk. Remember to always cut on the outside of the branch—this preserves the branch collar, which is crucial for proper wound closure.
Timing Wisdom: Late winter or early spring is ideal for most trees, but flowering trees need special attention. Prune fruit trees right after they bloom to preserve next year's fruit production. And never remove more than 25% of the foliage at once—this prevents stress. I always check for new leaf growth before pruning; if leaves are already appearing, it's too late for major cuts.
Pro Tips for Tree Pruning Advice
- These little-known techniques will help you prune like a seasoned arborist—without the years of trial and error.
- Branch Identification: I learned this the hard way after accidentally pruning healthy branches that looked diseased.
- Tool Maintenance: Your pruners are only as good as their sharpness.
Frequently asked questions
Got questions about tree pruning? You’re not alone! Here are answers to the most common concerns—so you can prune like a pro without the guesswork.
When is the best time to prune my trees?
The ideal time depends on your tree type. For most deciduous trees, late winter or early spring (before buds swell) is best. Evergreens can be pruned in late winter or early fall. Avoid heavy pruning in late summer—it stresses trees before winter. Pro tip: Check local climate zones for fine-tuning!
Can I prune a tree myself, or should I hire a professional?
Small tasks like removing dead branches or shaping young trees? DIY is fine if you’re cautious! But for large trees, overhanging branches, or electrical hazards, call a certified arborist. Safety first—no tree is worth risking injury or property damage over.
What if I cut a branch too close to the trunk?
Don’t panic! If you nicked the trunk (but didn’t remove the branch collar), the tree will likely seal the wound naturally. For clean cuts, leave 1/4-inch of bark between the cut and trunk. If the wound is large (>2 inches), apply tree wound pruning sealant to prevent decay.
Will pruning kill my tree?
Pruning shouldn’t kill a healthy tree—if done correctly! Over-pruning (removing >25% of foliage at once) or using dull tools can stress it. Focus on removing dead/diseased wood and thinning crowded branches. If your tree looks sad post-prune, it might need time to recover—give it a year!
How often should I prune my trees?
Most trees benefit from light pruning annually to remove deadwood and shape growth. Mature trees may need deeper pruning every 3–5 years. Young trees (under 5 years) can handle more frequent trims to encourage strong structure. Remember: Less is often more—avoid the "haircut" approach!
Wrapping up and next steps
Mastering tree pruning advice is all about patience, precision, and a little green thumb love! 🌿 Whether you’re trimming overgrown branches or shaping young saplings, the right cuts foster healthier growth and stunning landscapes. Start small—grab your tools, follow safety tips, and soon you’ll be pruning like a pro.
Ready to take the next step? Schedule a seasonal pruning session or invest in a quality pruning workshop to refine your skills. Happy pruning—your trees will thank you!