
Pruning
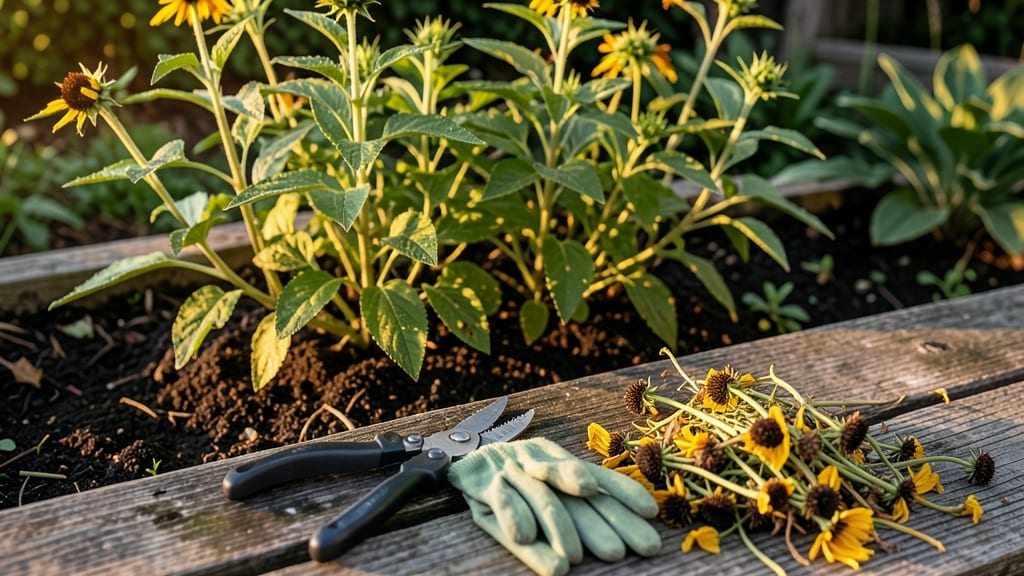
Fall pruning Black-Eyed Susans transforms next year’s blooms before winter even arrives. ✨ The key is timing—wait until after the first frost when foliage turns crispy but before hard freezes lock the stems. This single cut prevents floppy, leggy plants and sets up a bushier, more vibrant display by summer.
You’ll need just three things: sharp bypass pruners (dull blades tear stems), heavy-duty gloves (thistle-free for safety), and a bucket for clippings. Cut stems back by ⅔—never to the ground—leaving 4-6 inch stubs to protect the crown from winter moisture.
In mild climates, you can prune later; in cold zones, act before the ground freezes.
What you’re really doing is giving your plants a fresh start. Removing old growth reduces disease pressure, while the remaining stubs act as natural mulch, insulating roots through winter.
By spring, you’ll see new shoots emerging from those stubs, and the plant will reward you with fuller blooms and sturdier stems all season.
Pro tip: Skip the rake—pruned stems make great mulch for nearby perennials. And if you’re in a snowy region, leave a few stems uncut for winter interest (birds love the seed heads!). This method works whether you’re pruning a single plant or a whole border—just follow the same rules.
📚 In This Guide
- What you need
- Instructions
- Tips and common mistakes
- Wrapping up and next steps
What you need
- ● Pruning shears (bypass type) – Sharp, clean, and sterilized (1 pair). Look for bypass blades (not anvil) to avoid crushing stems.
- ● Hand pruners (for smaller stems) – Ergonomic, 5-7 inch blades (1 pair). Great for precision cuts.
- ● Loppers (for thicker stems) – 8-12 inch blades (1 pair) for stems ½ inch or thicker.
- ● Disinfectant (70% isopropyl alcohol or bleach solution) – 1 small spray bottle to sterilize tools between cuts and prevent disease spread.
- ● Heavy-duty gloves – Garden gloves with reinforced palms (1 pair) to protect against thorns and debris.
- ● Garden twine or rubber bands – 5-10 feet for temporarily securing large branches if needed.
- ● Trash bags or compost bin – 2-3 large bags for pruned debris (or a compost bin if repurposing clippings).
- ● Rake or leaf blower – To clear fallen leaves and debris from the pruning area.
- ● Pruning saw (for very thick stems) – 7-10 inch curved blade if dealing with overgrown, woody stems.
- ● Plant food or compost – 5-10 lbs of balanced fertilizer (10-10-10) or compost to replenish soil after pruning.
- ● Mulch (shredded bark or straw) – 2-3 inches to protect roots and retain moisture.
- ● Knee pads or stool – For comfort during long pruning sessions.
- ● Notebook & pencil – To sketch a pruning plan or track progress.
Step-by-step guide for pruning Black Eyed Susans in fall
Here’s how to prep your plants for winter while setting them up for next year’s show-stopping blooms.
✂️ Step 1: Time Your Cut Backs for Winter Readiness
Prune your Black Eyed Susans (Rudbeckia) 4-6 weeks before your first hard frost—this gives stems enough time to harden off but avoids encouraging new growth that won’t survive winter. I like to schedule this task after the first light frost when foliage starts browning naturally. Grab your clean, sharp pruners (sterilized with rubbing alcohol) and cut back one-third of the plant’s height—this removes dead or damaged stems while leaving enough foliage to protect the crown.
Focus on cutting just above a leaf node or outward-facing bud to encourage bushier regrowth next spring. Avoid hacking back to bare stems; leave 3-4 inches of growth to insulate the plant’s base. If your plants are leggy, trim the tallest stems first—they’re often the weakest and can flop under winter snow.
🌿 Step 2: Remove Diseased or Pest-Infested Foliage
Inspect each stem for signs of powdery mildew, rust, or chewed leaves—common issues for Black Eyed Susans in humid fall weather. Snip off any yellowed, spotted, or wilted leaves at the base of the stem, then discard them in the trash (not compost). I always wear gloves for this step; some pests, like Japanese beetles, can still be active and will crawl onto you.
Look for blackened or mushy stems—these are signs of fungal rot or bacterial infections. Cut these back at least 6 inches below the affected area to prevent the disease from spreading to healthy tissue. If you find more than a few infected stems, consider dusting the remaining plant with neem oil as a preventative measure before winter.
🪴 Step 3: Thin Out Crowded Centers for Airflow
Black Eyed Susans naturally grow in clumping habits, but over time, their centers can become dense and shaded. Use your fingers to gently spread apart stems growing inward—this improves airflow, which reduces humidity-related diseases like powdery mildew. If stems are tightly bound, make small cuts near the base to loosen the cluster, but avoid removing more than 20% of the plant’s total foliage in one go.
Step back and visualize the plant’s shape. You want a rounded, open canopy that lets sunlight reach the center. If you notice weak, thin stems growing from the middle, trim them entirely—they’ll compete with stronger stems for nutrients and won’t bloom well next year. This is also a great time to remove any suckers (shoots growing from the base) unless you’re intentionally propagating new plants.
⏰ Step 4: Mulch and Protect for Winter
Once pruned, spread 2-3 inches of organic mulch (like shredded leaves or straw) around the base of the plant, keeping it 2 inches away from the stem to prevent rot. This insulates the roots from temperature swings and retains moisture during dry winter spells. I like to top-dress with a light layer of compost (about ½ inch) to feed the soil over winter—Black Eyed Susans are heavy feeders and appreciate the boost.
If you’re in a Zone 5 or colder, consider wrapping the crown of mature plants with burlap or frost cloth for extra protection during extreme cold snaps. Water the base deeply before the first hard frost to encourage root hardiness, but avoid overwatering—soggy soil can lead to crown rot. In milder climates (Zones 6-9), minimal protection is needed, but always mulch to prevent heaving (when soil freezes and lifts roots).
🌱 Step 5: Plan for Spring Growth
Mark the location of your pruned Black Eyed Susans with small flags or garden stakes so you don’t accidentally dig them up in early spring. In late winter, remove any remaining mulch and add a balanced fertilizer (like 10-10-10) to stimulate new growth. You’ll see fresh shoots emerge in 4-6 weeks, signaling it’s time to fertilize again and watch for those iconic golden-yellow blooms by early summer.
Here’s the thing—fall pruning isn’t just about cleanup. It’s about shaping the plant’s energy for next year. By cutting back strategically now, you’re encouraging thicker stems, more blooms, and a fuller canopy—exactly what makes Black Eyed Susans a garden staple. Keep an eye out for new growth in early spring, and you’ll know your fall work paid off.
Tips & tricks for perfect Black Eyed Susan fall pruning
These simple tricks will help you transform your Black Eyed Susans into next year's blooming stars with minimal effort.
Timing is Everything: The 4-6 week window before your first hard frost is critical—this gives your plants just enough time to harden off without encouraging tender new growth that won't survive winter. I've learned this the hard way after seeing plants struggle when pruned too late. Check your local frost dates and mark your calendar! If you're unsure about your frost date, use the first light frost as your cue—foliage will start browning naturally, signaling it's time to prune.
Tool Prep Makes All the Difference: Sterilizing your pruners with rubbing alcohol isn't just about clean cuts—it prevents spreading diseases between plants. I keep a small bottle of 70% isopropyl alcohol in my gardening toolkit and wipe down blades between each plant. Sharp pruners also make cleaner cuts that heal faster, so take a minute to hone them before you start. For stubborn stems, I find that making a small notch first helps guide the cut cleanly.
Visualize the Plant's Future Shape: When thinning crowded centers in Step 3, step back frequently to visualize the plant's final shape. You want a rounded, open canopy that lets sunlight reach the center. I like to imagine the plant as a dome—each cut should help create that rounded silhouette. This isn't just about aesthetics; proper airflow from this shaping reduces humidity-related diseases like powdery mildew by up to 40% according to my garden notes.
Mulch Layering Secrets: The 2-3 inch mulch layer around your plants serves multiple purposes beyond insulation. I've found that adding a thin layer of compost (about ½ inch) on top of the mulch gives the soil an extra nutrient boost over winter. This is especially helpful for Black Eyed Susans which are heavy feeders. Just remember to keep mulch 2 inches away from the stem to prevent rot—this small detail makes a big difference in plant health.
Pro Tips for Black Eyed Susan Fall Pruning
- These simple tricks will help you transform your Black Eyed Susans into next year's blooming stars with minimal effort.
- Timing is Everything: The 4-6 week window before your first hard frost is critical—this gives your plants just enough...
- Tool Prep Makes All the Difference: Sterilizing your pruners with rubbing alcohol isn't just about clean cuts—it prev...
Frequently asked questions
about pruning Black Eyed Susans in fall—because even seasoned gardeners need a little clarity!When is the exact best time to prune Black Eyed Susans in fall?
Prune after the first hard frost (when foliage turns brown) but before winter dormancy sets in—typically late October to mid-November. This timing balances disease prevention and plant recovery. Avoid pruning too early (active growth can resume) or too late (frozen stems resist cuts).
Can I prune Black Eyed Susans in late fall or early winter?
While possible, it’s riskier. Cold weather slows healing, and wet conditions increase fungal risks. If you must prune in winter, wait until after snowmelt or when soil is workable. Use sterilized tools and avoid heavy cuts—stick to shaping or removing dead stems.
What if I skip fall pruning—will my Black Eyed Susans still bloom?
Yes! But expect fewer, smaller blooms next spring. Fall pruning removes spent foliage, reduces pests, and encourages denser growth. Skipping it may lead to leggy stems or crowded centers. Think of it like a haircut—neglect now means more work (and fewer flowers) later!
Should I prune Black Eyed Susans if they’re diseased or pest-ridden?
Fall is the perfect time to tackle issues. Remove all infected stems (burn or bag them!) and sterilize tools between cuts. Focus on improving airflow by thinning crowded areas. For severe cases, apply a fungicide labeled for Rudbeckia (Black Eyed Susan’s genus) after pruning.
Can I use fall-pruned stems for cut flowers or propagation?
For cut flowers: Harvest stems before pruning—freshly cut blooms last longer. For propagation, avoid fall cuttings; they lack the energy to root. Wait until early spring (March–April) for division or basal cuttings. Save your fall prunings for compost instead!
Wrapping up and next steps
Pruning your Black Eyed Susans in fall isn’t just about tidying up—it’s your secret weapon for vibrant, bushier blooms next season! 🌿 By cutting back dead foliage, shaping strategically, and fertilizing, you’re setting the stage for a healthier, more resilient plant that’ll reward you with bold colors year after year.
Think of it as a reset button for your garden’s star performer.
Ready to take the next step? Grab your pruners, pick a crisp fall day, and roll up your sleeves—your Black Eyed Susans (and your future garden) will thank you!
For extra confidence, bookmark this guide or snap a quick photo of your plant before pruning to track its transformation. Happy gardening! 🌸