
Pruning
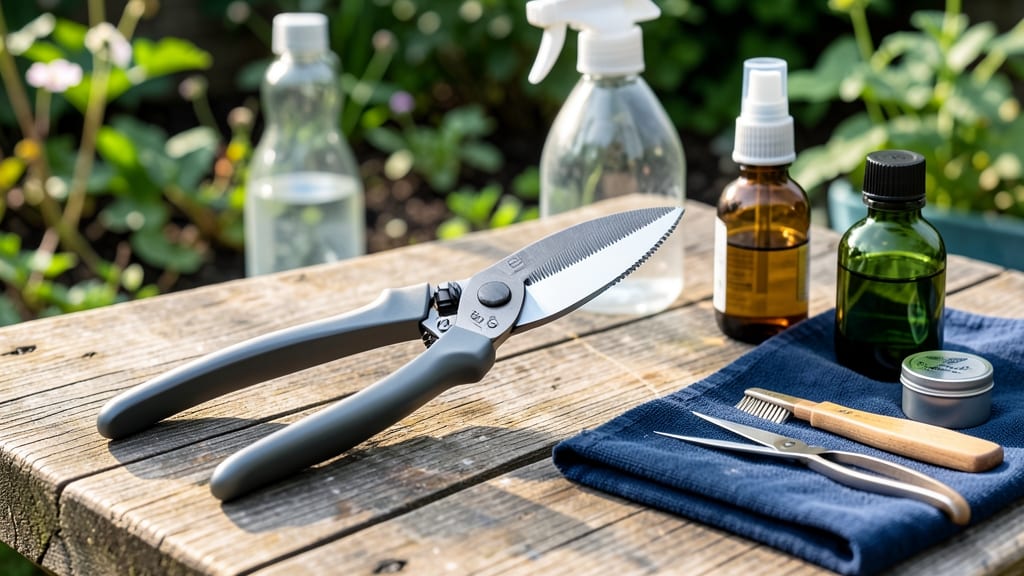
How to clean pruning shears before they turn into disease spreaders is easier than you think—rusty blades aren’t just unsightly, they’re silent killers. That dull, grimy edge isn’t just ugly—it’s clogging wounds with bacteria every time you cut, turning your tool into a pathogen highway. The good news? A proper cleaning takes just 5 minutes and keeps your shears sharp, sterile, and ready for years. Start with hot, soapy water to dissolve sap and grime, then scrub the blades with a stiff brush—don’t skip the crevices where sap hides. Rinse thoroughly and dry immediately with a clean towel, because damp metal is rust’s best friend. For stubborn sap, a drop of mineral oil on a rag works like magic, breaking down residue without damaging the blade. After cleaning, sharpen with a whetstone (or a file in a pinch) to maintain that clean cut. Test on a scrap branch—if it tears instead of slices, it’s time to sharpen again. Store shears blades-down in a dry place, never hanging where moisture collects. This routine prevents cross-contamination between plants and extends your shears' life. Healthy tools mean healthier plants—so make it part of your post-pruning ritual. Your garden (and your shears) will thank you.
📚 In This Guide
- What you need
- Instructions
- Tips and common mistakes
- Wrapping up and next steps
What you need
- ● Pruning shears – The star of the show! Ensure they’re completely dry before starting.
- ● Rag or microfiber cloth – 2-3 pieces (one for wiping, one for polishing, and one for oily residue). Avoid paper towels—they leave lint!
- ● Mild dish soap – 1-2 drops (like Dawn) in warm water for degreasing.
- ○ Rust converter or mineral oil – 1 small bottle (e.g., blank">WD-40 Specialist Rust Converter or blank">3-in-1 Oil). Optional but highly recommended for metal parts.
- ● Soft-bristle toothbrush – 1 (for scrubbing crevices). A small, old toothbrush works best!
- ● Rubbing alcohol (70% isopropyl) – 1 small bottle (for disinfecting and removing sap/residue).
- ● Fine-grit sandpaper – 220-grit (if rust spots are stubborn). Use sparingly!
- ● Clean, dry container – For soaking parts if heavily caked with sap.
- ● Stainless steel polish – For a showroom shine on metal blades.
- ● Silicon spray – To prevent future rust after cleaning.
- ● Pruning shear sharpening stone – If you want to hone the blade while you’re at it.
- ● Gloves – Nitrile or latex to protect your hands from sap and oils.
- ● Flashlight – For inspecting hidden crevices in dim lighting.
Step-by-step instructions for cleaning pruning shears
Here's the method I use after every pruning session to keep my shears sharp and rust-free.
Remove Sap and Debris Immediately After Use
First, wipe down the blades and handles with a clean, dry cloth to remove fresh sap or moisture. Sap hardens quickly and becomes nearly impossible to remove later, so don't let it dry on the metal. I keep a small towel tucked in my tool belt for this quick cleanup—it takes less than a minute and prevents buildup.
Pay special attention to the crevices between the blades and the pivot point where they meet. Use a wooden toothpick or a small brush to dislodge any debris stuck in these tight spaces. You'll see a noticeable difference in how smoothly the blades close if you skip this step—residue causes friction and dulls the edges over time.
Soak in Warm, Soapy Water
Fill a basin with warm water and add a few drops of mild dish soap. Submerge the shears completely for 10-15 minutes to loosen any remaining sap or dirt. The warmth helps break down sticky residues without damaging the metal. I like to add a splash of white vinegar to the water—it helps dissolve sap and prevents rust while the shears soak.
Gently agitate the shears occasionally by opening and closing the blades underwater. This dislodges debris from the pivot area and ensures the soap reaches all surfaces. Avoid using harsh chemicals or abrasive cleaners—they can strip protective coatings on the blades and handles.
Scrub and Rinse Thoroughly
After soaking, use a soft-bristle brush or an old toothbrush to scrub the blades, pivot point, and handle. Focus on the edges of the blades where sap often accumulates. A stiff brush can scratch the metal, so I stick to soft materials only. Rinse the shears under warm running water, making sure to flush out all soap residue from the pivot area.
Check the pivot screw (the bolt that holds the blades together) for dirt or rust. If you see corrosion starting, this is the time to address it—once it spreads, it can seize the mechanism. Run your finger along the blade edges to feel for any remaining roughness. If you detect any grit or stickiness, repeat the soaking and scrubbing steps until the blades feel completely smooth.
Dry and Apply a Protective Coating
Pat the shears dry with a clean towel, then let them air-dry completely in a well-ventilated area. Moisture trapped in the pivot area is the fastest way to encourage rust, so take your time here. I prop the blades open slightly with a clean cloth to ensure airflow reaches the pivot point.
Once fully dry, apply a thin layer of protective oil or rust inhibitor to the blades and pivot area. I use a few drops of mineral oil or a specialized tool oil—just enough to coat the metal without dripping. Wipe off any excess oil with a clean cloth. This step is non-negotiable if you want your shears to last for years. The oil creates a barrier that keeps moisture and sap from causing corrosion.
Sharpen and Store Properly
After cleaning, check the blade edges with a piece of paper. Hold the paper vertically and run the blade along it—if it cuts cleanly without tearing, the edge is sharp. If not, use a sharpening stone or file to restore the edge. Angle the blade at 20-30 degrees and stroke it evenly along the stone, alternating sides to maintain symmetry.
Store your shears in a dry place, preferably hanging or in a tool roll where they won't collect moisture. I keep mine in a padded case with silica gel packets to absorb any lingering humidity. Proper storage prevents rust and keeps the blades in top condition between uses. With this routine, your pruning shears will stay sharp and rust-free for seasons to come.
Tips & tricks for maintaining pruning shears
These little details make all the difference when it comes to keeping your pruning shears in top working condition for years to come.
Immediate Cleanup is Critical: I can't stress this enough—after every use, take that 60-second wipe-down with a dry cloth. Sap hardens within minutes, and once it dries, it becomes nearly impossible to remove without damaging the blades. I've ruined perfectly good shears by letting sap sit overnight, so don't make my mistake. Keep a small towel in your tool belt or pocket for this quick step—it's the single most important habit for long-term sharpness.
Soaking Secrets: During that 10-15 minute soak, don't just drop the shears in and walk away. The real magic happens when you occasionally open and close the blades underwater—this action helps dislodge stubborn debris from the pivot area that would otherwise cause friction. I like to set a timer so I remember to agitate them every 3-4 minutes. This simple action prevents that frustrating "stuck" feeling when you try to close the blades later.
Pivot Point Protection: The pivot screw is where most rust starts, so give it special attention in Step 3. After scrubbing, use a paperclip to gently pry out any dirt lodged around the screw. If you notice any rust forming here, don't panic—just apply a drop of mineral oil directly to the screw after cleaning. I've seen shears with decades of use that still work perfectly because someone took the time to maintain that tiny pivot point.
Drying Strategy: When it's time to dry your shears, prop the blades open slightly with a clean cloth to create an airflow channel to the pivot area. This prevents moisture from getting trapped where it can cause rust. I like to place them near a fan or in a slightly warm spot to speed up the drying process. Never leave them in a closed container or damp environment—rust starts within hours in those conditions.
Pro Tips for Clean Pruning Shears
- These little details make all the difference when it comes to keeping your pruning shears in top working condition fo...
- Immediate Cleanup is Critical: I can't stress this enough—after every use, take that 60-second wipe-down with a dry c...
- Soaking Secrets: During that 10-15 minute soak, don't just drop the shears in and walk away. The real magic happens w...
Frequently asked questions
Got questions about keeping your pruning shears in top shape? Here are some of the most common ones—and their answers—to help you maintain rust-free, sharp blades for years to come.
How often should I clean my pruning shears?
Clean your shears after every use if they’ve been cutting sap-heavy plants (like fruit trees or roses), as residue can cause rust. For lighter pruning, a quick wipe-down after each session and a deep clean every 3–6 months will keep them in great shape.
Can I use soap and water to clean my pruning shears?
Yes! A mild soap and warm water solution is perfect for removing dirt and sap. Avoid harsh detergents or bleach, as they can damage the blade’s finish or lubrication. Rinse thoroughly and dry immediately to prevent moisture buildup.
What should I do if my pruning shears are already rusty?
Don’t panic! Scrub the rust off with a stiff brush and a mix of baking soda and water (or vinegar for tough spots). Dry completely, then apply a thin coat of mineral oil or WD-40 Specialist to protect the metal. For severe rust, consider resharpening or replacing the blade.
Is it safe to use a dishwasher to clean pruning shears?
Nope! Dishwashers are a bad idea—the heat and moisture can warp the metal, dull the blade, and strip lubrication. Always clean by hand for the best results. If you’re in a hurry, a quick soak in warm, soapy water followed by a thorough drying is your best bet.
Can I use WD-40 instead of oil for lubricating my shears?
WD-40 is great for removing rust and initial lubrication, but it’s not a long-term solution. Once clean, switch to a light machine oil or pruning shear oil for smoother cuts and better protection. Reapply every few months or after heavy use.
Why do my pruning shears get dull so quickly?
Dull blades often mean lack of maintenance—rust, sap buildup, or improper sharpening can accelerate wear. Always clean and oil your shears after use, and sharpen them when you notice tearing instead of clean cuts. High-quality shears with stainless steel blades stay sharper longer.
Wrapping up and next steps
Keeping your pruning shears clean and sharp isn’t just about prolonging their life—it’s about ensuring every cut is precise and your plants thrive!
With just a few simple steps—disassembling, scrubbing, oiling, and storing them properly—you’ll banish rust and keep those blades razor-sharp for seasons to come. Your garden (and your tools) will thank you!
Now that you’re equipped with the know-how, grab those shears and get cleaning! 🌿✨ Ready for more pruning tips? Check out our guide on seasonal pruning best practices to keep your garden looking its best year-round.