
How To
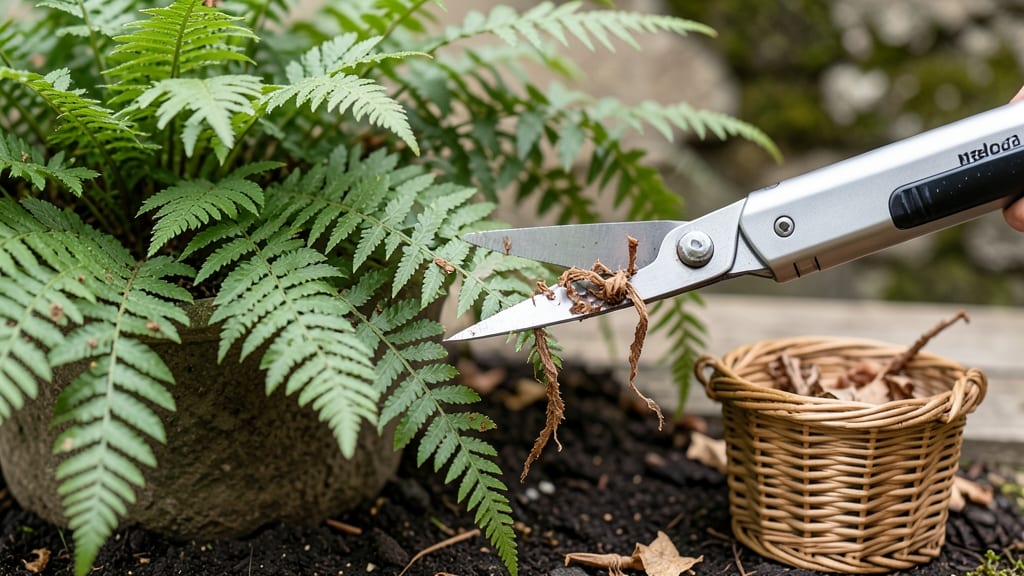
Pruning ferns isn’t just about cleaning up—it’s the secret to lush, bushier growth all year. 🌿 I’ve learned the hard way that skipping this step means leggy fronds and fewer new shoots, but a few simple cuts in the right spots transform even the scraggliest fern into a vibrant showstopper.
The key is timing: wait until you spot brown, crispy fronds (a sure sign they’re done) before grabbing your shears.
Start by snipping dead fronds at the base where they meet the crown, then trim any yellowing or sparse growth back by about one-third to encourage fresh, fuller fronds.
For maidenhair ferns, be gentle—these delicate types need only a light touch, while Boston ferns can handle a little more aggressive pruning. The goal is to keep the center open and airy, which prevents fungal issues and lets light reach the new growth waiting below.
📚 In This Guide
- What you need
- Instructions
- Tips and common mistakes
- Wrapping up and next steps
What you need
- ● Sharp, clean pruning shears or scissors – Choose bypass pruners (for small fronds) or sterilized bypass loppers (for larger, woody stems). Avoid dull tools to prevent tearing.
- ● Rubbing alcohol (70% or higher) or hydrogen peroxide (3%) – For sterilizing tools before and after pruning to prevent disease spread.
- ○ Gloves (optional but recommended) – Wear nitrile or latex-free gloves if your fern has irritating hairs (e.g., Dryopteris varieties) or if you prefer protection.
- ● Newspaper or drop cloth – Lay down a protective layer to catch fallen fronds and debris, especially indoors.
- ● Small bucket or container with water – To rinse tools or dispose of wet fronds after cutting.
- ● Pruning saw (for mature, thick stems) – Use a folding pruning saw if your fern has woody rhizomes (e.g., Osmunda cinnamomea).
- ● Plant food or compost – Have balanced liquid fertilizer (10-10-10) or worm castings ready to nourish your fern post-prune.
- ● Spray bottle with water – Mist fronds lightly before pruning to reduce dust and make cuts cleaner.
- ● Labeling tags or markers – If propagating from cuttings, label containers with the fern type and date.
Step-by-Step instructions for pruning ferns
Revitalize your ferns with these simple, year-round techniques that keep them full and vibrant.
✂️ Step 1: Identify Dead or Damaged Fronds
Start by examining your fern carefully. Dead fronds will feel crispy to the touch and turn brown or black, while damaged ones may have torn edges or yellow patches. I always prune these first—they’re no longer contributing to the plant’s energy and can even attract pests. Use clean, sharp pruners or scissors to avoid tearing the stems.
Cut each frond back to the base where it meets the crown, making a clean slice at a slight angle. This prevents water from pooling on the cut and causing rot. If you’re unsure whether a frond is dead, gently tug on it—if it comes away easily, it’s ready for removal.
✂️ Step 2: Thin Out Overcrowded Growth
Ferns grow best when they have good airflow and light penetration. If fronds are growing too close together, especially near the center, they’ll compete for resources and weaken. Look for fronds that are growing in the wrong direction or blocking sunlight from reaching the middle of the plant.
Use your pruners to trim back the thickest or most outward-growing fronds, cutting them back to about half their length. This encourages new growth from the center, giving your fern a fuller, bushier appearance. I like to step back every few cuts to check the balance—you want a natural, rounded shape, not a sparse center.
✂️ Step 3: Encourage New Growth in Spring
Spring is the best time to give your fern a little extra encouragement. After removing dead fronds and thinning, look for any fronds that are still green but have slowed growth. These are perfect candidates for a light trim to stimulate fresh shoots.
Cut back these fronds to just above a set of healthy leaves or a node where new growth can emerge. Ferns grow from these nodes, so trimming here signals the plant to redirect energy into new fronds. Water the plant thoroughly after pruning to help it recover—you’ll see new growth within 2-4 weeks if conditions are right.
⏰ Step 4: Maintain Year-Round with Light Trims
Ferns don’t need heavy pruning often, but a little maintenance keeps them looking their best. Throughout the year, remove any fronds that turn brown or yellow, even if they’re not completely dead. This prevents them from draining the plant’s energy.
In fall or winter, if your fern looks leggy or sparse, give it a light trim to refresh its shape. Cut back the longest fronds by about one-third to promote denser growth. Avoid heavy pruning in winter, though—fern growth slows down in cooler months, and they need all their energy to stay healthy.
🌿 Step 5: Clean Up and Prevent Pests
After pruning, gather all the cut fronds and dispose of them properly. If they’re diseased, seal them in a plastic bag before tossing to prevent spores from spreading. Wipe down your pruners with rubbing alcohol to sterilize them—this keeps your tools ready for the next plant and prevents bacterial or fungal infections.
Finally, give your fern a light layer of fresh mulch around the base to retain moisture and protect the roots. This is especially helpful if you’ve done a lot of trimming, as it helps the plant recover faster. Keep an eye on your fern in the days after pruning—healthy new growth is your sign that everything is on track.
Tips & tricks for perfect fern pruning
Transforming your ferns into lush, vibrant plants takes more than just cutting—it's about understanding when and how to prune for maximum growth. Here's what I've learned after pruning dozens of ferns over the years.
Timing is Everything: Spring is the absolute best time to give your ferns a growth boost, but don't ignore maintenance pruning throughout the year. After removing dead fronds in Step 1, look for those slightly yellowing fronds that still have some green—these are perfect candidates for a light trim. The key is to prune when you see slowed growth, not just when fronds are completely dead. This stimulates new shoots from the center, creating that full, bushy look we all want.
Cutting Technique Matters: That slight angle when cutting fronds in Step 1 isn't just for show—it's crucial for preventing water damage. When you make a clean, angled cut at the base, you create better drainage and reduce the risk of rot. I've seen so many ferns suffer from this simple oversight. Also, always use sharp tools—dull scissors tear the stems, which can invite pests and disease. Take a minute to sharpen your pruners before you start.
Visual Balance is Key: When thinning in Step 2, step back every few cuts to check your progress. You want to create an open center that allows light to reach all parts of the plant. A common mistake is to focus only on the longest fronds without considering the overall shape. Think of your fern like a living sculpture—you're shaping it to be full and symmetrical. The goal is a natural, rounded form, not a sparse center with fronds all growing outward.
Seasonal Considerations: Winter pruning deserves special attention. While you can do light maintenance year-round, avoid heavy pruning during winter months when growth naturally slows. The plant needs all its energy to survive, not produce new fronds. If your fern looks leggy in winter, a simple one-third trim on the longest fronds will refresh its shape without stressing the plant. This subtle approach prevents winter shock while still giving you that polished look.
Pro Tips for Prune A Fern
- Transforming your ferns into lush, vibrant plants takes more than just cutting—it's about understanding when and how to prune for maximum growth.
- Timing is Everything: Spring is the absolute best time to give your ferns a growth boost, but don't ignore maintenance pruning throughout the year.
- Cutting Technique Matters: That slight angle when cutting fronds in Step 1 isn't just for show—it's crucial for preventing water damage.
Frequently asked questions
Got questions about pruning ferns? You’re not alone! Here are answers to the most common concerns—so you can keep your ferns thriving with confidence.
When is the best time to prune ferns?
Prune ferns in early spring (before new growth starts) or late summer (after flowering, if applicable). Avoid heavy pruning in winter, as ferns are dormant. For tropical ferns, you can trim lightly year-round to maintain shape—but never cut more than 1/3 of the frond at once.
Do I need special tools to prune ferns?
Nope! Basic tools like sharp pruning shears or clean scissors work perfectly. For larger fronds, a small hand saw may help. Always sterilize tools with rubbing alcohol to prevent disease. Pro tip: Use gloves if your fern has thorns (like Holly Fern) to avoid scratches!
What if I accidentally cut too much off my fern?
Don’t panic—fern fronds won’t grow back if pruned too harshly, but the plant will focus energy on new growth. If you’ve trimmed more than half, reduce watering slightly and fertilize lightly (with a balanced liquid fertilizer) to help recovery. Most ferns bounce back surprisingly well!
Should I water my fern after pruning?
Yes! Water the plant thoroughly after pruning to reduce stress and encourage new growth. Keep the soil consistently moist (but not soggy) for 2–3 weeks post-prune. For tropical ferns, mist the fronds lightly too—this mimics their natural humid habitat.
Can I propagate my fern from cuttings?
Many ferns (like Maidenhair or Boston Fern) root easily from cuttings. Trim a healthy frond, dip the base in rooting hormone, and place it in moist potting mix. Cover with plastic to retain humidity, and keep it warm (70–75°F). Roots should form in 4–8 weeks!
What do brown or crispy fronds mean?
Brown fronds are normal as they age, but crispy or yellowing ones may signal underwatering, overwatering, or pests. Check the soil moisture—fern roots rot easily in soggy conditions. If pests (like spider mites) are the culprit, wipe fronds with a damp cloth and treat with neem oil.
Wrapping up and next steps
Pruning ferns is all about patience, precision, and a little green thumb love—and now you’ve got the know-how to keep them thriving! 🌿 By following these year-round tricks, you’ll encourage healthier growth, prevent overcrowding, and keep your ferns looking their lush best.
Whether you’re trimming dead fronds in spring or giving them a mid-winter checkup, small efforts lead to big rewards.
Ready to see your ferns flourish? Grab your shears and take a closer look at your plants this weekend—you’ll be amazed at how a little pruning can transform their appearance (and your garden’s vibe!).