
Pruning
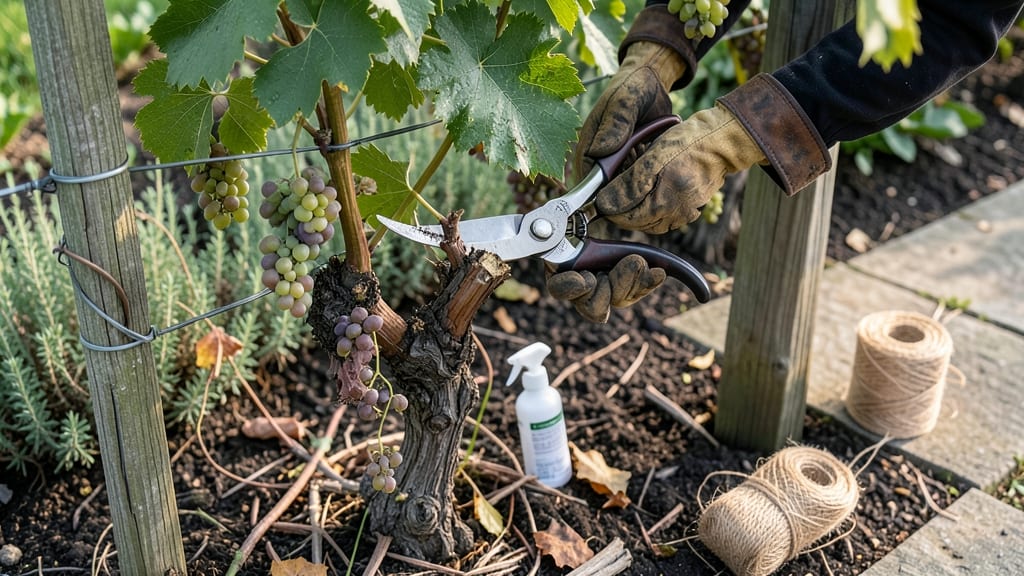
Pruning grape vines in autumn sets up next year’s harvest before winter even arrives. 🌿 The key is timing—dormant season cuts heal faster, reduce disease risk, and let you see the vine’s structure clearly after leaf drop.
I’ve pruned my own vines for years, and autumn pruning has cut my spring workload in half while boosting fruit quality. You’ll need sharp pruners, rubbing alcohol (to sterilize cuts), and a clear plan for removing dead wood and thinning crowded canes.
The goal is to open the center for airflow and sunlight, which prevents rot and encourages stronger new growth. Most vines need 50-70% of their canes removed, depending on age and vigor.
After pruning, seal larger cuts with pruning sealant to prevent disease entry, then mulch heavily to protect roots from freeze-thaw cycles. In colder zones, wrap young vines in burlap for extra insulation—this small step can mean the difference between a thriving vine and a frost-killed one next spring.
Works for both table grapes and wine varieties, though exact timing shifts slightly by climate. Here’s how to adapt for your region—without guessing.
📚 In This Guide
- What you need
- Instructions
- Tips and common mistakes
- Wrapping up and next steps
What you need
- ● Pruning shears (secateurs): Sharp, bypass-style shears (4–6 inches long) for clean cuts. Quantity: 1 pair.
- ● Loppers: For thicker branches (up to 2 inches in diameter). Quantity: 1 pair.
- ● Hand pruners (felco or similar): For precision cuts on smaller growth. Quantity: 1 pair.
- ● Disinfectant (70% isopropyl alcohol or bleach solution): To sterilize tools between cuts and prevent disease spread. Quantity: Small spray bottle or wipe.
- ● Gloves: Heavy-duty, cut-resistant gloves (gardening or pruning-specific). Quantity: 1 pair.
- ○ Pruning saw (optional): For stubborn, thick branches (if loppers aren’t enough). Quantity: 1.
- ○ Marking twine or flags (optional): To tag canes for future reference. Quantity: Small roll or 5–10 flags.
- ● Weather check: Prune on a dry, cool day (50–70°F) to avoid stressing the vine.
- ● First aid kit: Bandages and antiseptic wipes for minor cuts.
- ● Cleanup supplies: Garden bags or bucket for debris disposal.
- ● Ladder (if needed): Sturdy, extendable ladder for tall vines. Quantity: 1.
Step-by-Step instructions for pruning a grape vine in autumn
Autumn’s the perfect time to shape your grape vine—here’s how to do it right for healthier vines and bigger harvests next year.
✂️ Step 1: Gather Your Tools and Prep the Vine
Start by cleaning your pruning shears with rubbing alcohol to prevent spreading disease. I always use sharp, clean tools—dull blades tear wood and invite rot. Grab a pair of gloves too; grapevine canes have thorns that pack a punch. Before you begin, examine the vine’s structure: identify last year’s growth (the canes) and the permanent arms (the cordons). These are your roadmap for pruning.
Look for any dead, diseased, or weak canes—these are easy to spot because they’re brown, shriveled, or hollow. Cut these out first, making your cuts at a 45-degree angle about ¼ inch above a healthy bud. This prevents water from pooling and rotting the wound. Mark your cuts with a pencil if you’re unsure—it’s better to err on the side of caution and leave a bud than to cut too aggressively.
✂️ Step 2: Remove Last Year’s Fruit-Bearing Canes
Grapevines produce fruit on one-year-old canes, so last year’s growth is where the harvest came from—and now it’s time to remove it. These canes are thicker and often have scars or dried-up fruit clusters. Cut them back to the permanent cordon or trunk, leaving 2-4 buds on each remaining cane. This ensures new growth will sprout from those buds in spring, giving you next year’s fruit.
Here’s the thing—don’t overthink it. If a cane looks vigorous and healthy, leave it. If it’s thin, weak, or has fewer than 2 buds, it’s better to remove it. You’ll know you’re on the right track when your vine’s structure looks balanced, with canes evenly spaced along the cordon. This airflow keeps diseases like powdery mildew at bay.
✂️ Step 3: Thin Out Overcrowded Growth
Now focus on the remaining canes. Grapevines need space to breathe, so thin out any that are growing too close together or rubbing against each other. Aim for 4-6 canes per vine, depending on the variety and your vine’s vigor. If you have more, remove the weakest ones first—these are usually thinner, have fewer buds, or are shaded by stronger canes.
Pay attention to the vine’s natural shape. Canes that grow outward and upward are ideal because they’ll catch sunlight and air circulation. If a cane is growing inward or downward, it’s likely to become crowded or shaded. Cut it back to a bud that’s facing the outside of the vine. You’ll see the difference next season: stronger, more productive canes that produce better-quality fruit.
✂️ Step 4: Shape the Vine for Balance and Airflow
Step back and assess the vine’s overall shape. Your goal is to create an open, V-shaped structure that allows sunlight to reach the center and air to circulate freely. This prevents humidity buildup, which is a breeding ground for fungal diseases. If your vine has a trellis, ensure canes are evenly distributed along the wires—no more than 12-18 inches apart.
For younger vines, you might leave longer canes to encourage more growth next year. For older, established vines, be more aggressive with pruning to rejuvenate the plant. If you’re unsure, think of it like giving your vine a haircut: you want to leave it looking neat, healthy, and ready for spring. Once you’re happy with the shape, give the vine a final once-over to remove any small twigs or suckers that might have been missed.
🪴 Step 5: Clean Up and Protect for Winter
After pruning, rake up and dispose of all clippings—don’t leave them on the ground, as they can harbor pests and diseases. I like to burn them or add them to a compost pile designated for garden waste only (not kitchen scraps). Once the area is clear, apply a 2-3 inch layer of mulch around the base of the vine to insulate the roots and retain moisture. Use organic mulch like wood chips or straw, but keep it 6 inches away from the trunk to prevent rot.
Finally, give your vine one last look. The ideal pruned grapevine should look like a well-maintained shrub with an open center and evenly spaced canes. If you’ve done it right, you’ll see buds along the canes that are plump and firm—these are the promise of next year’s harvest. Water the vine deeply if autumn has been dry, and you’re all set until spring!
Tips & tricks for perfect autumn grape vine pruning
These simple tricks will help you prune your grape vine like a pro—saving you time, stress, and ensuring a healthier vine for next year's harvest.
Tool Prep is Everything: I can't stress enough how important it is to sanitize your pruning shears with rubbing alcohol before you begin. Dirty tools spread disease faster than you can say "powdery mildew." I also like to oil my shears after each use to keep them sharp longer. A dull blade tears wood instead of making clean cuts, which invites infection. Grab those gloves too—those thorns are no joke!
Bud Count Matters: When cutting back last year's fruit-bearing canes in Step 2, remember to leave exactly 2-4 buds per remaining cane. These buds are your future harvest! I've learned this the hard way—once I left only 1 bud on a cane, and that branch produced barely any fruit the next season. Think of those buds as little promises for next year's grapes. You'll know you're on the right track when your vine looks balanced with canes evenly spaced along the cordon.
Visual Cues for Pruning: In Step 3, when thinning out overcrowded growth, look for canes growing outward and upward—they'll catch the most sunlight and air circulation. If a cane is growing inward or downward, it's likely to get crowded or shaded. Cut it back to a bud facing outward. I like to imagine the vine as an open umbrella—you want sunlight to reach the center, not just the edges. This open structure prevents humidity buildup that causes fungal diseases.
Mulch Placement Tip: That 2-3 inch layer of mulch in Step 5 is crucial for winter protection, but placement matters just as much as quantity. Keep mulch 6 inches away from the trunk to prevent rot. I've seen beginners pile mulch right against the trunk, which actually suffocates the plant. Think of it like giving your vine a cozy blanket—warm and protective, but not smothering.
Pro Tips for Prune A Grape Vine In Autumn
- These simple tricks will help you prune your grape vine like a pro—saving you time, stress, and ensuring a healthier ...
- Tool Prep is Everything: I can't stress enough how important it is to sanitize your pruning shears with rubbing alcoh...
- Bud Count Matters: When cutting back last year's fruit-bearing canes in Step 2, remember to leave exactly 2-4 buds pe...
Frequently asked questions
Got questions about pruning grapevines in autumn? You’re not alone! Here are answers to the most common concerns to help you prune with confidence.
When is the exact best time to prune grapevines in autumn?
Prune after the first hard frost (when leaves have dropped but before winter’s deepest freeze). For most regions, late November to early December works best. If you’re in a mild climate, wait until January. Pro tip: Avoid pruning during wet or freezing conditions to prevent disease or damage.
What if I missed autumn pruning? Can I still do it in winter?
Yes! Winter pruning (late winter/early spring, before buds swell) is better than no pruning at all. However, autumn cuts are ideal for shaping vines and reducing disease risk. If you wait too long, prioritize removing dead wood and large branches first—just be gentle to avoid stressing the vine.
Do I need special tools for autumn pruning, or will regular pruners work?
Basic hand pruners or loppers are fine for small branches, but for thicker stems (over 1 inch), use bypass pruners or a pruning saw. Sterilize tools with rubbing alcohol or bleach between cuts to prevent spreading fungal diseases like black rot. A disposable pruning bag helps collect debris easily.
How do I know if I’ve pruned too much or too little?
Aim to leave 2–4 mature buds per vine (or 6–8 for vigorous varieties). If you’ve cut back more than 1/3 of the vine’s growth, you may stunt next year’s harvest. Signs of over-pruning: sparse foliage, weak shoots, or no fruit. Signs of under-pruning: dense, tangled growth with poor airflow (invites pests/disease).
What should I do if my grapevine has pests or diseases after pruning?
Remove all infected leaves, canes, and debris (burn or trash them—don’t compost). Apply a copper fungicide or neem oil spray in late autumn to protect dormant buds. For pests like Japanese beetles or spider mites, use insecticidal soap in early spring. Prevention tip: Prune in dry weather and avoid wounding healthy wood.
Wrapping up and next steps
Pruning your grape vine in autumn is the secret sauce for a thriving harvest next season! 🍇 By following these steps—removing dead wood, thinning canes, and balancing growth—you’ll encourage healthier vines, better fruit production, and easier maintenance.
Don’t let overwhelm hold you back; start small, stay patient, and watch your vine reward you with lush, flavorful grapes.
Ready to take the next step? Mark your calendar for late autumn or early winter when temperatures drop and the vine is dormant. Grab your tools, roll up your sleeves, and give your grape vine the care it deserves—your future harvest will thank you! 🌱