
Pruning
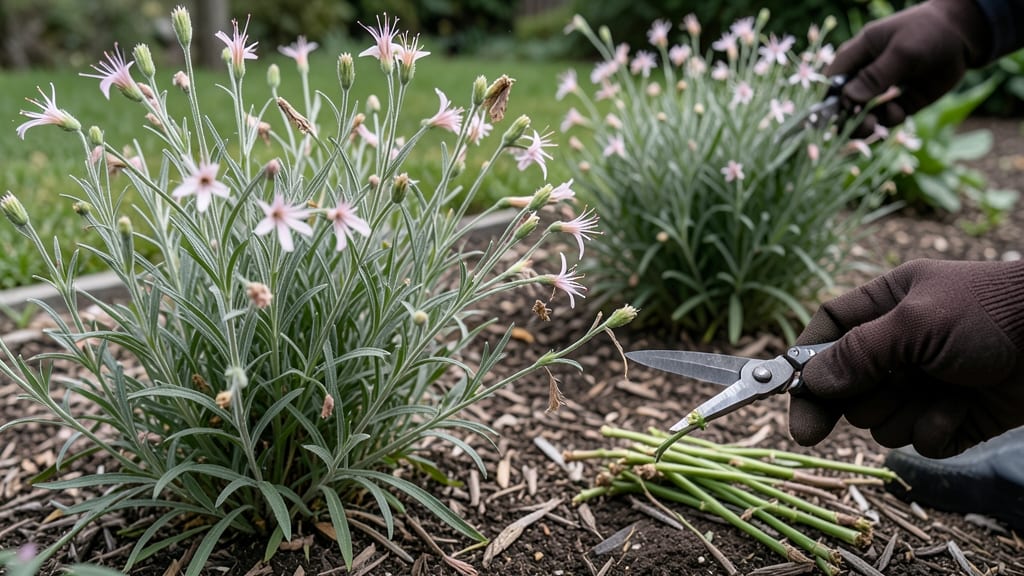
Pruning gaura isn’t just about tidying up—it’s the secret to nonstop summer blooms that make your garden look like a cloud of pink and white lace. ✨ I’ve turned my gaura from a floppy mess to a bushy, flower-covered powerhouse by mastering just two simple cuts: one in early spring and another after each flush of blooms.
The key? Timing and confidence—no fancy tools or green thumbs required.
You’ll need sharp pruners (clean blades prevent disease) and a sunny day when the plant’s at least 12 inches tall. Start by cutting back any dead or leggy stems to the first set of healthy leaves—this jumpstarts fresh growth.
Then, as soon as blooms fade, snip spent stems 1/3 of the way down to encourage new flowers. Think of it like giving your gaura a haircut: shorter stems = bushier plants.
Within 2-3 weeks, you’ll see new shoots pushing out, and those same stems will burst with fresh blooms. The result? A gaura that flowers from early summer until frost, with stems so sturdy they barely flop—even in humidity.
Plus, the more you prune, the denser the foliage gets, crowding out weeds and looking neat without trying.
Pro tip: Skip the shears if your gaura’s still small (under 6 inches). And never cut into old wood—if stems are woody or bare, it’s time to dig up and divide instead.
This trick works for all gaura varieties, from ‘Whirlybird’ to ‘Candy Hearts’, so grab those pruners and let’s get growing!
📚 In This Guide
- What you need
- Instructions
- Tips and common mistakes
- Wrapping up and next steps
What you need
- ● Pruning shears: Bypass pruners (sharp, clean blades, 5–7" length) – 1 pair. Dull blades crush stems; invest in quality!
- ● Hand pruners: Small, precision pruners (for delicate stems) – 1 pair. Perfect for tight spaces!
- ● Gloves: Garden gloves (nitrile-coated for grip, size medium/large). Protects from thorns and dirt!
- ● Disinfectant: Rubbing alcohol (70%+) or bleach solution (1 part bleach to 9 parts water). Sanitizes tools between cuts!
- ● Trash bag or bucket: For spent blooms and debris. Keep your workspace tidy!
- ● Water: Small spray bottle or hose. Dust off plants before pruning!
- ● Lopper: For thicker stems (8–12" length). Useful if gaura grows leggy!
- ● Knee pad: For comfort (if pruning large patches). Your knees will thank you!
- ● Garden twine: To tie stems for support after pruning. Great for floppy varieties!
- ● Compost bin: For recycling pruned stems. Gaura stems decompose easily!
Step-by-Step guide to pruning gaura for continuous blooms
Here’s the simple method I use to keep my gaura flowering all summer long—no fancy tools or complicated steps.
🌿 Step 1: Identify What to Prune
Gaura blooms on new growth, so the key is removing spent flowers while leaving healthy stems intact. Look for wilted or brown blooms—these signal flowers that have finished their cycle. Snip just above a set of healthy leaves or a leaf node, where new growth will emerge. Avoid cutting into green stems unless they’re leggy or damaged.
I like to prune in the early morning when plants are hydrated and the air is cool. This reduces stress on the plant and gives it time to recover before the heat of the day. If you wait until flowers are fully dried out, you risk attracting pests or spreading disease.
✂️ Step 2: Use the Right Tools and Technique
Sharp, clean pruners make all the difference. I use bypass pruners (not anvil-style) because they create cleaner cuts that heal faster. Before you start, wipe the blades with rubbing alcohol to prevent spreading bacteria between cuts. Gaura stems are thin but tough—don’t crush them with dull shears.
For each bloom, pinch or cut just above the leaf node where the flower stem meets the main stem. This encourages the plant to branch out and produce more flowers. If you see leggy stems (long, bare stretches), cut them back by one-third to promote bushier growth. Just don’t overdo it—gaura is resilient but can get stressed if pruned too aggressively.
🌱 Step 3: Prune in Stages for Long-Lasting Blooms
Don’t prune everything at once. Instead, deadhead weekly during peak bloom (late spring through summer) and lightly trim leggy growth every 4-6 weeks. This keeps the plant in balance and prevents it from putting all its energy into seed production instead of flowers.
Watch for new buds forming at the base of spent blooms. These are your signal that the plant is responding well. If you notice yellowing leaves or slow growth after pruning, you might be cutting too much. Gaura is drought-tolerant but still needs 1-1.5 inches of water per week to recover from pruning.
☀️ Step 4: Post-Pruning Care for Healthy Growth
After pruning, give your gaura a light feeding with a balanced, water-soluble fertilizer (like 10-10-10) diluted to half strength. This boosts recovery and encourages new blooms. Water deeply at the base—avoid wetting the foliage to prevent fungal issues.
Place pruned stems in a shaded, well-ventilated area if you plan to use them in bouquets. Gaura’s delicate blooms last longer in arrangements if they’re cut fresh and kept hydrated. If you’re not using them, leave them in the garden—they’ll reward you with more flowers in just a few weeks.
⏰ Step 5: Seasonal Adjustments for Year-Round Care
In late summer or early fall, when blooms slow down, give your gaura a light haircut—trim back one-third of the plant’s height to tidy it up. This prevents it from looking ragged and encourages fresh growth for next season. Avoid heavy pruning in fall if you’re in a cold climate, as gaura is tender and may not recover before winter.
In winter, if you’re growing gaura as an annual (or in colder zones), let it die back naturally. In warmer climates, it may continue blooming lightly—just keep deadheading to encourage new flowers. Gaura is tough, so don’t stress if it looks a little rough after pruning. It bounces back faster than you’d expect!
Tips & tricks for perfect gaura pruning
Keeping gaura blooming all season takes just a few smart tricks—here's how to avoid common mistakes and get the best results.
Timing is Everything: The early morning timing in Step 1 isn't just about convenience—it's about plant physiology. Gaura's cells are turgid (full of water) in the morning, making cuts heal cleaner and reducing stress. If you must prune later, do it in the evening when temperatures drop below 80°F. I've seen gaura wilt dramatically when pruned in midday heat, even when properly hydrated.
Tool Technique Matters: When using bypass pruners in Step 2, make sure the blades are sharp enough to cut through stems with minimal resistance. Dull blades crush stems instead of cutting cleanly, which can introduce disease. I keep a small bottle of rubbing alcohol handy to wipe blades between cuts—this prevents bacterial spread between plants, especially important if you're pruning multiple gaura bushes.
Visual Cues for Pruning: In Step 3, look for these signs you're pruning correctly: new buds forming within 3-5 days at the base of where you cut, and stems showing slight swelling at the cut point. If you're not seeing these within a week, you might be cutting too close to the main stem or not providing enough water (remember those 1-1.5 inches per week!). The plant should look fuller, not more sparse, after proper pruning.
Seasonal Adjustments: The late summer/fall pruning in Step 5 deserves special attention. In colder climates, avoid heavy pruning after mid-September—gaura needs time to establish new growth before winter. I've learned this the hard way after seeing gaura freeze back to the ground after aggressive fall pruning. For winter care, simply deadhead any remaining blooms to redirect energy to root development rather than seed production.
Pro Tips for Prune Gaura
- Keeping gaura blooming all season takes just a few smart tricks—here's how to avoid common mistakes and get the best results.
- Timing is Everything: The early morning timing in Step 1 isn't just about convenience—it's about plant physiology.
- Tool Technique Matters: When using bypass pruners in Step 2, make sure the blades are sharp enough to cut through stems with minimal resistance.
Frequently asked questions
Got questions about pruning your gaura? You’re not alone! Here are answers to the most common queries to keep your plants thriving and blooming all season.
When is the best time to prune gaura?
Prune gaura in early spring or after the first flush of blooms in late spring. You can also do light deadheading throughout summer to encourage continuous flowers. Avoid heavy pruning in fall—let the plant rest until spring.
Do I need to sterilize my pruners?
Yes! Sterilizing your pruners with rubbing alcohol or a 10% bleach solution before and after pruning prevents disease spread. Gaura is generally hardy, but clean tools keep your plants healthier and your garden thriving.
What if my gaura stops blooming after pruning?
If blooms taper off, check for over-pruning or nutrient deficiencies. Gaura thrives with well-draining soil and full sun. Try a balanced fertilizer in spring, and avoid cutting back more than ⅓ of the plant at once.
Can I propagate gaura from cuttings after pruning?
Use healthy, disease-free stems (4-6 inches long) from pruning. Dip in rooting hormone, plant in moist potting mix, and cover with a plastic bag. Keep in indirect light until roots form (4-6 weeks).
Should I prune gaura in winter?
No—gaura is cold-hardy and benefits from a winter rest. Prune lightly in late winter (just before new growth starts) to remove dead foliage. Heavy winter pruning can stress the plant and delay spring blooms.
Wrapping up and next steps
Pruning your gaura doesn’t have to be intimidating—it’s all about timing, technique, and a little love for your plants! 🌸 With deadheading and strategic cuts, you’ll keep those delicate blooms coming all season long.
Now that you’re armed with the know-how, grab those shears and give your gaura the care it deserves.
Ready to see your garden burst with color? Start small—pick a sunny afternoon, gather your tools, and enjoy the process. Happy pruning! 🌿✨