
How To
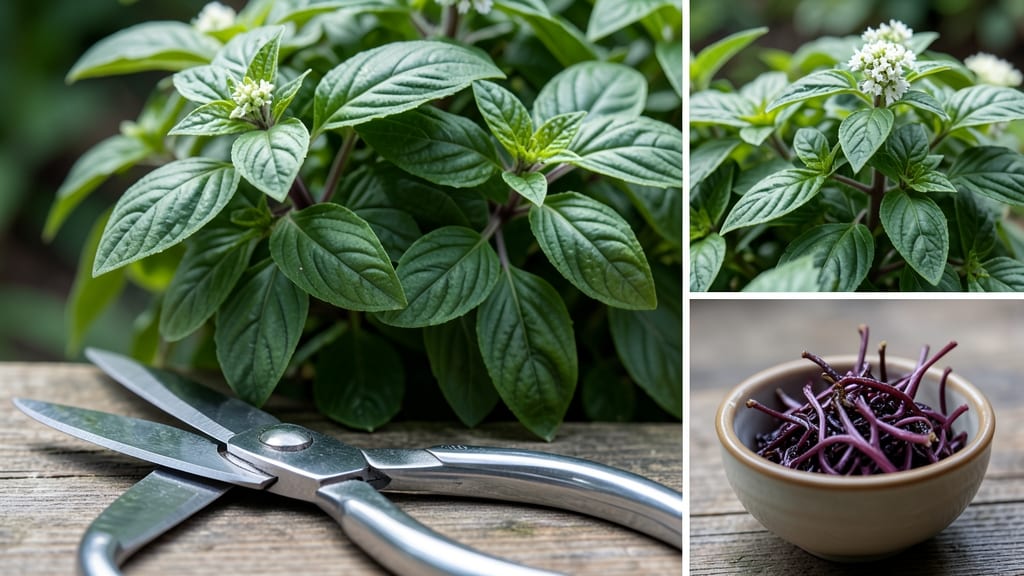
Pruning Thai basil isn’t rocket science—just three simple cuts can transform leggy, sparse plants into lush, productive bushes. 🌿 I’ve turned my kitchen windowsill from a sad basil stub to a fragrant, leafy powerhouse using these same tricks, and you can too.
Start by pinching off the top sets of leaves when the plant reaches 6 inches tall—this forces it to branch out instead of stretching. Then, trim back any flower buds as soon as they appear (yes, even if they’re tiny), because flowering signals the plant to stop producing leaves.
Finally, give it a light haircut every 4-6 weeks to encourage dense growth and prevent woody stems.
You’ll end up with bold, bushy plants that stay compact, produce leaves for months, and even repel pests better than unpruned varieties. The best part? No fancy tools—just clean scissors or your fingers.
Just remember: never cut more than one-third of the plant at once, or you’ll shock it into dormancy. Now grab those shears and let’s get growing!
📚 In This Guide
- What you need
- Instructions
- Tips and common mistakes
- Wrapping up and next steps
What you need
- ● Clean, sharp pruning shears – A bypass pruner (not anvil-type) is ideal to avoid crushing stems. Size: Small to medium (4-6 inches).
- ● Hand pruners or scissors – For delicate trimming (e.g., removing small leaves). Quantity: 1 pair.
- ● Rubbing alcohol (70% or higher) – To sterilize tools before and after pruning. Quantity: Small bottle (4 oz).
- ○ Gloves (optional but recommended) – Protects hands from sap and thorns. Type: Lightweight gardening gloves.
- ● Healthy Thai basil plant – Prune only when the plant is at least 3-4 inches tall and has 4-6 true leaves.
- ● Bright, indirect light – Ensure your plant is in a well-lit spot (6+ hours of sunlight daily).
- ● Watering can or spray bottle – Keep soil moist but not soggy 1-2 days before pruning.
- ● Rooting hormone – Speeds up growth of cuttings if you plan to propagate.
- ● Small pots or jars – For water propagation of cuttings (if you want to grow more plants!).
- ● Plant food (balanced fertilizer) – Apply after pruning to boost recovery. Dilution: Half-strength.
Step-by-step instructions for pruning Thai basil
Thai basil thrives with just three strategic cuts—here's how to keep it bushy, fragrant, and productive all season.
✂️ Step 1: Identify the Right Time and Tools
Prune Thai basil in the morning after the dew has dried but before the midday heat sets in. Use sharp, clean pruning shears or scissors—dull tools crush stems and invite disease. I always wipe the blades with rubbing alcohol between cuts to prevent bacterial spread. The best time to prune is when your plant has at least 6-8 inches of new growth and 4-6 pairs of true leaves—this ensures you're not cutting back too aggressively.
Look for the uppermost set of leaves where the stem begins to thicken. This is your target zone. Avoid cutting into woody stems—Thai basil is tender and regrows best from soft, green growth. If your plant is leggy, you'll see long stems with sparse leaves; this is your signal to act before it becomes unmanageable.
✂️ Step 2: Make the First Cut to Encourage Bushiness
Cut just above a pair of leaves where the stem is about 1/4 inch below a leaf node. This encourages new branches to form from that node, creating a fuller plant. Angle your cut slightly downward to prevent water from pooling on the stem. For a 4-plant setup, I make 3-4 cuts per plant—never more than 1/3 of the plant's total height at once. This ensures the plant doesn't go into shock and keeps the energy focused on regrowth.
Remove any yellow or damaged leaves at the base of the cut. These leaves won't recover and can harbor pests. If you see flowers forming, snip them off immediately—Thai basil loses its signature anise flavor once it blooms. The goal here is to redirect the plant's energy toward leaf production, not seed development.
✂️ Step 3: Thin Out Overcrowded Stems for Airflow
Examine the plant for thin, weak stems growing inward toward the center. These compete for light and nutrients but rarely produce quality leaves. Use your fingers to gently pull or your shears to cut these stems at the base. For Thai basil, 3-4 strong stems per plant is ideal—this allows sunlight to penetrate to the inner leaves and reduces humidity buildup, which can lead to fungal issues.
If your plant has more than 6 stems, prioritize removing the smallest ones first. You'll notice the remaining stems thicken and grow more upright within 7-10 days. This is your plant's way of saying, "I've got this!" Avoid leaving stubs—always cut cleanly at the base to prevent disease entry points.
💧 Step 4: Post-Prune Care for Rapid Recovery
Water the plant deeply within 24 hours of pruning to help it recover. Thai basil has shallow roots, so 1 cup of water per plant is usually enough—let the excess drain away completely. Avoid getting water on the leaves, as this can encourage mildew. Place the plant in a location with bright, indirect light for the first 48 hours to reduce stress. Direct sunlight can scorch new growth as the plant adjusts.
Fertilize lightly with a balanced liquid fertilizer (10-10-10) diluted to half strength. I mix 1 teaspoon per gallon of water and apply it to the soil, not the leaves. This gives your basil a gentle nutrient boost without overwhelming the roots. You'll see new growth emerging from the leaf nodes within 5-7 days—that's your reward for a job well done.
Tips & tricks for pruning Thai basil
Here's what nobody tells you about keeping your Thai basil thriving after those strategic cuts.
Timing Secret: The morning dew is your friend—pruning after it dries prevents fungal spores from settling on fresh cuts. I've learned the hard way that midday pruning can shock the plant, especially in hot climates. If you miss morning, wait until late afternoon when temperatures drop. The plant's natural circadian rhythm means it recovers faster during cooler periods.
Cutting Precision: That 1/4-inch measurement below the leaf node is critical—it's where new branches will sprout. Use your thumb and forefinger to measure the distance visually before cutting. For thicker stems, I like to make a slight downward angle on the cut to prevent water pooling, which can lead to rot. Think of it like creating a tiny roof over the cut surface.
Pruning Frequency: You can repeat this process every 4-6 weeks during the growing season, but never take more than 1/3 of the plant's height at once. I've seen beginners over-prune and end up with bare stems. If your plant looks leggy between prunings, focus on removing just the top sets of leaves rather than making deep cuts.
Post-Prune Recovery: The 48-hour bright, indirect light period is non-negotiable for new growth. I've watched plants placed in direct sunlight immediately after pruning develop crispy leaf edges within days. If you don't have an ideal spot, consider using a sheer curtain to diffuse harsh afternoon sun while still providing plenty of light.
Pro Tips for Prune Thai Basil
- Here's what nobody tells you about keeping your Thai basil thriving after those strategic cuts.
- Timing Secret: The morning dew is your friend—pruning after it dries prevents fungal spores from settling on fresh cu...
- Cutting Precision: That 1/4-inch measurement below the leaf node is critical—it's where new branches will sprout. Use...
Frequently asked questions
Got questions about pruning Thai basil? You’re not alone—this aromatic herb can be tricky if you’re new to the game! Below, we’ve answered the most common questions to help you keep your Thai basil thriving (and delicious).
When is the best time to prune Thai basil?
Prune Thai basil early and often—ideally every 4–6 weeks during the growing season (spring to fall). Avoid heavy pruning in winter, as the plant slows down. A light trim to encourage bushiness works year-round, but never cut more than ⅓ of the plant at once to prevent stress.
Can I prune Thai basil after it flowers?
Yes, but act fast! Once Thai basil flowers, it starts producing seeds and may lose its flavor. Pinch off flower buds as soon as you see them ( check our tips section for how). If flowers appear, prune them back to a leaf node to redirect energy into growth—not seeds.
What do I do if my Thai basil turns yellow after pruning?
Yellowing leaves after pruning usually mean over-pruning or underwatering. Give your plant a week to recover, then adjust care: water deeply but let soil dry slightly between waterings, and avoid harsh cuts. If the issue persists, check for pests or nutrient deficiencies (like nitrogen) and fertilize lightly.
Can I use regular basil pruning methods on Thai basil?
Not quite! Thai basil is bolder and more delicate than sweet basil. Avoid aggressive "hard pruning" (cutting stems to the ground)—Thai basil prefers gentle, frequent trims to maintain its compact shape and flavor. Stick to the ⅓ rule and focus on harvesting leaves rather than heavy structural cuts.
How do I prune Thai basil for regrowth if it’s leggy?
Leggy Thai basil needs a rejuvenation trim. Cut back the tallest stems by about half, always just above a leaf node (where new growth emerges). This encourages bushier growth. For extreme cases, trim all stems to 4–6 inches tall, but keep at least 2–3 sets of leaves per stem to avoid killing the plant.
| Issue | Quick Fix |
|---|---|
| Wilting after pruning | Move to indirect light, water lightly, and avoid pruning in direct sun for 24 hours. |
| Slow regrowth | Fertilize with a balanced liquid fertilizer (10-10-10) and ensure it gets 6+ hours of sunlight. |
| Bitter taste post-pruning | Harvest leaves before they fully mature—young leaves are sweeter! |
Wrapping up and next steps
Pruning Thai basil isn’t just about keeping your plant tidy—it’s the secret to a lush, flavorful harvest that’ll make your kitchen the envy of the neighborhood! 🌿 By mastering those three simple cuts, you’ll encourage bushier growth, prevent woody stems, and enjoy a steady supply of aromatic leaves for your favorite dishes.
Remember: consistency is key, and a little effort now means big rewards later.
Ready to transform your Thai basil into a thriving powerhouse? Grab your shears and get pruning! Once you’ve nailed the technique, why not experiment with growing Thai basil indoors or exploring creative ways to use it in recipes? Your green thumb—and taste buds—will thank you!