
Pruning
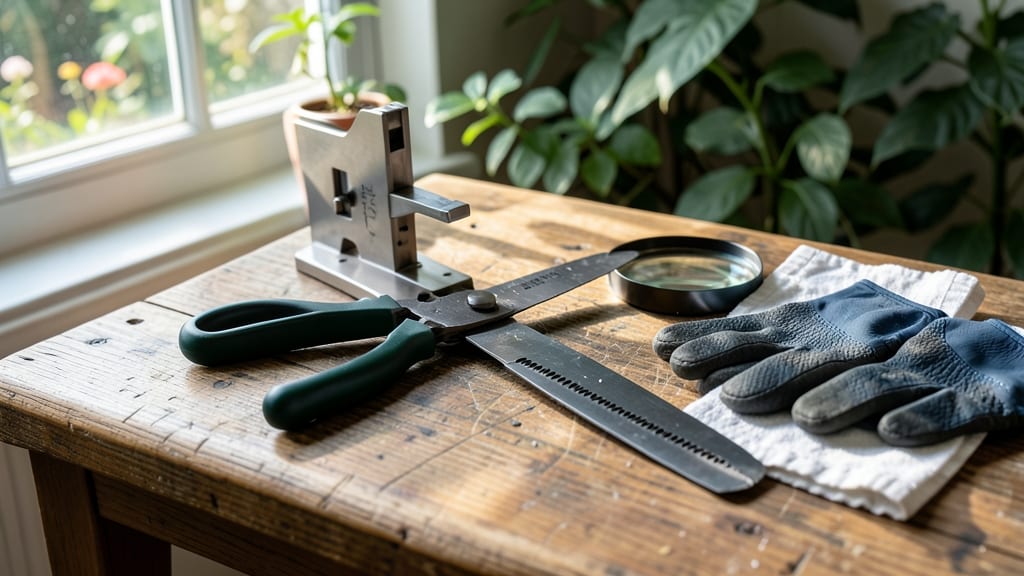
How to sharpen pruners with a file turns pruning into a breeze—your plants pay the price when dull blades leave jagged cuts that invite disease. 🌿 I’ve spent years sharpening my own tools, and the difference between a clean slice and a struggle is just a few precise strokes with the right file. Most gardeners wait until their blades are so dull they force the job, but sharp tools make pruning faster, safer, and far less frustrating.
The secret isn’t brute force—it’s patience and the right technique. You’ll need a flat file (not a round one) that matches your blade’s angle, some mineral oil to keep things smooth, and a cloth or rag to wipe away metal shavings.
Start with the blade fully closed, then work your way to the tip, keeping the file flat against the cutting edge. One mistake? Rushing—it ruins the angle and dulls the blade faster.
After just 5-10 minutes of focused work, your pruners will cut through stems like butter, leaving clean wounds that heal faster. No more tearing bark or wasted energy—your plants will thank you with healthier growth and fewer pests sneaking in through ragged cuts.
And here’s the best part: once you master the stroke, you’ll only need to sharpen once or twice a season instead of mid-project.
Works for bypass pruners, loppers, and even shears—just adjust the file size. Pro tip: If your blade feels rough after sharpening, it’s time to check the edge for nicks. A magnifying glass helps spot microscopic damage before it turns into a bigger problem. Let’s get those blades razor-sharp!
📚 In This Guide
- What you need
- Instructions
- Tips and common mistakes
- Wrapping up and next steps
What you need
- ● Pruners: Bypass or anvil pruners (ensure they’re clean and free of sap/resin).
- ● File: Type: Flat or triangular mill file (10–12 inches long, #4–#6 cut for coarse sharpening or #8–#10 cut for finer edges).
- ● Quantity: 1 (a double-cut file is ideal for efficiency).
- ○ File guide or jig: (Optional but helpful) A pruner sharpening guide or DIY jig (e.g., a wooden block with angled slots).
- ● Rags or paper towels: To clean blades and wipe away metal filings.
- ● Degreaser or mineral spirits: (1 small bottle) To remove sap, oil, or grime from blades.
- ○ Safety gloves: (Optional) To protect hands from sharp edges and metal debris.
- ● Lubricant: Light machine oil or file oil to reduce friction and prolong file life.
- ● Honning oil or strop: For a final polish and extra smoothness.
- ● Magnifying glass: (1x–3x magnification) To inspect blade angles and nicks.
- ● Pruner stand: A clamp or vice to secure pruners during sharpening.
Step-by-Step instructions for sharpening pruners with a file
Here's how I restore razor-sharp edges to my pruners—no expensive sharpening tools required.
🪴 Step 1: Inspect and Clean the Blade
Start by examining both blades of your pruners. Look for nicks, bends, or uneven wear along the cutting edge. Run your thumb gently along the edge—if it catches or feels rough, it needs sharpening. Before you begin, wipe the blades clean with a dry cloth to remove sap, dirt, or debris that could dull your file.
Check the pivot point where the blades meet. If it feels stiff or squeaks, apply a few drops of lightweight machine oil to keep it moving smoothly. A well-maintained pivot ensures cleaner cuts and makes sharpening easier. If the blades are bent or damaged, stop here—you'll need to replace them instead of trying to sharpen them.
✂️ Step 2: Choose the Right File and Angle
Use a flat, coarse file with a fine-tooth pattern—typically a 12-15 inch bastard file works best for pruners. Hold the pruners in your non-dominant hand with the blade facing away from you, and the file in your dominant hand. The file should be positioned at a 20-25° angle relative to the blade—this is the standard angle for pruning blades.
To find the right angle, hold the file so the edge of the blade rests against the file's flat surface. The file should touch only the outer ⅓ of the blade's edge, not the entire length. If you're unsure, start with a 20° angle—you can always adjust slightly if needed. This angle ensures a sharp edge without weakening the blade.
💧 Step 3: Apply Even, Controlled Strokes
Press the file firmly against the blade and draw it toward you in smooth, even strokes—about 3-4 inches per stroke. Keep the pressure consistent; too much force will heat the blade and damage the metal, while too little won't remove enough material. Aim for 10-15 strokes per side to start, then check the edge.
After each set of strokes, run your thumb along the edge again. You're looking for a smooth, burr-free finish. If the edge feels rough or jagged, continue filing until it's even. Stop as soon as the edge feels sharp—over-filing weakens the blade faster. For stubborn dull spots, focus extra strokes there, but always maintain the same angle.
☀️ Step 4: Hone the Edge and Test
Once both blades feel sharp, switch to a finer file or a slip stone to refine the edge. Use light, sweeping strokes to smooth out any microscopic imperfections. This step ensures the blades cut cleanly without tearing plant tissue. A properly honed edge should glide through a sheet of paper effortlessly—test this before using the pruners on plants.
After honing, wipe the blades clean again to remove metal filings. Open and close the pruners a few times to check for smooth operation. If the blades still feel uneven or catch, repeat the filing process with extra care. Once satisfied, your pruners are ready for precise, clean cuts—no more jagged edges or wasted effort.
Tips & tricks for perfect pruner sharpening
Here's what nobody tells you—these little details make all the difference between a decent edge and razor-sharp precision.
The Angle Secret: That 20-25° angle in Step 2 is your best friend, but here's the thing: most people start too steep. Imagine the blade as a clock face—position the file so it touches around the 2 o'clock position. This keeps the edge strong while removing just enough metal. I learned this the hard way after filing away too much material and weakening my blades.
Pressure Matters: In Step 3, when you're doing those 3-4 inch strokes, think "consistent pressure" not "harder is better." Too much force heats the metal and creates burrs, while too little won't sharpen effectively. I use about 10 pounds of pressure—just enough to feel resistance but not enough to make the blade glow. Test with your thumb after every 5 strokes to check for smoothness.
File Choice Wisdom: While a 12-15 inch bastard file is ideal, don't have one? A flat mill file or even a coarse nail file will work in a pinch. The key is the tooth pattern—look for fine, parallel teeth that can remove metal without leaving scratches. I've used old hacksaw blades in emergencies, but they require extra care to avoid uneven edges.
Pro Tips for Sharpen Pruners With A File
- Here's what nobody tells you—these little details make all the difference between a decent edge and razor-sharp precision.
- The Angle Secret: That 20-25° angle in Step 2 is your best friend, but here's the thing: most people start too steep.
- Pressure Matters: In Step 3, when you're doing those 3-4 inch strokes, think "consistent pressure" not "harder is better."
Frequently asked questions
Got questions about sharpening your pruners? You’re not alone—keeping those blades razor-sharp can feel tricky at first! Here are answers to the most common queries to help you sharpen like a pro.
How often should I sharpen my pruners?
Sharpen your pruners before they start struggling—usually every 1-3 uses for heavy pruning or 5-10 cuts for lighter tasks. Test sharpness by cutting a leaf or thin branch; if it tears instead of cleanly slicing, it’s time to sharpen. Overlooking this leads to jagged cuts that damage plants!
How long does it take to sharpen pruners with a file?
For a basic sharpening session, count on 5–15 minutes, depending on how dull they are. Beginners may take longer at first, but with practice, you’ll hit 30–60 seconds per blade. Pro tip: Work in short bursts to avoid hand fatigue—your arms (and plants) will thank you!
Can I use a regular file or do I need a special one?
A flat or triangular file (like a mill file) works best, but avoid round files—they won’t sharpen the blade’s edge properly. For pruners, a medium-coarse file (4–6 teeth per inch) is ideal. If you’re short on tools, a bike chain file (used for chainsaws) is a great backup!
What if my pruners still don’t cut well after sharpening?
If your pruners feel dull or uneven post-sharpening, check for these issues:
- Incorrect angle: Re-sharpen at 20–30° (most pruners need ~25°).
- Damaged blade: Look for nicks or bends—these can’t be filed away.
- File too coarse/fine: A fine file won’t bite into metal; a coarse one can over-aggressively wear blades.
- Rust or sap buildup: Clean blades with rubbing alcohol before sharpening.
Should I sharpen both blades the same way?
Yes! Both blades (the fixed and bypass blades) should be sharpened identically to maintain balance and prevent uneven wear. Uneven blades can cause pinching (squishing instead of cutting) or misalignment, which dulls them faster. Always cross-check angles for consistency!
Wrapping up and next steps
Sharpening your pruners with a file is a simple yet powerful skill that keeps your tools sharp, efficient, and long-lasting—no expensive sharpening stone required! 🌟 With the right technique, you’ll restore razor-edge precision in just minutes, saving time and effort in your gardening tasks.
Now that you’re equipped with the know-how, grab your pruners and file—your next pruning session will feel like a breeze!
Ready to take it further? Try practicing on a few different blade angles to find what works best for your pruners, or explore advanced sharpening methods for even finer control. Happy pruning! ✂️🌿