
Pruning
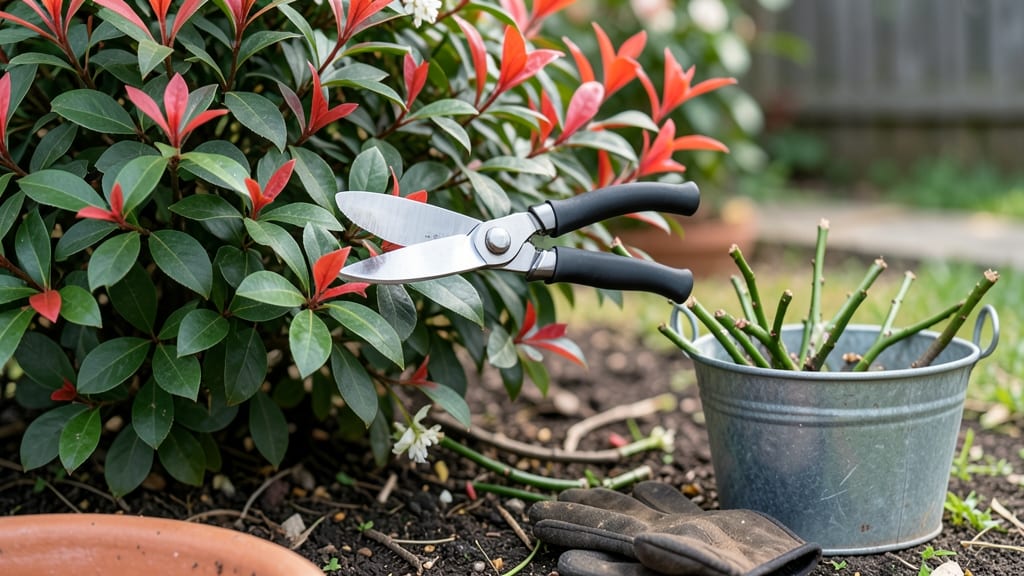
Pruning red tip photinia transforms it from a scraggly mess into a vibrant, bushy hedge that turns heads all year. 🌿 I’ve spent years perfecting the timing and technique—because doing it wrong can stunt growth or invite pests.
The secret lies in understanding when to prune for color, shape, and health, not just aesthetics. Start with the right tools: clean, sharp bypass pruners and loppers (dull blades tear bark).
Prune twice a year—once in late winter/early spring to shape and again in summer to encourage fresh red-tipped growth. Avoid heavy pruning in fall, as new growth won’t harden off before winter. You’ll end up with denser foliage, brighter red tips, and stronger canes that resist disease.
The key is patience: never remove more than one-third of the plant in a single season, and always prune just above a leaf node or bud. Works for both formal hedges and loose, natural shapes. Here’s how to do it right the first time—no more sad, leggy bushes!
📚 In This Guide
- What you need
- Instructions
- Tips and common mistakes
- Wrapping up and next steps
What you need
- ● Pruning shears – Bypass-style (for clean cuts on small branches, 4–6" blades). Quantity: 1 pair.
- ● Loppers – Bypass or anvil (for thicker branches, 8–12" handles). Quantity: 1 pair.
- ● Pruning saw – Curved or folding blade (for stubborn, woody stems). Quantity: 1.
- ● Garden gloves – Cut-resistant (to protect hands from thorns and sap). Quantity: 1 pair.
- ● Disinfectant (70% isopropyl alcohol or bleach solution) – 1:9 bleach-to-water ratio (to sterilize tools and prevent disease). Quantity: Small spray bottle or wipe.
- ● Rag or paper towels – For wiping tools between cuts.
- ○ Sharpie or pruning paint – Optional but helpful (to mark cuts for future reference).
- ● Extension pole – For high branches (10–12 ft, with detachable head).
- ● Hose with nozzle – To clean sap off tools and rinse cuts.
- ● Mulch or compost – For post-pruning soil enrichment.
- ○ Pruning sealant – Optional for large cuts (to prevent disease entry).
- ● Check the weather: Prune on a dry, calm day (avoid rain for 24 hours before/after).
- ● Know your pruning goals: Are you shaping, thinning, or rejuvenating?
- ● Gather a bucket or bag for clippings (compost or dispose of them).
Step-by-Step guide to pruning red tip photinia for healthier growth
Here's how I keep my photinia bushes full, vibrant, and disease-free year-round—no guesswork involved.
✂️ Step 1: Prune in Late Winter for Shape and Structure
Grab your pruners and tackle this in late winter or early spring before new growth begins. I cut back about one-third of the oldest, thickest canes right at the base—these are the ones that turn woody and produce fewer leaves. You'll see them easily: they're the thicker stems with fewer leaves compared to the newer, thinner growth.
Make clean cuts at a 45-degree angle, about ¼ inch above a leaf node or outward-facing bud. This encourages new growth to shoot out from that spot. Avoid cutting into the center of the bush—this creates a dense, shaded interior where pests love to hide and leaves can't get enough sunlight.
✂️ Step 2: Thin Out Crowded Branches in Early Summer
Wait until June or early July for this step. That's when your photinia starts pushing new growth, and you'll notice some branches growing straight up or crossing over others. These are the ones to remove—thin out 10-20% of the bush by cutting back to the main stem or a strong side branch.
Focus on branches that are rubbing against each other or growing inward. You want sunlight to reach the center of the bush, not just the outer edges. After pruning, step back and check if you can see light filtering through the middle—if not, keep thinning until you can.
✂️ Step 3: Light Pruning in Fall to Encourage New Growth
In late September or early October, give your photinia a light trim to remove any dead, diseased, or crossing branches. This isn't about shaping—it's about cleaning up and encouraging fresh growth for next year. Look for branches with brown or mushy spots, or any that look weak and leggy.
Cut these back to a healthy leaf node, and avoid heavy pruning now—you don’t want to stress the plant before winter. If you see any red tips fading or turning brown, that’s a sign of stress, so keep pruning minimal. A little cleanup now prevents bigger problems later.
✂️ Step 4: Prune for Bushiness in Early Spring
Just as buds begin to swell in early spring, do a final light pruning to encourage bushier growth. Trim back any branches that grew too long over winter, cutting just above a set of leaves or buds. This is where the magic happens—you’ll see new shoots sprouting from those cuts within a few weeks.
Pay attention to the direction of growth: if a branch is growing straight up, cut it back to a side branch that angles outward. This opens up the bush and lets sunlight hit more leaves, which means brighter red tips and healthier foliage. After pruning, give the bush a light watering to help it recover.
💧 Step 5: Post-Pruning Care for a Strong Recovery
After your final pruning in spring, avoid fertilizing for at least 4-6 weeks—the plant needs time to recover from the cuts. Instead, focus on watering deeply once a week if rain is scarce. You’ll know it’s getting enough water when the soil feels moist 2 inches down but not soggy.
Watch for new growth in 3-4 weeks—that’s your sign everything’s on track. If you see yellowing leaves or wilting, you’re either overwatering or underwatering. Photinias are tough, but they do best with consistent moisture, not soggy soil. A little mulch around the base helps retain moisture and keeps roots cool.
Tips & tricks for perfect red tip photinia pruning
These simple tricks will keep your photinia looking lush and vibrant year after year—without the guesswork.
Timing is Everything: The late winter pruning in Step 1 is your foundation. I always check for the first signs of bud swell—when you see tiny green buds forming, that's your cue. Cold snaps can delay this, so don't rush it. If you prune too early, you risk damaging the plant's energy reserves before spring growth begins.
Cuts Matter More Than You Think: That 45-degree angle in Step 1 isn't just for looks—it prevents water from pooling on the cut, which can cause rot. I use sharp pruners and make clean cuts right above a leaf node or outward-facing bud. If you're unsure which way is "outward," imagine sunlight hitting the bush from all directions and cut to encourage that spread.
Light Test for Perfect Thinning: In Step 2, the light test is your secret weapon. After thinning, stand back and look for gaps where sunlight filters through. If you can't see light in the center, keep removing branches until you can. This simple check prevents that dense, shaded interior that invites pests and weak growth. I usually need to thin 15-20% of the bush to get that perfect light penetration.
Fall Cleanup Prevents Winter Stress: The fall pruning in Step 3 is often overlooked, but it's crucial. I focus on removing only the truly problematic branches—anything with brown spots, mushiness, or that's crossing others. This minimal approach prevents stress that could make your photinia vulnerable to winter damage. Think of it as spring cleaning for your bush, setting it up for success in the new year.
Pro Tips for Red Tip Photinia Pruning
- These simple tricks will keep your photinia looking lush and vibrant year after year—without the guesswork.
- Timing is Everything: The late winter pruning in Step 1 is your foundation. I always check for the first signs of bud...
- Cuts Matter More Than You Think: That 45-degree angle in Step 1 isn't just for looks—it prevents water from pooling o...
Frequently asked questions
Got questions about keeping your Red Tip Photinia looking its best? You’re not alone! Here are some of the most common concerns—plus expert answers to keep your shrub thriving.
When is the best time to prune Red Tip Photinia for maximum blooms?
Prune after flowering (late spring to early summer) to encourage new growth and vibrant red tips. Avoid heavy pruning in fall or winter—this can leave canes vulnerable to frost damage. Light shaping in late winter (before buds swell) is fine, but skip drastic cuts.
How often should I prune my Red Tip Photinia?
Prune once a year for maintenance, but don’t shy away from light trims in late winter to remove dead or crossing branches. Over-pruning weakens the shrub, so aim for a 25% reduction in growth per year. Think of it as a haircut—not a buzz cut!
Can I prune Red Tip Photinia in winter? What are the risks?
Winter pruning is risky because dormant canes are more susceptible to disease (like Entomosporium, a fungal infection). If you must prune in cold months, do it on a dry day and sterilize tools. Otherwise, wait until late winter or spring for healthier results.
What if my Red Tip Photinia isn’t growing back after pruning?
Check for over-pruning or dieback. If canes are brown and mushy, it’s likely fungal disease. Remove affected branches below the damage, apply fungicide, and avoid wetting foliage. If growth still stalls, fertilize lightly in spring to encourage recovery.
Are there alternatives to Red Tip Photinia that require less pruning?
Yes! Try Dwarf Fountain Grass (low-maintenance), Oakleaf Hydrangea (tolerates light pruning), or Abelia (blooms on old wood, so minimal shaping is needed). For a similar red-tipped look, Dwarf Gardenia is a fragrant, low-prune option.
Wrapping up and next steps
Mastering red tip photinia pruning is your ticket to lush, vibrant shrubs that thrive year-round! 🌿 With the right tools, timing, and techniques, you’ll encourage bushier growth and stronger canes while keeping your landscape looking its best.
Whether you’re a seasoned gardener or just starting out, these tricks will help you prune with confidence.
Ready to take your pruning skills to the next level? Grab your shears and start shaping! 🌱 For even more tips, check out our pruning calendar or join a local gardening group to share your progress.