
Pruning
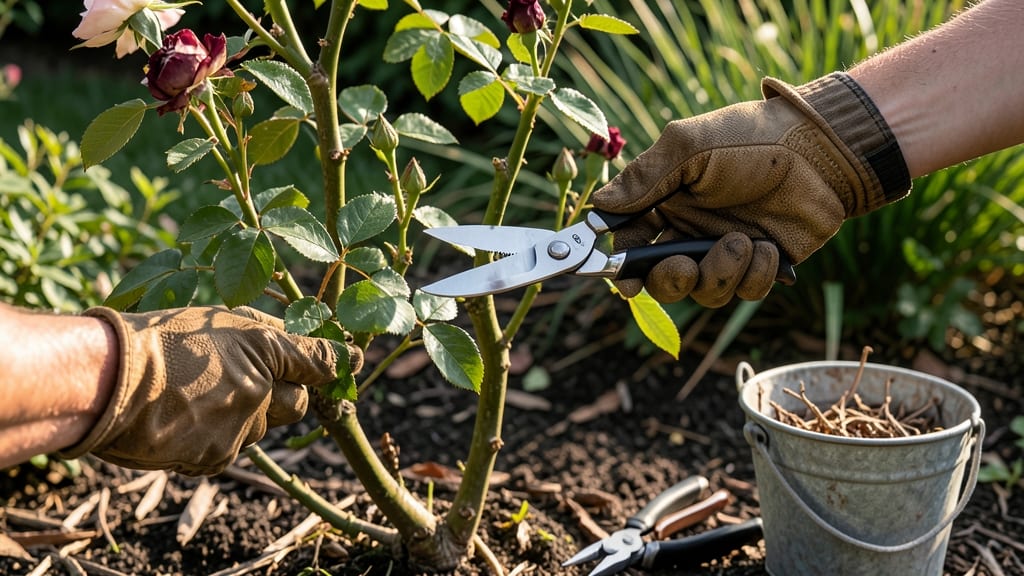
Spring pruning roses before and after reveals the before—a tangled thicket—and the after—structured beauty you’ll love. ✂️ I’ve pruned roses for years, and the difference between a wild, leggy bush and one that blooms like crazy comes down to timing, technique, and a few sharp cuts.
The best time is when your forsythia blooms, signaling that new growth is just around the corner.
You’ll need three simple tools: sharp bypass pruners, loppers for thicker stems, and a bucket for clippings (which you can compost later). The goal is to open up the center of the plant, remove dead wood, and shape the rose so air circulates freely.
This isn’t about art—it’s about health and blooms, and the results speak for themselves.
After pruning, your roses will look like they’ve been given a fresh start—literally. New shoots emerge within 10-14 days, and by summer, you’ll have more flowers and fewer pests thanks to better airflow.
The before-and-after difference is dramatic: what was once a tangled mess becomes a neat, productive bush ready to reward you with weeks of blooms.
Works for all rose types—hybrids, floribundas, even climbers—just adjust the cuts based on their natural shape. And here’s the secret: don’t overthink it. Confidence comes from practice, and your first pruning will get easier every year. Ready to see the transformation?
📚 In This Guide
- What you need
- Instructions
- Tips and common mistakes
- Wrapping up and next steps
What you need
- ● Bypass pruners: Sharp, high-quality bypass pruners (4–6 inches) for clean cuts on smaller stems. Replace blades if dull.
- ● Loppers: Heavy-duty bypass loppers (8–12 inches) for thicker branches (½–2 inches in diameter). Look for ergonomic handles for comfort.
- ● Pruning saw: A curved-tooth pruning saw for branches over 2 inches thick. Avoid cheap saws—they can tear wood.
- ● Gloves: Leather or heavy-duty gardening gloves to protect against thorns and debris. Choose long-cuffed for extra safety.
- ● Disinfectant: Rubbing alcohol (70%+ isopropyl) or a commercial pruning sealant to sterilize tools between cuts and prevent disease spread.
- ○ Pruning sealant (optional): Tree wound paint for large cuts (over ½ inch), though many experts debate its necessity—focus on clean cuts instead.
- ● Safety glasses: Protect your eyes from debris (especially when sawing).
- ● Long sleeves/pants: Wear lightweight, long-sleeved clothing to shield against thorns and sun.
- ● Trash bags or bucket: For collecting pruned branches and debris. A 5-gallon bucket with a lid works well for small jobs.
- ● Hose or water spray bottle: To rinse tools and clean up sap or sap-sucking insects.
- ● Weather check: Prune on a dry, cloudy day (or early morning) to avoid stressing the plant. Avoid pruning in extreme heat or wind.
- ● Tool sharpening: Test your pruners/loppers on a pencil or scrap wood—if they crush instead of cut cleanly, sharpen them.
- ● Rose identification: Know your rose type! Hybrid teas, floribundas, and grandifloras need different pruning approaches than climbing roses or shrub roses.
Step-by-step instructions for spring pruning roses
Transform your roses from tangled messes into thriving, blooming beauties with this precise pruning method.
✂️ Step 1: Remove Dead, Diseased, or Weak Wood
Start by examining each cane—those blackened, mushy stems with no green underneath are dead and must go. I grab my pruners and make a clean cut just above a 5-leaf bud (about ¼ inch below) at a 45-degree angle. This ensures water runs off the cut instead of pooling.
Look for canes that are thinner than a pencil or have no buds—these won’t produce flowers and are better removed. I like to bundle the cuttings in a bag for composting later. If you see any black spots or powdery mildew, sterilize your pruners with rubbing alcohol between cuts to prevent spreading disease.
✂️ Step 2: Open the Center for Airflow
The goal here is to create an open vase shape so sunlight and air reach the center. I start by removing any crossing canes—where two stems rub against each other. This prevents wounds that invite pests and disease. Cut these back to an outward-facing bud to encourage new growth in the right direction.
Next, trim back any overly long canes that block light from the center. Aim to leave 3-5 strong canes per plant, spaced evenly around the base. You’ll see the plant’s natural structure emerge as you work—this is your guide for where to make cuts.
☀️ Step 3: Shape for Optimal Bloom Production
Now it’s time to encourage the plant to focus its energy on strong, flowering canes. For hybrid teas and grandifloras, I cut back last year’s blooms to just above a strong outward-facing bud. For floribundas and shrub roses, I make the cuts slightly higher—about ⅓ of the cane’s length—to promote bushier growth.
Step back and visualize the plant’s final shape. The top of the rose should be slightly narrower than the base, like an inverted cone. This shape lets sunlight penetrate all the way to the center, where new growth emerges. If a cane is growing inward, cut it back to redirect energy outward.
🌿 Step 4: Clean Up and Fertilize
After pruning, rake up all the debris from the base of the plant—this removes hiding spots for pests and reduces disease risk. I like to apply a balanced rose fertilizer (10-10-10) right after pruning to give the plant a nutrient boost for the growing season. Water deeply to help the fertilizer penetrate the soil.
Finally, mulch around the base with 2-3 inches of organic mulch, like shredded bark. This keeps the roots cool and retains moisture. Avoid piling mulch against the stems—leave a 2-inch gap to prevent rot. Your roses are now ready to burst into bloom!
Tips & tricks for perfect spring rose pruning
Real talk: Pruning roses can feel intimidating, but these insights will help you transform tangled bushes into showstopping bloomers with confidence.
Tool Prep: Before you start, sharpen your pruners and sterilize them with rubbing alcohol—this prevents spreading disease between cuts. I also like to wipe the blades with a clean cloth after every few cuts to remove sap buildup. A clean cut heals faster and looks more professional. For larger branches, use loppers with a bypass blade to avoid crushing the stems.
Bud Selection: When making cuts, always aim for an outward-facing bud located just above the cut. This encourages new growth to spread outward rather than inward. The 5-leaf bud rule is your guide—count those leaves to ensure you're cutting in the right spot. For hybrid teas, focus on buds that are at least 1/4 inch above the cut, while floribundas can handle slightly higher cuts for bushier growth.
Visualization Technique: Step back frequently to visualize your rose's final shape. Imagine an inverted cone—wider at the base, narrower at the top. This open center allows sunlight to reach all canes, promoting even blooming. If you're unsure about a cut, ask yourself: "Does this cane contribute to the plant's structure or block light from the center?" If it's the latter, it's time to go.
Post-Pruning Care: After finishing, don't forget to bundle and compost your cuttings immediately. I keep a small bag handy to collect them as I work. This prevents debris from accumulating around the plant, which can harbor pests. The 2-3 inch mulch layer you apply afterward should be spread evenly, avoiding the stems to prevent moisture-related diseases.
Pro Tips for Spring Pruning Roses Before And After
- Real talk: Pruning roses can feel intimidating, but these insights will help you transform tangled bushes into showst...
- Tool Prep: Before you start, sharpen your pruners and sterilize them with rubbing alcohol—this prevents spreading dis...
- Bud Selection: When making cuts, always aim for an outward-facing bud located just above the cut. This encourages new...
Frequently asked questions
Got questions about spring pruning roses?
You’re not alone! Here are answers to the most common concerns—so you can prune with confidence and watch your roses transform from wild to stunning.
When is the exact best time to prune roses in spring?
Prune when your roses are just starting to bud (usually after the last frost but before new growth bursts). For most roses, this falls between late February and early April in warmer climates, or March to early May in colder zones. Never prune in fall or winter—dormant plants are vulnerable to disease.
How do I know if I’ve pruned too much or too little?
You’ve pruned just right if you’re left with 3–5 strong, outward-facing buds on each stem (about 1/3 of the plant’s height). Too much? Look for bare stems or no buds—your rose may struggle to bloom. Too little? Overcrowded canes mean fewer flowers and poor airflow (hello, fungal risks!).
What if my roses bloom on old wood (like hybrid teas)? Can I still prune in spring?
Yes! Even old-wood bloomers benefit from light spring pruning. Focus on dead, diseased, or crossing canes—just avoid heavy cuts. For hybrid teas, aim to shape the plant while preserving last year’s growth. Pro tip: If you’re unsure, snap a photo of your rose’s canes before pruning!
How do I prevent my roses from getting sick after pruning?
Sterilize your tools with rubbing alcohol before/after pruning, and remove all debris (leaves, stems) from the base. Avoid pruning when it’s wet—fungus thrives in moisture. For extra protection, apply a copper fungicide after pruning. Bonus: Mulch around the base to keep soil dry.
What if my roses don’t bloom after pruning? Did I mess up?
Not necessarily! Roses need 4–6 weeks to recover and set buds. If you pruned too late (after buds formed) or in extreme heat, blooms may delay. Check for green shoots—new growth means your rose is alive and well. Patience is key! Over-fertilizing or drought can also stunt blooms.
Can I prune roses in containers differently than garden roses?
Container roses follow the same rules, but size matters. Prune to maintain the pot’s shape—aim for 1/3 of the plant’s height (or less for dwarf varieties). Since containers dry out faster, water deeply after pruning and use a well-draining mix to prevent root rot.
Wrapping up and next steps
Spring pruning is your secret weapon for transforming wild, overgrown roses into structured, blooming masterpieces—and the best part?
You’ve got all the tools and know-how to make it happen! 🌸 With the right timing, techniques, and a little elbow grease, your roses will reward you with healthier growth, more vibrant flowers, and years of beauty.
Don’t wait—grab those shears and get ready to watch your garden bloom like never before!
🔹 Next step: Mark your calendar for early spring (just before new growth starts) and start small—pick one rose bush to practice. Before you know it, you’ll be a pruning pro!